
BuildRunKit Strategy Hub: Problems Sub-Section
BuildRunKit Strategy Hub: Problems Sub-Section
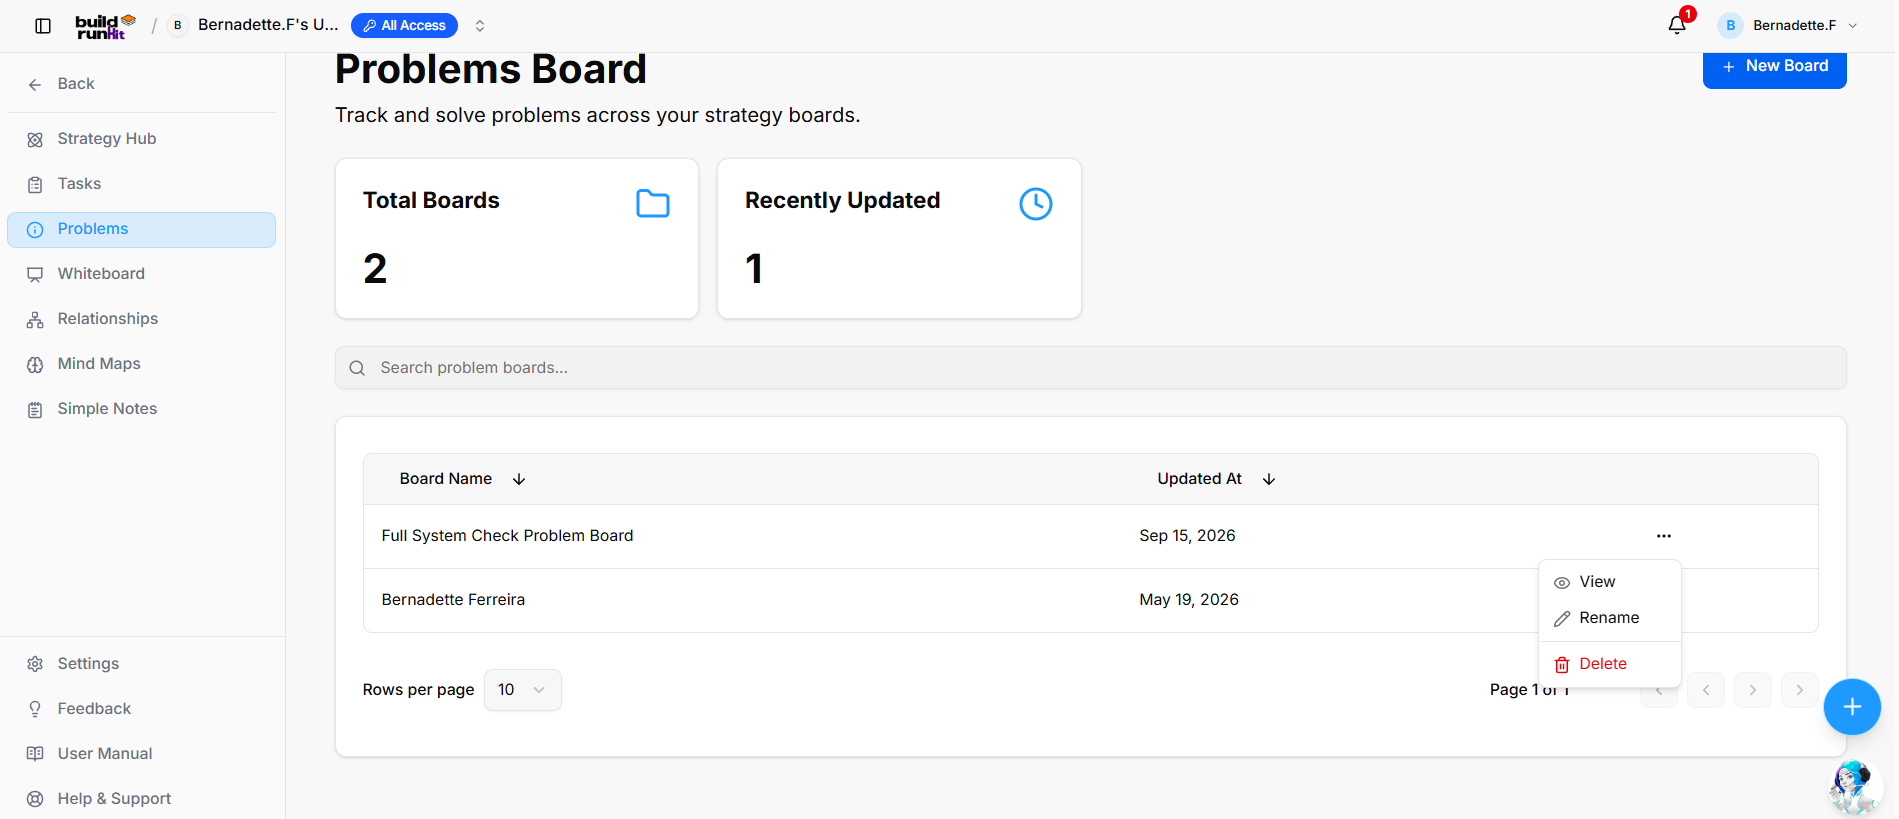
The Problems sub-section lets users create boards to organize and track problems. Each board can be arranged into customizable lists, such as Incoming, Fixing, and Done / Archive.
Problems Board Directory
The directory displays problem boards and their recent update dates.
- + New Board: Opens the form to create a problem board.
- Total Boards: Shows the number of problem boards.
- Recently Updated: Shows the number of recently updated boards.
- Search problem boards…: Searches boards by name.
- Board Name: Shows the name of each problem board.
- Updated At: Shows when each board was last updated.
- Row actions menu (...):
- View: Opens the problem board.
- Rename: Changes the board name.
- Delete: Removes the board.
Creating a Problem Board
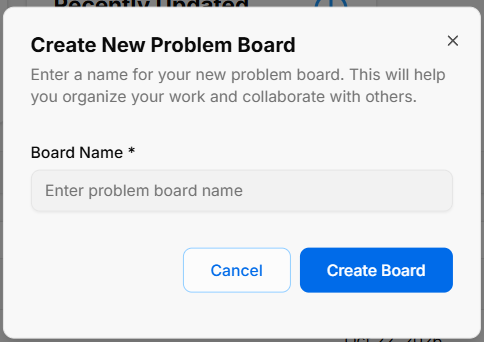
Select + New Board in the directory, or choose Create new board from the board selector.
- Board Name *: Enter a name for the board.
- Create Board: Creates the board.
- Cancel: Closes the dialog without creating a board.
- X: Closes the dialog.
Opening and Switching Problem Boards
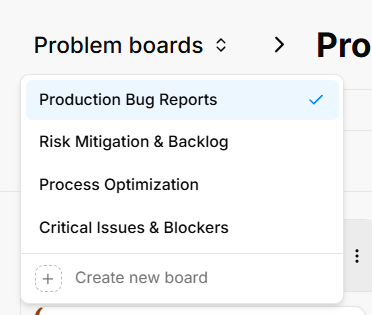
Use the Problem boards selector to switch between boards or select Create new board.
Working in a Problem Board
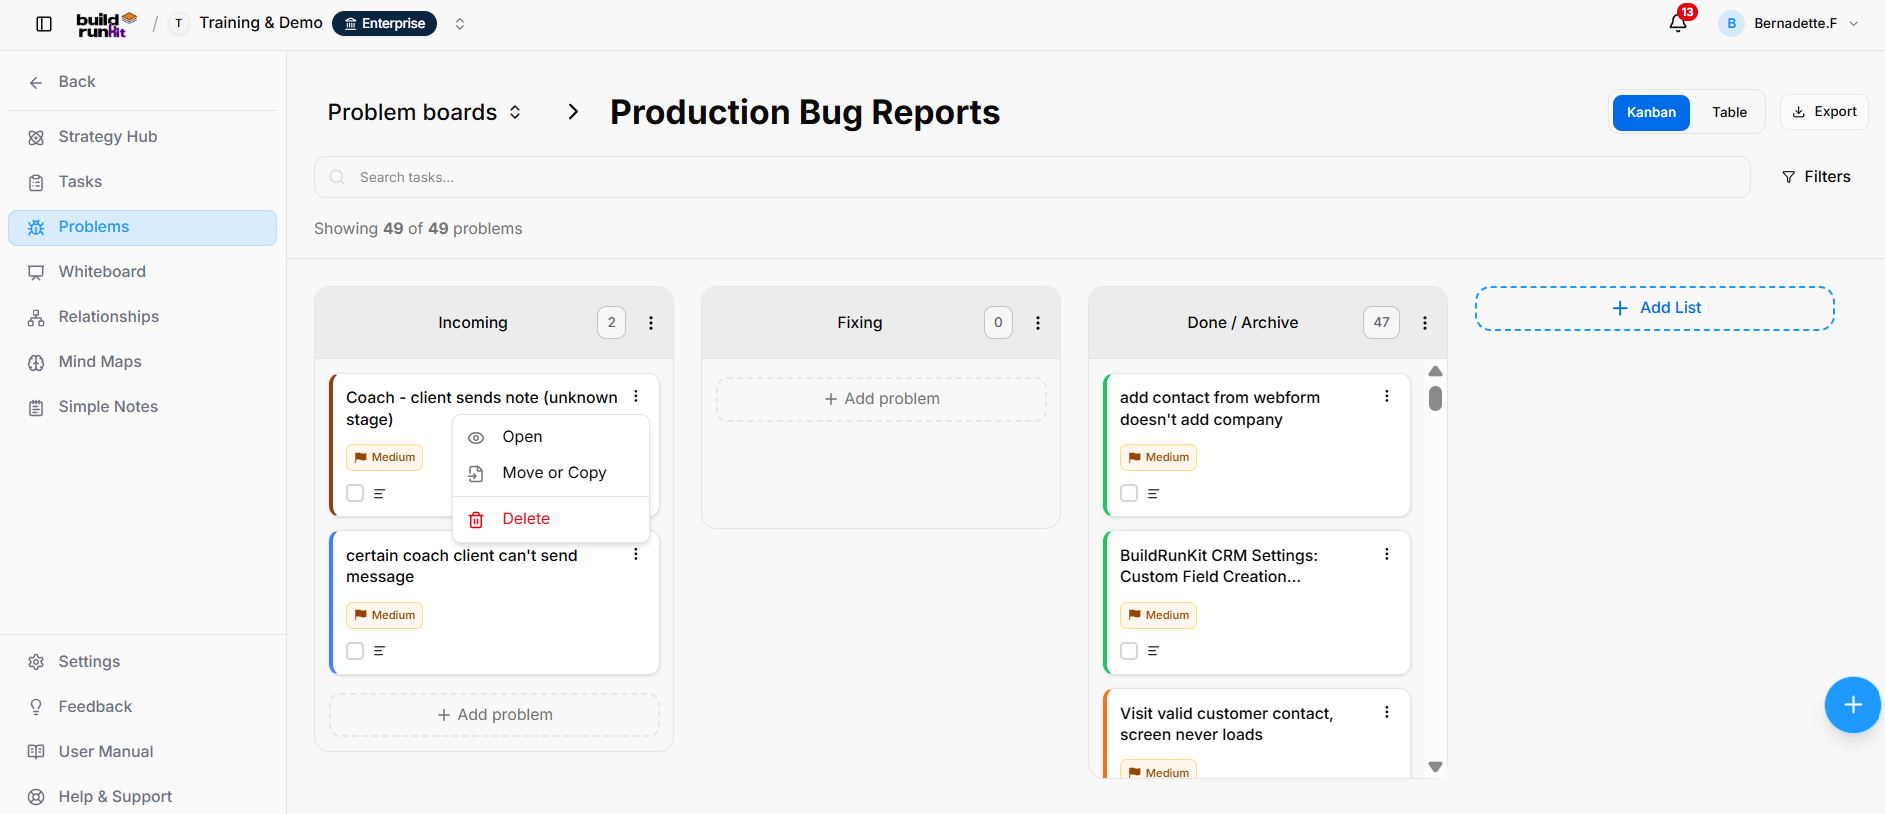
A problem board displays its problems in customizable lists. Each list shows a problem count and may contain problem cards. Cards can display a title, priority, and completion control.
- Kanban / Table: Switches between the Kanban board and Table view.
- Export: Opens the export options.
- Search tasks…: Searches for problems on the current board.
- Filters: Opens filtering options.
- Showing [number] of [number] problems: Indicates the number of problems displayed.
- + Add problem: Adds a problem to a list.
- Problem card actions menu (...):
- Open: Opens the problem details.
- Move or Copy: Moves or copies the problem.
- Delete: Removes the problem.
Exporting Problems
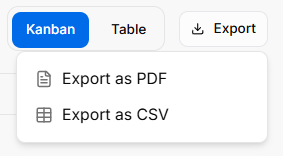
Managing Lists
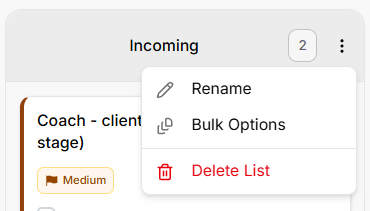
- Rename: Changes the list name.
- Bulk Options: Applies actions to multiple problems in the list.
- Delete List: Removes the list from the board.
Select + Add List to create another list.
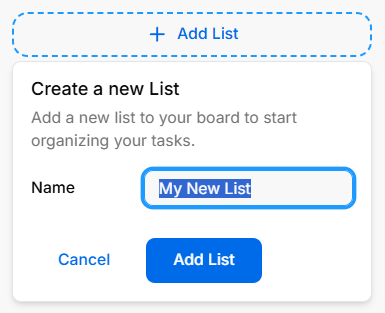
Enter a list Name, then select Add List. Select Cancel to close the form without adding the list.
Creating a Problem
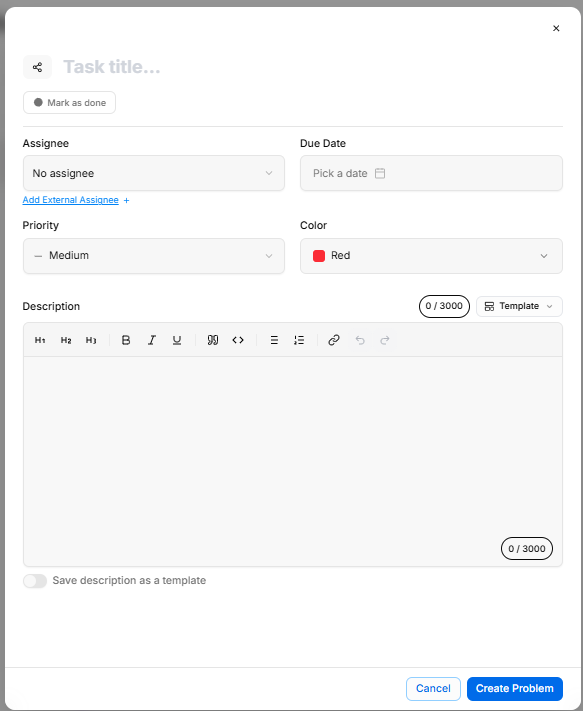
Select + Add problem in a list to open the problem form.
- Problem title: Enter the problem name.
- Mark as done: Mark the problem as complete.
- Assignee: Assign a team member, or leave No assignee.
- Add External Assignee: Add an external assignee.
- Due Date: Optionally select a deadline.
- Priority: Choose a priority; the form shows Medium by default.
- Color: Choose a color for the problem card.
- Description: Add details using the rich-text editor. The form shows a 3,000-character limit.
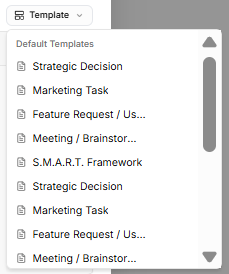
- Template: Apply an available description template.
- Save description as a template: Save the description for reuse.
- Create Problem: Creates the problem.
- Cancel: Closes the form without saving.
- X: Closes the form.
Description Templates
Viewing and Editing a Problem
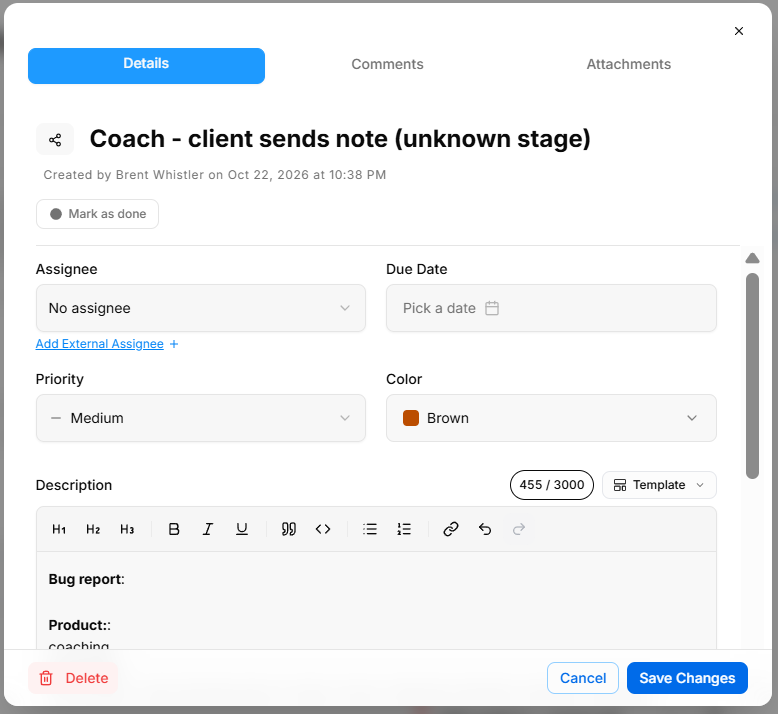
Open a problem to view or edit its details. The Details tab shows the title, creator and creation time, completion control, assignee, due date, priority, color, and description.
Adding Comments
Select the Comments tab to add an update or note to the problem. Comments can contain up to 2,000 characters. Select Add Comment to post the comment.
Adding Attachments
Select the Attachments tab, then use Upload to drag and drop or select supporting files. You can upload up to 5 files, with a maximum size of 20 MB per file. Supported formats include images, PDFs, Office documents, archives, CSV, JSON, XML, and Markdown. View existing uploads under Files.
No comments to display
No comments to display