
BuildRunKit Account Setup and Overview
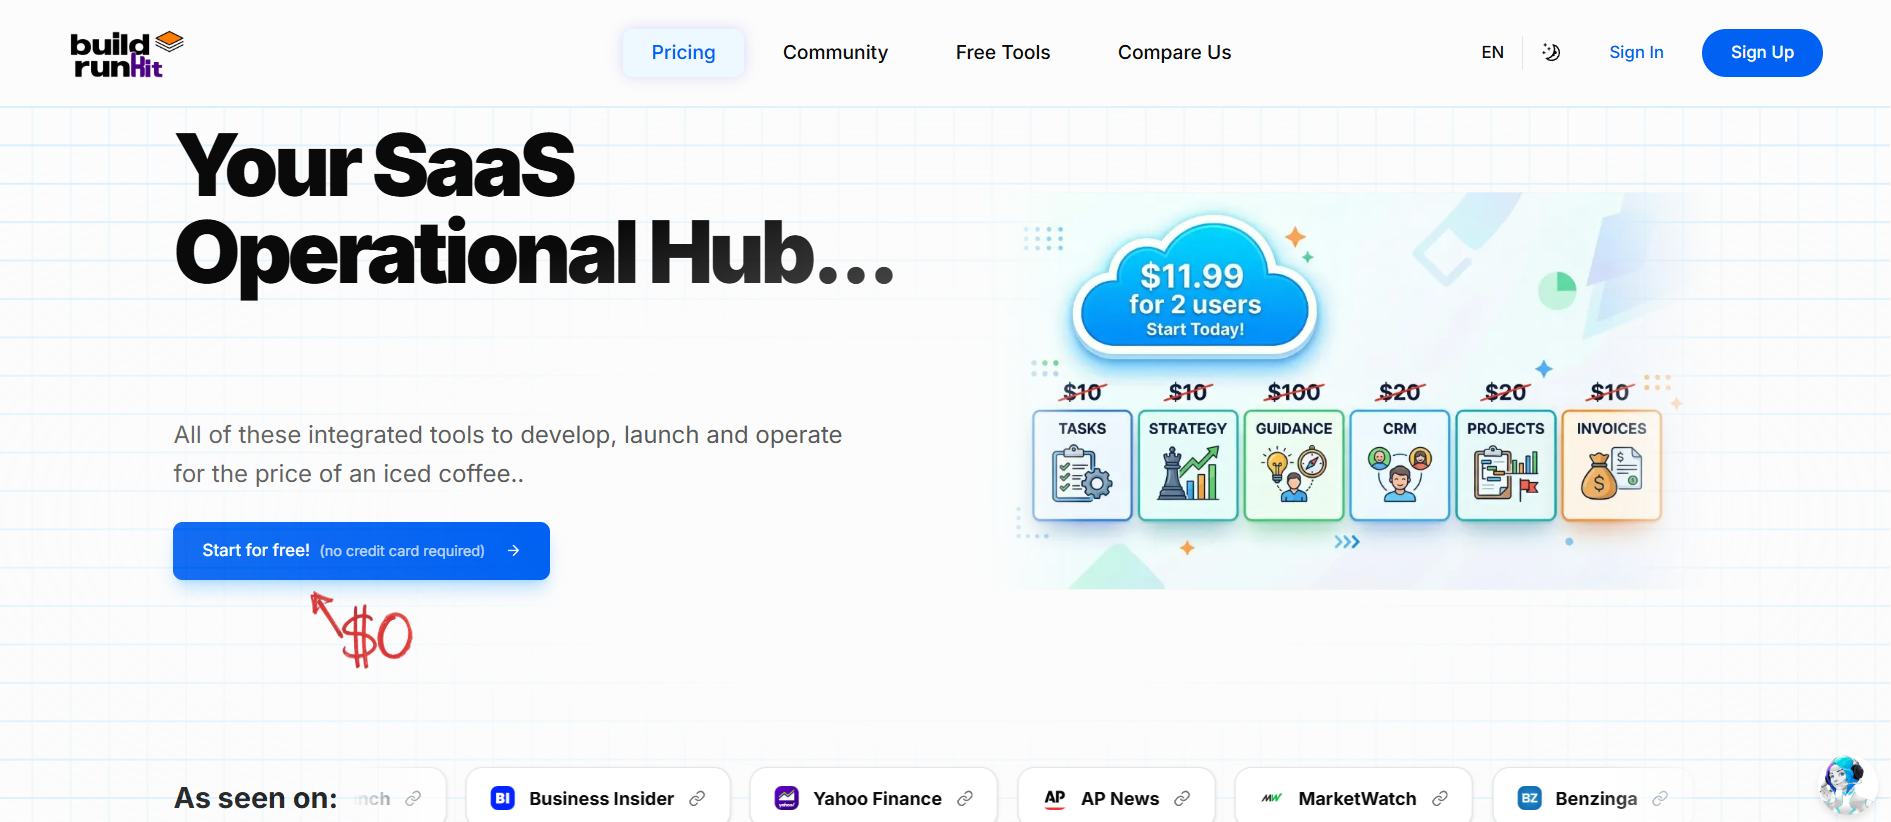
BuildRunKit is an all-in-one business operating system designed for founders, entrepreneurs, and growing teams. It bridges the gap between high-level strategy and daily execution by providing a unified workspace for planning, building, and running every aspect of a modern business.
Landing Page Controls & Hero Callouts
Creating Your Account
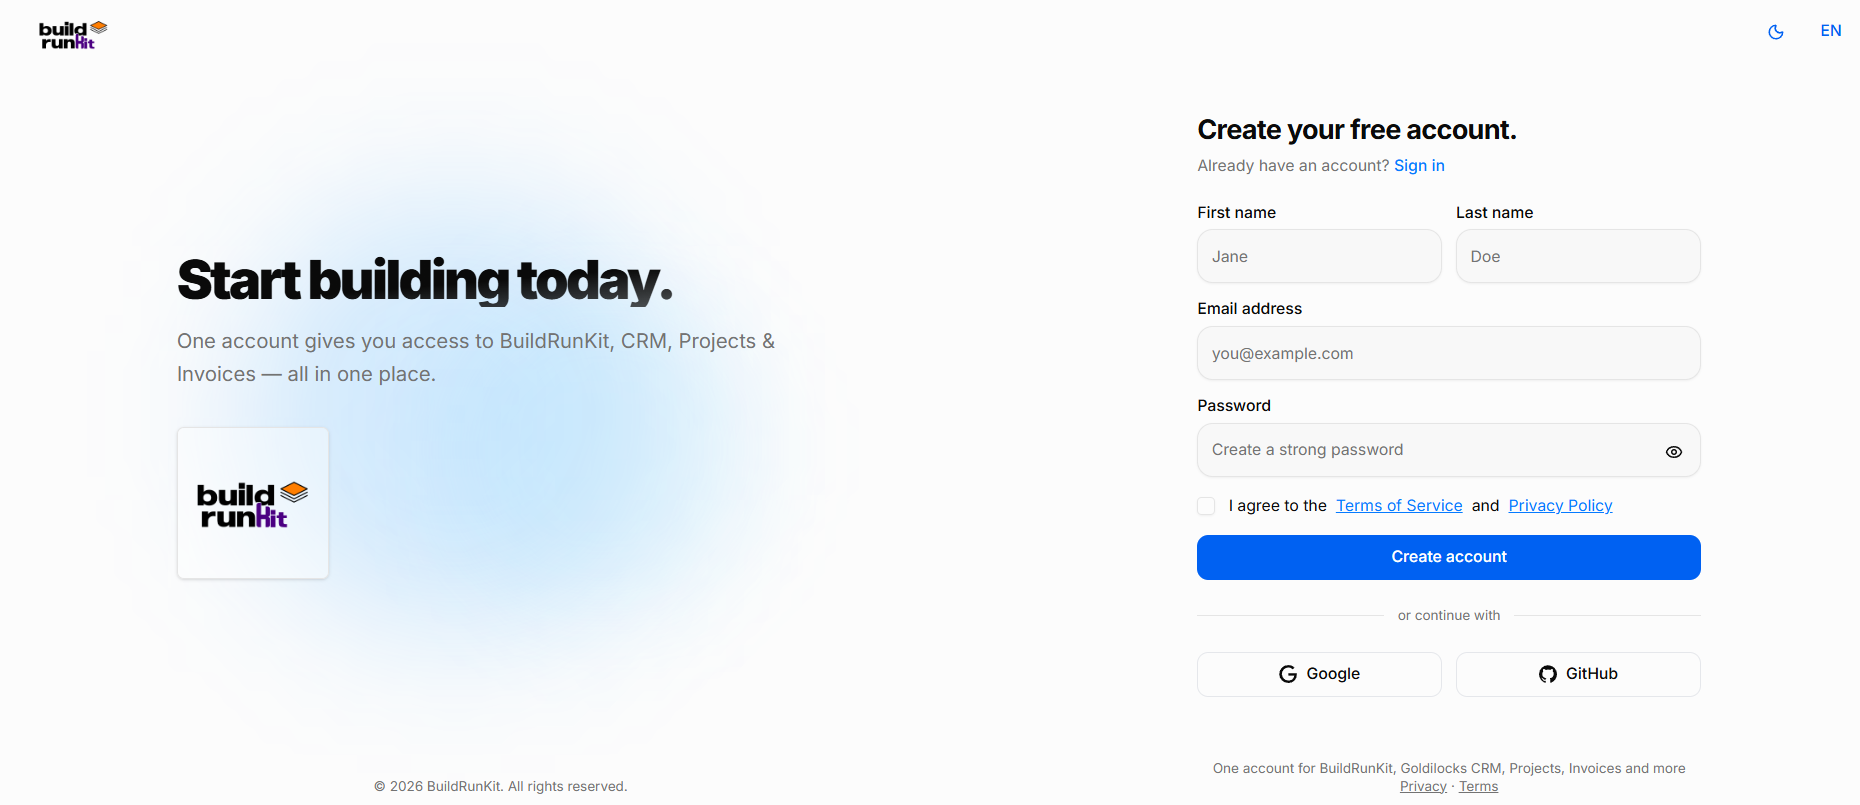
Setting up your account with BuildRunKit is quick and easy. Follow these steps to register and access your workspace:
What You Need
-
A valid email address
-
A secure password of your choice
-
Agreement to the platform Terms of Service and Privacy Policy
How to Sign Up
-
Enter Personal Details: Type your First name and Last name in the top fields.
-
Email Address: Enter your primary email address in the Email address field.
-
Create a Password: Type a strong, secure password into the Password field. Click the eye icon on the right to double-check your typing.
-
Terms & Privacy: Review the Terms of Service and Privacy Policy, then check the box next to "I agree to the Terms of Service and Privacy Policy". This step is required to proceed.
-
Complete Registration: Click the blue Create account button to finish setting up your profile.
Alternative Registration Options
-
Single Sign-On (SSO): Click either the Google or GitHub button at the bottom of the form to register instantly using your existing accounts.
Already Have an Account?
-
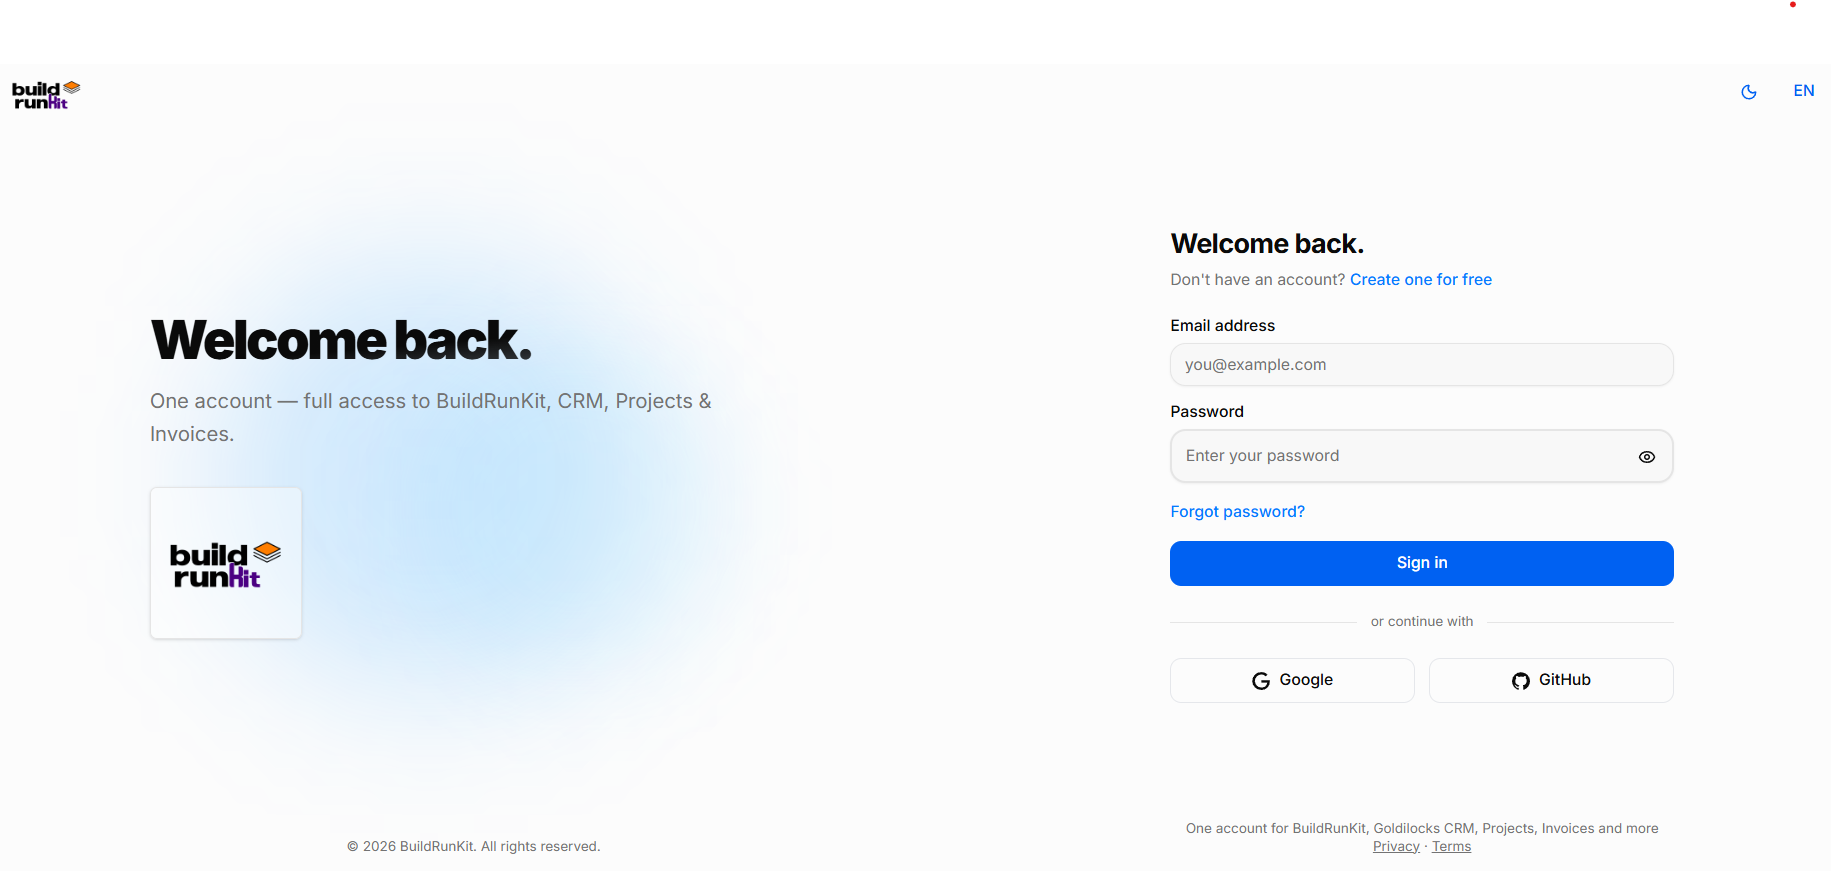
If you already have a profile, click the Sign in link at the top or bottom of the page to return to the standard login screen.
Accessing Your Workspace
Logging in to BuildRunKit gives you immediate access to your entire integrated tool suite. Follow these steps to sign in:
What You Need
-
Your registered email address
-
Your account password (or connected Google/GitHub account)
How to Sign In
-
Email Address: Enter your registered email address in the Email address field.
-
Password: Type your account password in the Password field. Click the eye icon on the right to toggle password visibility and verify your typing.
-
Submit Credentials: Click the blue Sign in button to access your workspace.
Alternative Sign-In Options
-
Single Sign-On (SSO): Click either the Google or GitHub button under the "or continue with" section to log in instantly using your connected third-party credentials.
Troubleshooting & New Users
-
Forgot Password: If you cannot remember your password, click the Forgot password? link directly above the Sign in button to trigger a password reset link via email.
-
New Users: If you do not have an account yet, click the Create one for free link located next to "Don't have an account?" at the top right of the form to switch to the registration page.
Initial Brand Onboarding Setup
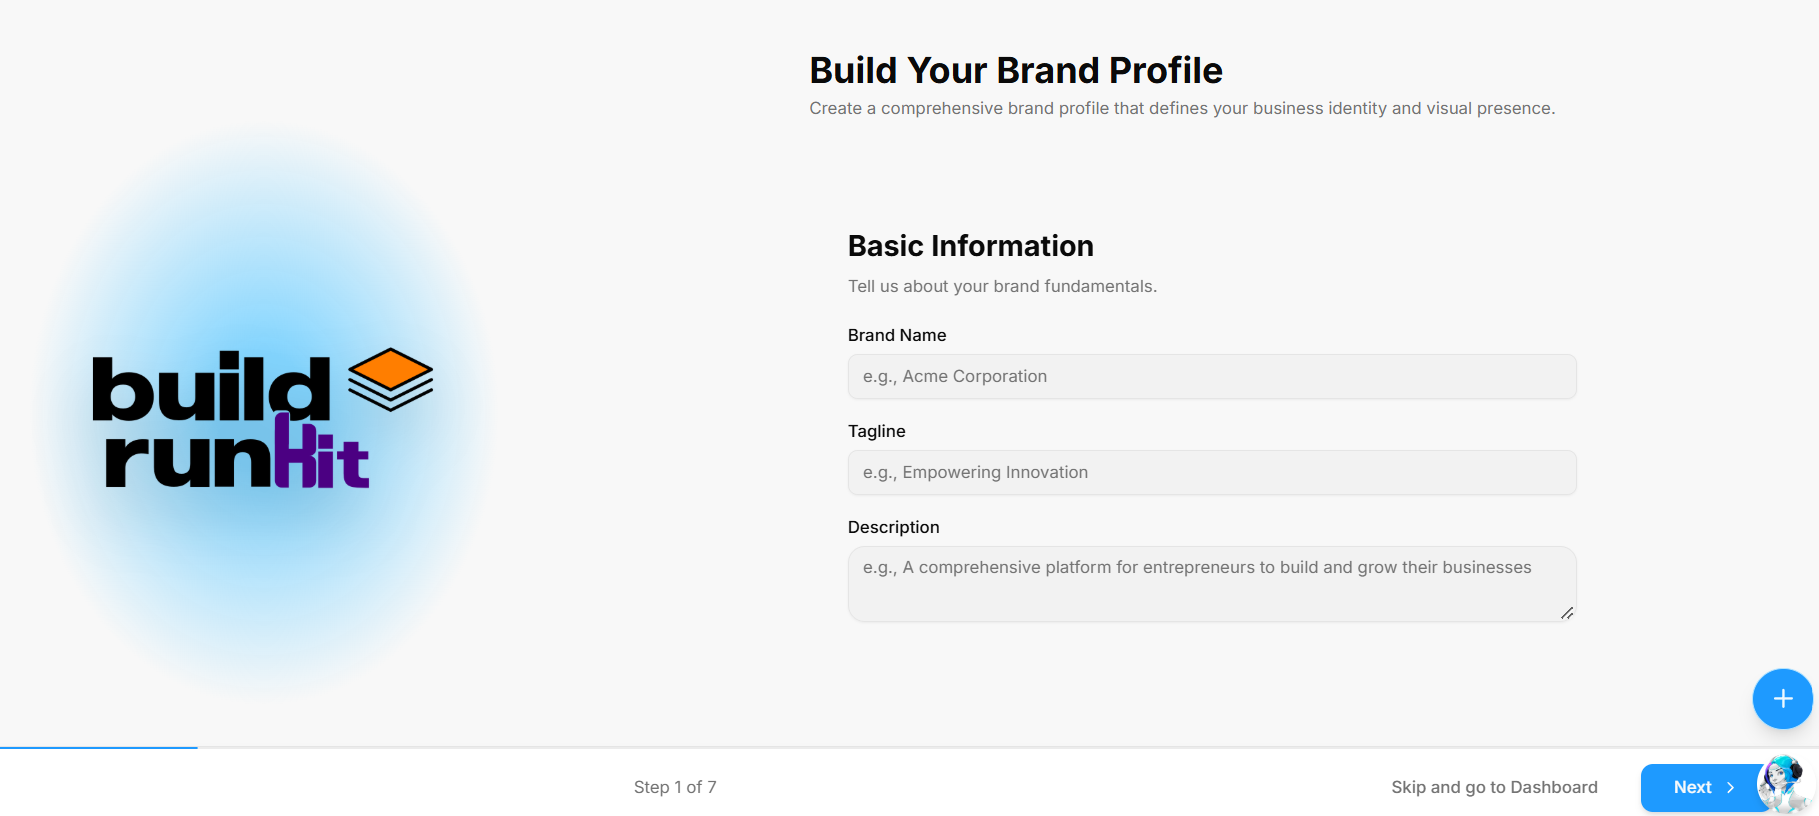
After signing up or logging in for the first time, you are guided through the multi-step Build Your Brand Profile onboarding wizard to define your business identity.
What You Need
-
Your company or project name
-
A short catchy tagline (optional)
-
A brief summary or mission statement describing your business
Step 1: Basic Information
-
Brand Name: Enter your official business or project name in the Brand Name field (e.g., Acme Corporation).
-
Tagline: Enter your primary catchphrase or slogan in the Tagline field (e.g., Empowering Innovation).
-
Description: Provide a summary of what your business does in the Description text box (e.g., A comprehensive platform for entrepreneurs to build and grow their businesses).
-
Navigation & Submission:
-
Click Next > at the bottom right to save your details and advance to Step 2.
-
Skip Option: If you prefer to set up your brand details later, click Skip and go to Dashboard at the bottom of the screen to head straight to your workspace.
-
Step 2: Brand Voice
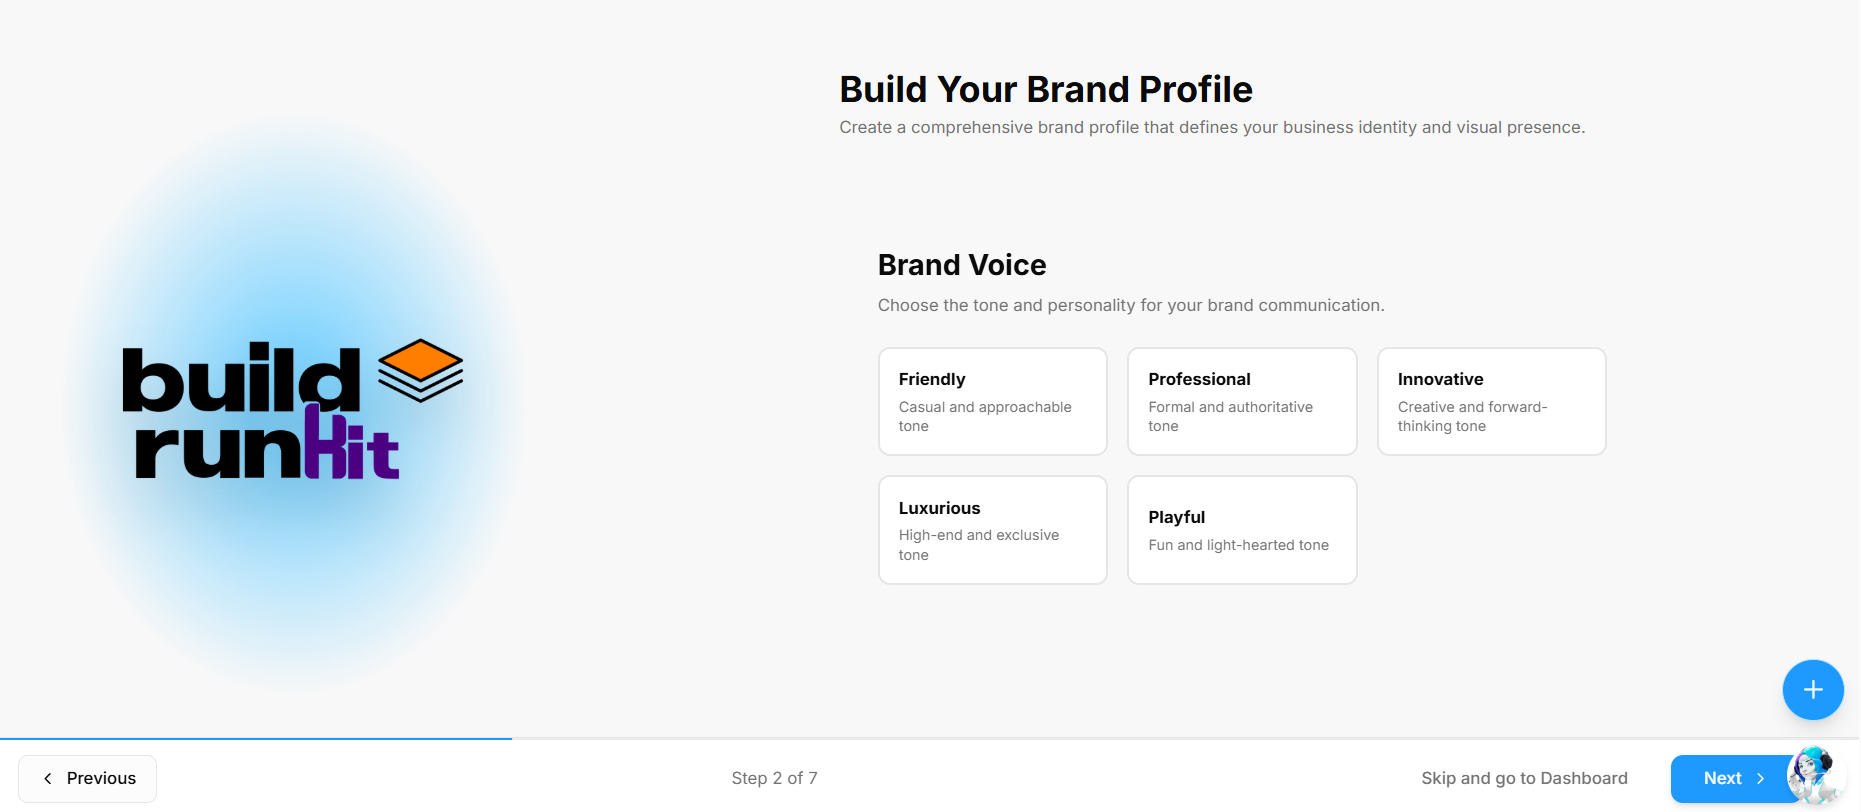
Step 2 of the Build Your Brand Profile onboarding wizard helps define the overall tone and communication style of your brand.
What You Need
-
A clear idea of the communication style and personality that best aligns with your target audience
How to Select Your Brand Voice
-
Choose a Personality Card: Click one of the preset tone options to set your primary brand voice:
-
Friendly: Casual and approachable tone.
-
Professional: Formal and authoritative tone.
-
Innovative: Creative and forward-thinking tone.
-
Luxurious: High-end and exclusive tone.
-
Playful: Fun and light-hearted tone.
-
-
Navigation Controls:
-
Click Next > at the bottom right to save your selection and advance to Step 3.
-
Click < Previous at the bottom left to return to Step 1 and edit your basic details.
-
Skip Option: Click Skip and go to Dashboard at the bottom of the screen to bypass setup and enter your workspace immediately.
-
Step 3: Target Audience
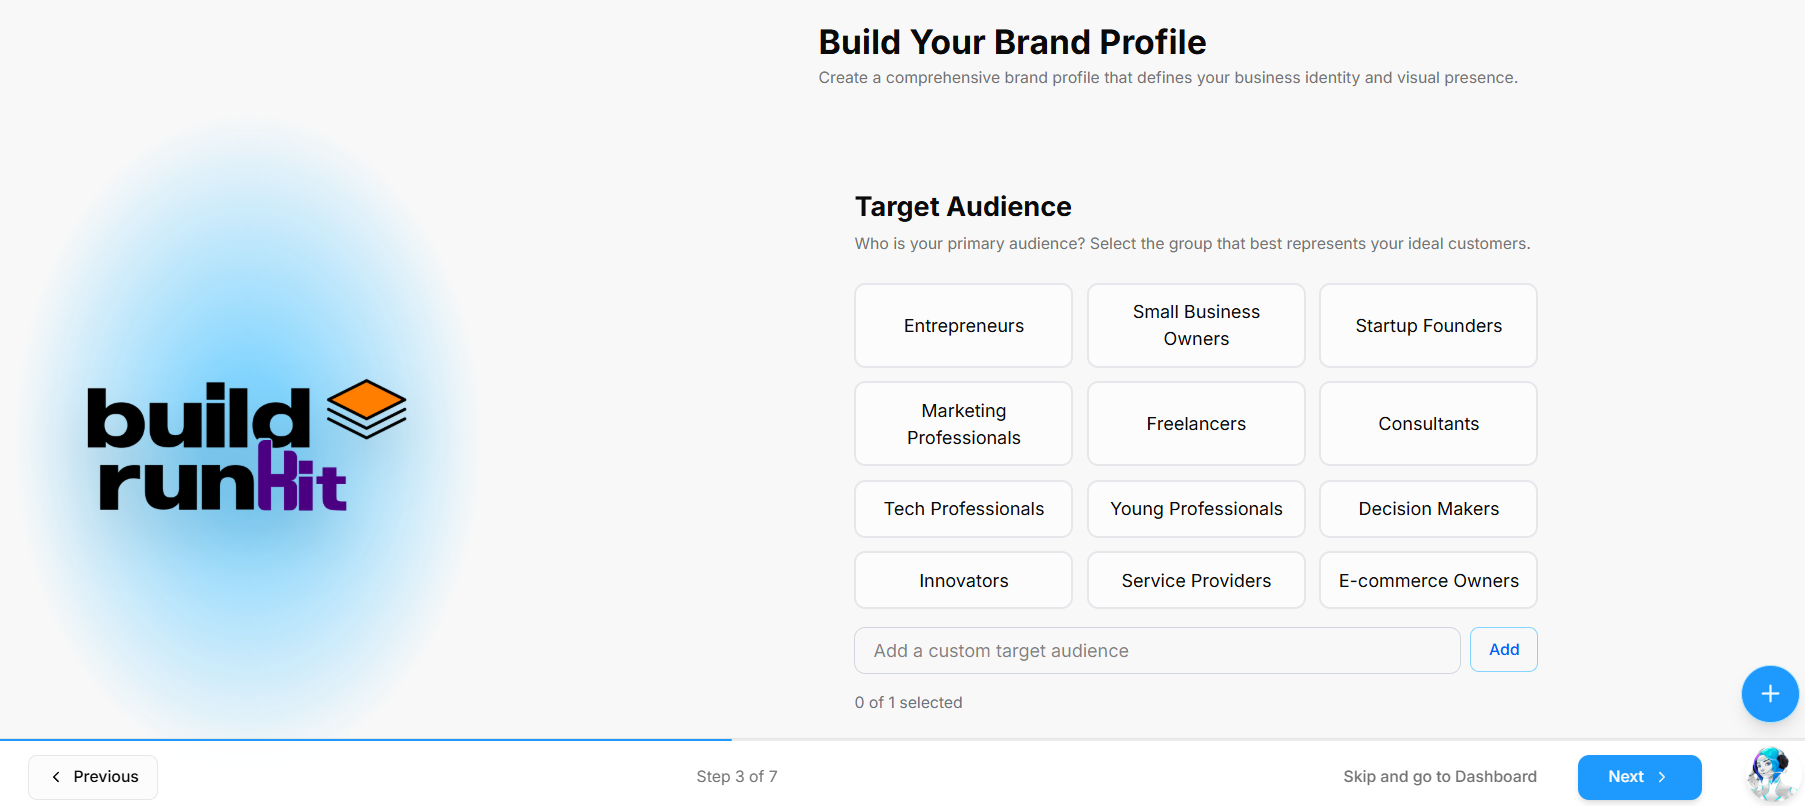
Step 3 of the Build Your Brand Profile onboarding wizard defines the primary group that best represents your ideal customers.
What You Need
-
An understanding of your primary audience segment or ideal buyer persona
How to Select Your Target Audience
-
Choose Preset Audience Categories: Click one of the preset options to select your primary target group:
-
Entrepreneurs
-
Small Business Owners
-
Startup Founders
-
Marketing Professionals
-
Freelancers
-
Consultants
-
Tech Professionals
-
Young Professionals
-
Decision Makers
-
Innovators
-
Service Providers
-
E-commerce Owners
-
-
Add Custom Target Audience: If your specific customer demographic is not listed, type your custom audience into the Add a custom target audience field and click Add.
-
Verify Selection: Check the counter below the input field (e.g., 0 of 1 selected) to ensure your chosen target group is applied.
-
Navigation Controls:
-
Click Next > at the bottom right to save your selection and advance to Step 4.
-
Click < Previous at the bottom left to return to Step 2 and adjust your brand voice choices.
-
Skip Option: Click Skip and go to Dashboard at the bottom of the screen to enter your workspace immediately.
-
Step 4: Core Values
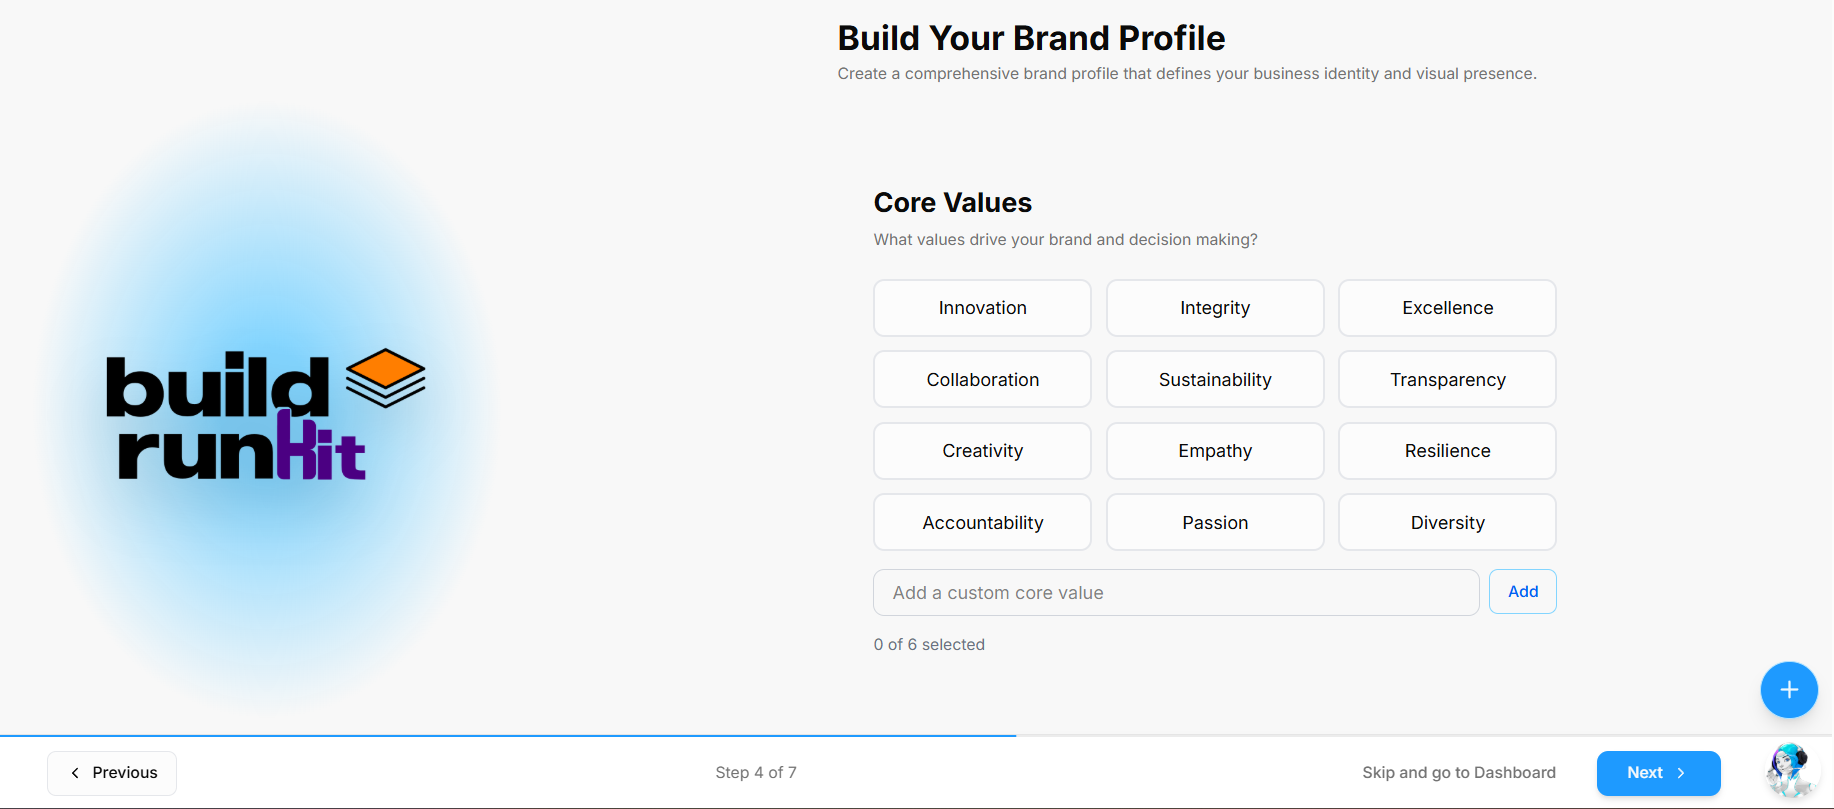
Step 4 of the Build Your Brand Profile onboarding wizard defines the core principles and values that drive your brand and decision-making.
What You Need
-
The foundational principles and values that represent your business operations and company culture
How to Select Your Core Values
-
Choose Preset Core Values: Click the options that represent your brand principles (up to 5 values):
-
Innovation
-
Integrity
-
Excellence
-
Collaboration
-
Sustainability
-
Transparency
-
Creativity
-
Empathy
-
Resilience
-
Accountability
-
Passion
-
Diversity
-
-
Add Custom Core Values: If a specific value is missing, enter it into the Add a custom core value field and click Add.
-
Verify Selection: Review the counter below the input box (e.g., 0 of 5 selected) to track your chosen principles.
-
Navigation Controls:
-
Click Next > at the bottom right to save your selections and advance to Step 5.
-
Click < Previous at the bottom left to return to Step 3 and modify your target audience options.
-
Skip Option: Click Skip and go to Dashboard at the bottom of the screen to enter your workspace immediately.
-
Step 5: Visual Identity
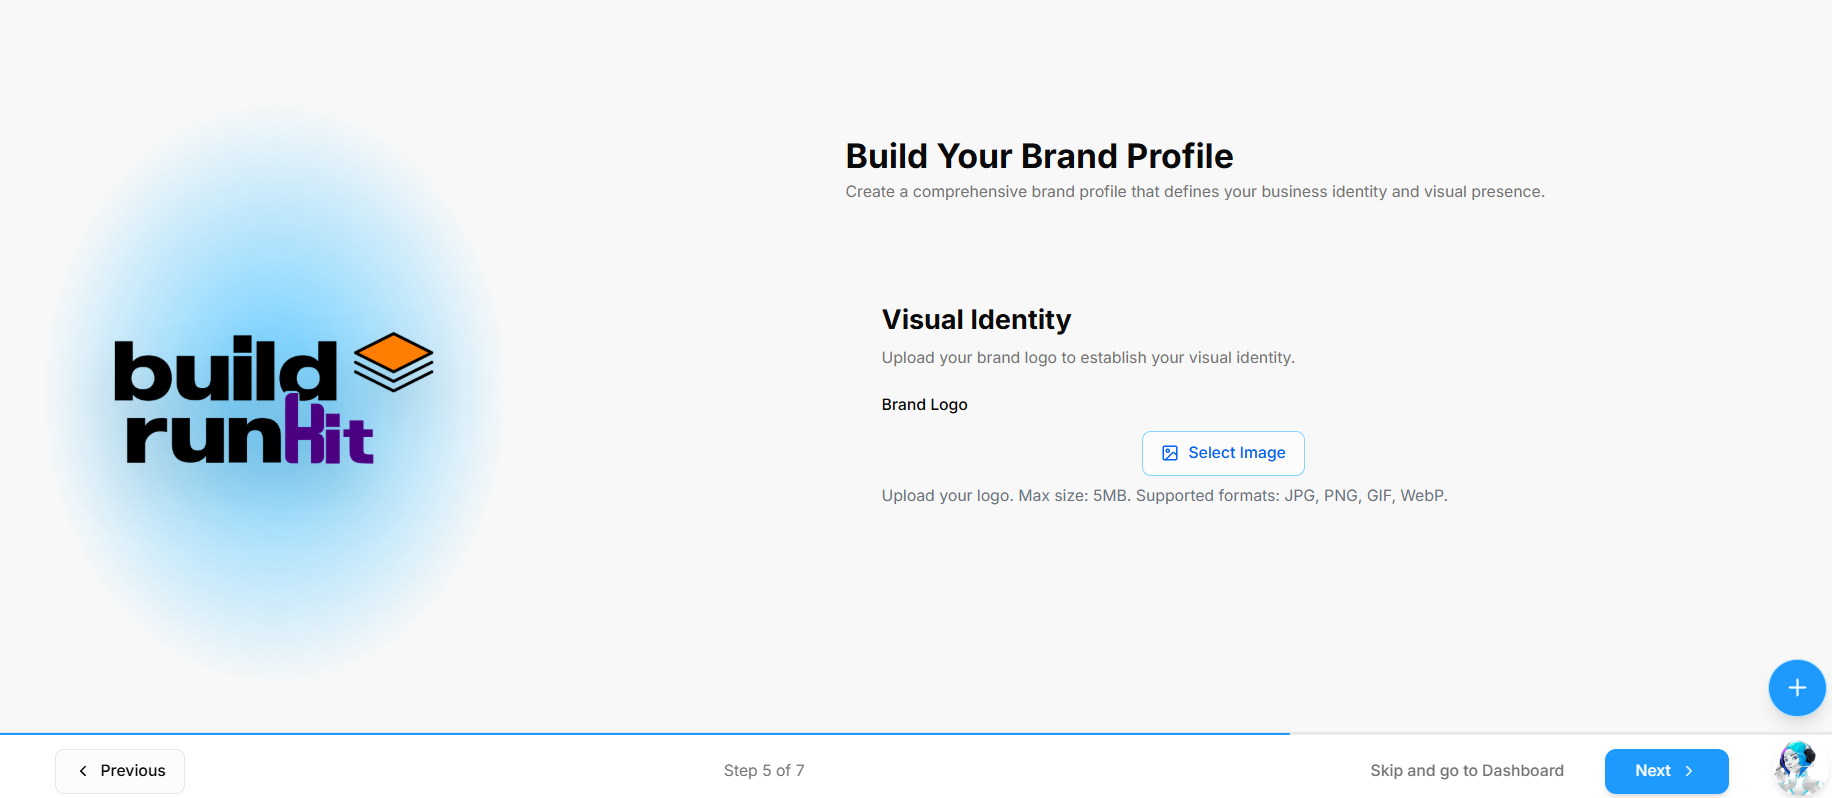
Step 5 of the Build Your Brand Profile onboarding wizard establishes your visual branding by uploading your official brand logo.
What You Need
-
An image file of your brand logo (JPG, PNG, GIF, or WebP format, max 5MB)
How to Set Up Your Visual Identity
-
Upload Brand Logo: Click the Select Image button to open your device file browser and select your logo graphic.
-
Review Image Requirements: Ensure your image meets the supported format specifications (JPG, PNG, GIF, WebP) and file size limit (5MB max).
-
Navigation Controls:
-
Click Next > at the bottom right to upload your asset and advance to Step 6.
-
Click < Previous at the bottom left to return to Step 4 and adjust your core values choices.
-
Skip Option: Click Skip and go to Dashboard at the bottom of the screen to enter your workspace immediately.
-
Step 6: Brand Colors
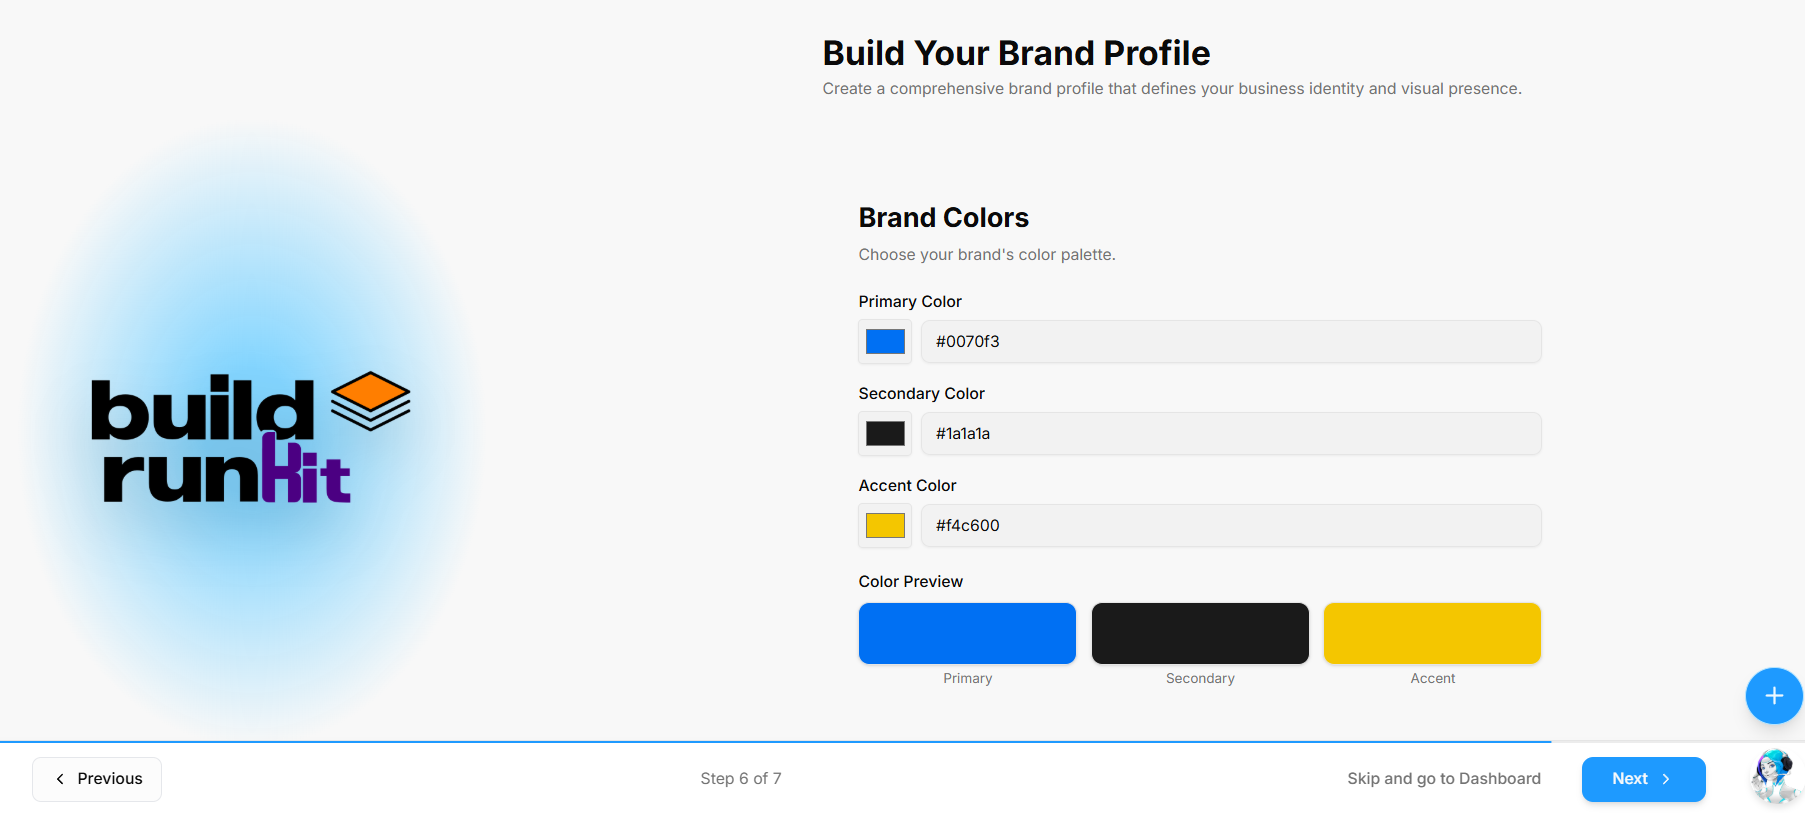
Step 6 of the Build Your Brand Profile onboarding wizard defines your visual palette across primary, secondary, and accent colors.
What You Need
-
Hex color codes for your brand's primary, secondary, and accent shades
How to Set Up Your Brand Colors
-
Primary Color: Click the color picker box or type a hex code into the Primary Color field (e.g.,
#0070f3). -
Secondary Color: Select a color or enter a hex code in the Secondary Color field (e.g.,
#1a1a1a). -
Accent Color: Select a color or enter a hex code in the Accent Color field (e.g.,
#f4c600). -
Color Preview: Review the real-time Color Preview blocks below the fields to verify how your Primary, Secondary, and Accent colors look side by side.
-
Navigation Controls:
-
Click Next > at the bottom right to save your color palette and advance to Step 7.
-
Click < Previous at the bottom left to return to Step 5 and update your visual identity assets.
-
Skip Option: Click Skip and go to Dashboard at the bottom of the screen to enter your workspace immediately.
-
Step 7: Typography
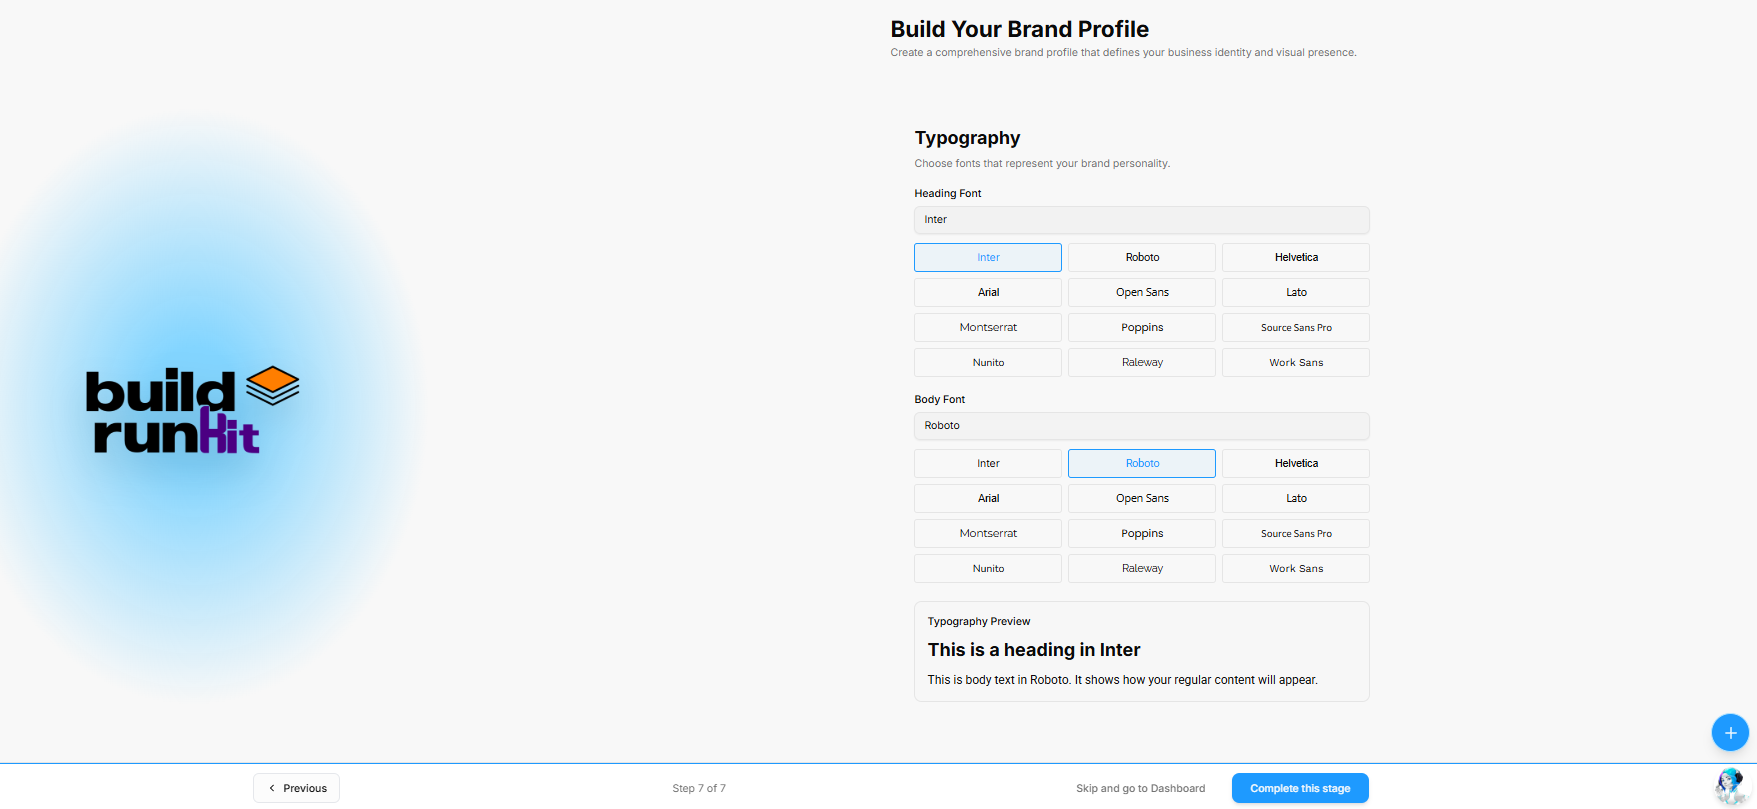
Step 7 of the Build Your Brand Profile onboarding wizard establishes the typographic identity for your headers and body copy.
What You Need
-
Preferred primary font styles for your brand headings and body content
How to Set Up Your Typography
-
Heading Font: Click a font card to select your primary heading font (e.g., Inter, Roboto, Helvetica, Arial, Open Sans, Lato, Montserrat, Poppins, Source Sans Pro, Nunito, Raleway, Work Sans).
-
Body Font: Click a font card to select your primary body font (e.g., Roboto).
-
Typography Preview: Review the live preview box at the bottom to see how your selected Heading Font and Body Font render together.
-
Navigation & Completion:
-
Click Complete this stage at the bottom right to finalize and save your entire brand profile.
-
Click < Previous at the bottom left to return to Step 6 and modify your color palette.
-
Skip Option: Click Skip and go to Dashboard at the bottom of the screen to enter your workspace without saving font preferences.
-
Initial Onboarding & Role-Based Dashboards
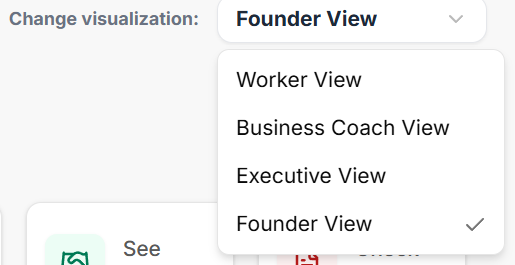
After completing initial account setup, BuildRunKit provides 4 role-based dashboard architectures (Founder View, Executive View, Business Coach View, and Worker View). Each view filters workspace metrics to match specific operational roles.
Role View Switcher & Universal Shortcuts
-
Change Visualization Dropdown: Located at the top right of the dashboard (e.g., set to Founder View), allowing users to switch views on demand.
-
Where To Now? (Shortcuts Bar): Quick action navigation tiles:
-
Finish Onboarding: Directly access pending profile setup steps.
-
Manage Workspaces: Switch or edit organization environments.
-
Subscription: View and update billing or tier details.
-
Your Brands: Jump directly to configured brand assets.
-
See Deals: View active sales pipeline items in the CRM.
-
Check Invoices: Inspect billing and client payments.
-
Founder Dashboard Breakdown
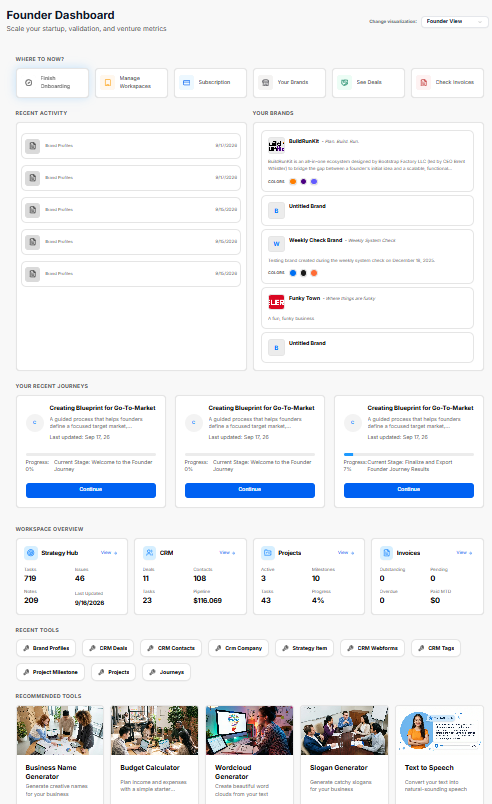
Recent Activity & Your Brands Panels
-
Recent Activity: Stream showing recently generated outputs, brand profile edits, or stage logs with timestamps (e.g., Sep 15, 2026).
-
Your Brands: Quick overview cards displaying active brand profiles (e.g., BuildRunKit, Untitled Brand, Funky Town) along with associated taglines, descriptions, and color swatches.
Your Recent Journeys
-
Journey Cards: Progress cards displaying active strategic tracks (e.g., Creating Blueprint for Go-To-Market), last updated dates, stage completion percentages, current stage names (e.g., Welcome to the Founder Journey), and blue Continue action buttons.
Workspace Overview Metrics
-
Strategy Hub: Displays key counts for active Tasks (719), Issues (46), Notes (209), and last updated dates.
-
CRM: Displays real-time sales pipeline numbers: Deals (11), Contacts (108), Tasks (23), and total Pipeline value ($116,069).
-
Projects: Tracks active operational progress: Active projects (3), Milestones (10), total Tasks (43), and Progress percentage (4%).
-
Invoices: Summary of financial status: Outstanding (0), Pending (0), Overdue (0), and Paid MTD ($0).
Recent & Recommended Tools
-
Recent Tools: One-click quick-launch buttons for frequently accessed features (e.g., Brand Profiles, CRM Deals, CRM Contacts, CRM Company, Strategy Item, CRM Webforms, CRM Tags, Project Milestone, Projects, Journeys).
-
Recommended Tools: Feature cards with direct launch buttons for platform utilities (e.g., Business Name Generator, Budget Calculator, Wordcloud Generator, Slogan Generator, Text to Speech).
Executive Overview Breakdown
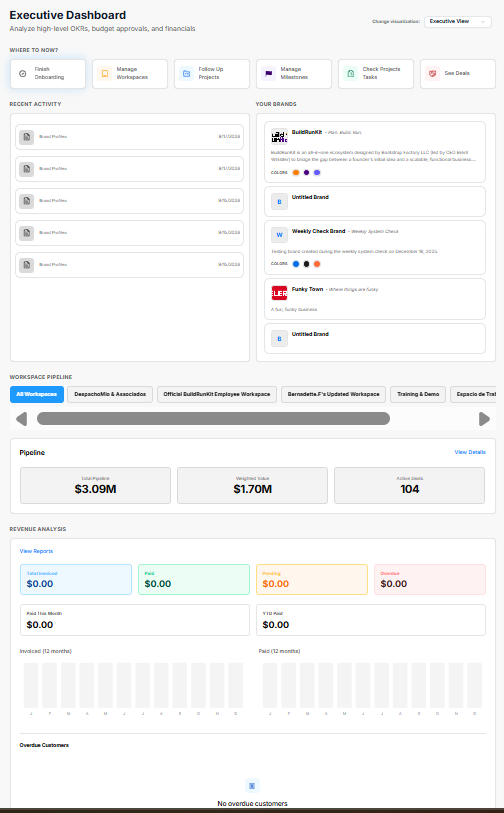
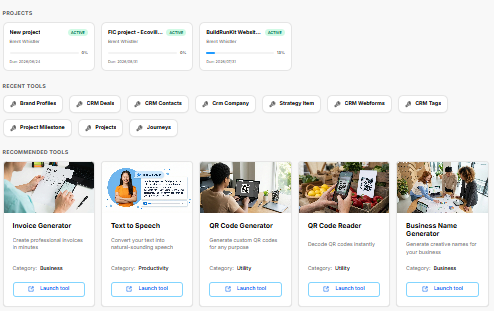
The Executive Dashboard is tailored for corporate leadership to analyze high-level OKRs, budget approvals, pipeline health, and overall organization financials.
Role View Switcher & Executive Shortcuts
-
Change Visualization Dropdown: Positioned at the top right (set to Executive View) to switch role-based dashboard views.
-
Where To Now? (Shortcuts Bar): Quick navigation tiles for executive actions:
-
Finish Onboarding: Complete any remaining setup tasks.
-
Manage Workspaces: Access and configure organizational workspaces.
-
Follow Up Projects: Direct link to monitor project progress.
-
Manage Milestones: View key deadlines and deliverable goals.
-
Check Projects Tasks: Drill into specific project tasks.
-
See Deals: Review active sales pipeline deals.
-
Recent Activity & Brand Assets
-
Recent Activity: Timestamped log of recent updates, brand profile edits, or system entries (e.g., Sep 15, 2026).
-
Your Brands: Overview cards highlighting active company profiles (e.g., BuildRunKit, Untitled Brand, Weekly Check Brand, Funky Town) complete with descriptions and visual color palettes.
Workspace Pipeline
-
Workspace Selector Tab Bar: Filter pipeline data across specific accounts (e.g., All Workspaces, DespachoMio & Asociados, Official BuildRunKit Employee Workspace, Bernadette.F's Updated Workspace, Training & Demo).
-
Pipeline Summary: High-level deal metrics showing Total Pipeline ($3.09M), Weighted Value ($1.70M), and Active Deals (104), with a View Details link for deeper reporting.
Revenue Analysis
-
Financial Status Cards: Real-time billing metrics including Total Invoiced ($0.00), Paid ($0.00), Pending ($0.00), and Overdue ($0.00).
-
Period Highlights: Tracks Paid This Month ($0.00) and YTD Paid ($0.00).
-
Comparative Charts: 12-month visual breakdown charts for Invoiced and Paid trends.
-
Overdue Customers: Dedicated status area highlighting accounts requiring collection follow-ups (currently showing No overdue customers).
Projects, Recent & Recommended Tools
-
Projects: Active status cards displaying project names (e.g., New project, FIC project - Ecovill..., BuildRunKit Websit...), owner names (Brent Whistler), progress indicators, and due dates.
-
Recent Tools: One-click quick links to key features (e.g., Brand Profiles, CRM Deals, CRM Contacts, Crm Company, Strategy Item, CRM Webforms, CRM Tags, Project Milestone, Projects, Journeys).
-
Recommended Tools: Dedicated utility cards with direct Launch tool buttons (e.g., Invoice Generator, Text to Speech, QR Code Generator, QR Code Reader, Business Name Generator).
Business Coach Overview Breakdown
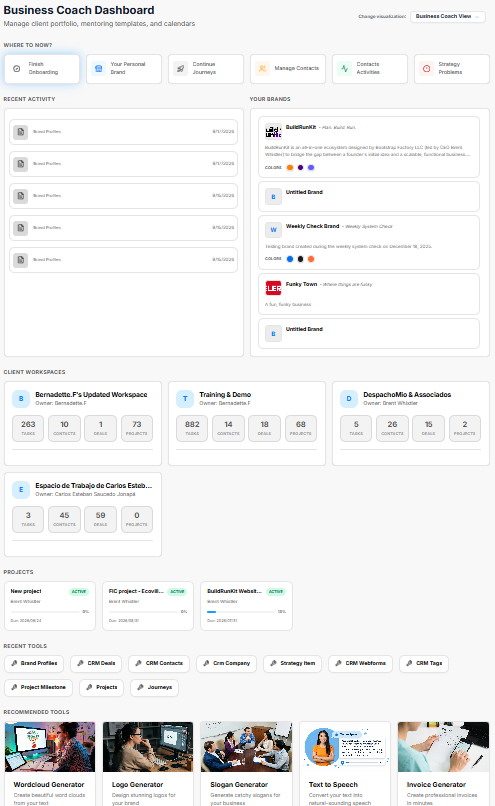
The Business Coach Dashboard is structured for mentorship tracking, client portfolio management, coaching templates, and strategic calendar overviews.
Role View Switcher & Coaching Shortcuts
-
Change Visualization Dropdown: Positioned at the top right (set to Business Coach View) to easily switch between user role perspectives.
-
Where To Now? (Shortcuts Bar): Direct shortcut links tailored for coaching workflows:
-
Finish Onboarding: Complete profile or brand setup.
-
Your Personal Brand: Jump directly to personal or agency brand configurations.
-
Continue Journeys: Resume active coaching and strategy programs.
-
Manage Contacts: Access the client directory.
-
Contacts Activities: Track client communications and engagements.
-
Strategy Problems: Review strategic roadblocks and action items.
-
Recent Activity & Your Brands
-
Recent Activity: Stream logging recent updates, client edits, and profile actions with timestamps (e.g., Sep 15, 2026).
-
Your Brands: Overview cards highlighting managed brand identities (e.g., BuildRunKit, Untitled Brand, Weekly Check Brand, Funky Town) along with associated taglines, descriptions, and color palettes.
Client Workspaces
Dedicated client cards summarizing cross-account operational metrics for active coaching cohorts:
-
Bernadette.F's Updated Workspace (Owner: Bernadette.F): 263 Tasks, 10 Contacts, 1 Deal, 73 Projects.
-
Training & Demo (Owner: Bernadette.F): 882 Tasks, 14 Contacts, 18 Deals, 68 Projects.
-
DespachoMio & Associados (Owner: Brent Whistler): 5 Tasks, 26 Contacts, 15 Deals, 2 Projects.
Projects, Recent & Recommended Tools
-
Projects: Active status overview cards (e.g., New project, FIC project - Ecovill..., BuildRunKit Websit...) displaying owner names (Brent Whistler), progress indicators, and due dates.
-
Recent Tools: One-click launcher buttons for frequently used modules (e.g., Brand Profiles, CRM Deals, CRM Contacts, Crm Company, Strategy Item, CRM Webforms, CRM Tags, Project Milestone, Projects, Journeys).
-
Recommended Tools: Feature cards with direct Launch tool action links (e.g., Wordcloud Generator, Logo Generator, Slogan Generator, Text to Speech, Invoice Generator).
Worker Workspace Breakdown
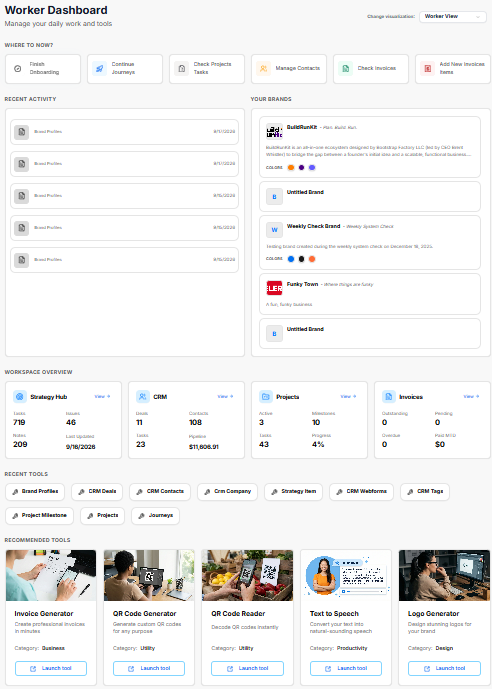
The Worker Dashboard is focused on day-to-day task execution, direct workflows, individual assignments, and immediate operational access.
Role View Switcher & Execution Shortcuts
-
Change Visualization Dropdown: Located at the top right (set to Worker View) to switch role-based dashboard perspectives.
-
Where To Now? (Shortcuts Bar): Navigation buttons optimized for daily operational tasks:
-
Finish Onboarding: Complete profile or initial setup steps.
-
Continue Journeys: Jump directly into active strategic or onboarding workflows.
-
Check Projects Tasks: View assigned project action items and deliverables.
-
Manage Contacts: Access and update CRM customer records.
-
Check Invoices: Review current billing and payment statuses.
-
Add New Invoices Items: Quickly create new billable line items or invoices.
-
Recent Activity & Your Brands
-
Recent Activity: Real-time log showing recent workspace edits, stage updates, and profile activity with timestamps (e.g., Sep 15, 2026).
-
Your Brands: Managed brand cards (e.g., BuildRunKit, Untitled Brand, Weekly Check Brand, Funky Town) featuring brand summaries, visual swatches, and taglines.
Workspace Overview Metrics
-
Strategy Hub: High-level execution board metrics tracking Tasks (719), Issues (46), Notes (209), and last updated timestamps (9/16/2026).
-
CRM: Real-time record summary showing Deals (11), Contacts (108), Tasks (23), and Pipeline total ($11,606.91).
-
Projects: Operations progress overview tracking Active projects (3), Milestones (10), Tasks (43), and Progress completion percentage (4%).
-
Invoices: Financial snapshot displaying Outstanding (0), Pending (0), Overdue (0), and Paid MTD ($0).
Recent & Recommended Tools
-
Recent Tools: Quick-launch shortcut buttons for daily application tools (e.g., Brand Profiles, CRM Deals, CRM Contacts, Crm Company, Strategy Item, CRM Webforms, CRM Tags, Project Milestone, Projects, Journeys).
-
Recommended Tools: Execution utility cards with direct Launch tool action links (e.g., Invoice Generator, QR Code Generator, QR Code Reader, Text to Speech, Logo Generator).
No comments to display
No comments to display