
Managing Invoices
Managing Invoices

The Invoices page is where you track the lifecycle of every bill sent from your workspace. It provides a high-level summary of your revenue and a detailed list for granular management.
Invoice Overview
At the top of the page, four key metrics provide an instant status update for your current workspace:
-
Total Invoices: The total number of invoices generated.
-
Paid: The count of all completed payments.
-
Pending: Invoices that have been sent and are awaiting payment.
-
Overdue: Any invoices that have passed their assigned due date.
The Invoice List
The Invoice List table displays all records, allowing you to search and organize your data:
-
Search: Use the "Search invoices by number..." bar to find a specific document quickly.
-
Customizing Columns: Click the Columns dropdown to choose which details to display, such as Invoice Number, Customer, Date, Due Date, Amount, Balance, and Status.
-
New Invoice: Click the + New Invoice button at the top right to start a new billing entry.
Generating Reports
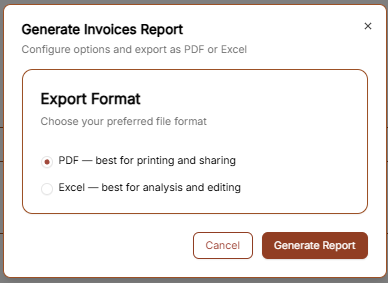
If you need to export your invoicing data for accounting or review, click the Generate Report button at the top right. This will open a configuration window with the following options:
-
PDF: This format is best for printing and direct sharing with stakeholders.
-
Excel: This format is best for detailed financial analysis and editing.
Once you have selected your preferred format, click Generate Report to download the file.
Creating Your First Invoice
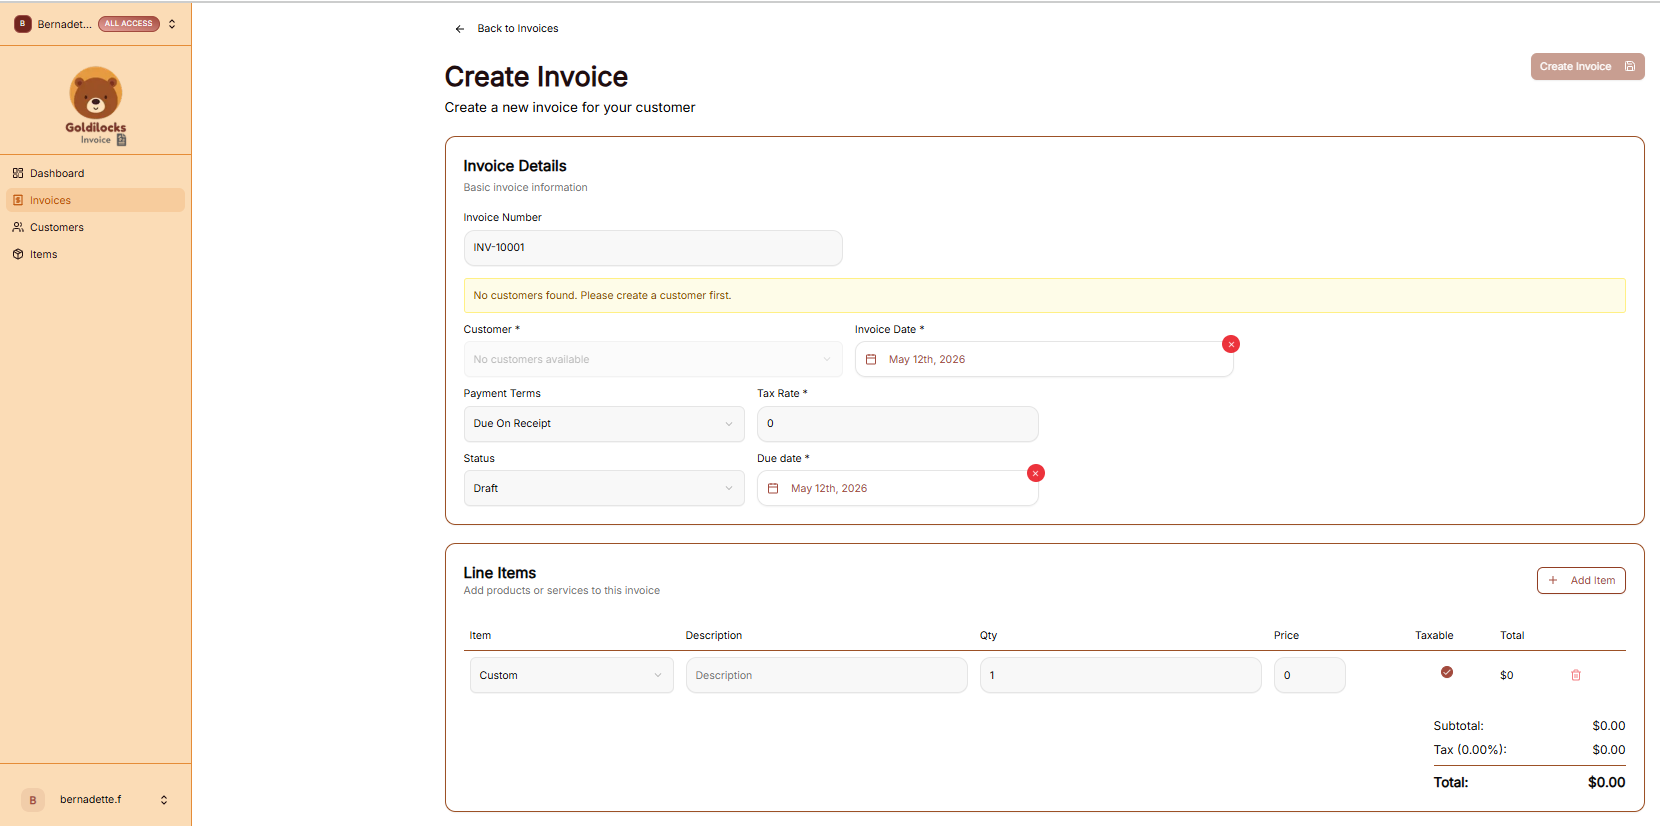
To begin a new bill, click the + New Invoice button from either the Dashboard or the Invoices page. This will open the "Create Invoice" workflow.
Invoice Details
In this section, you will configure the basic identity and timeline of the invoice:
-
Invoice Number: This is automatically generated (e.g., INV-10001) but can be modified if you have a specific internal numbering system.
-
Customer: Select a client from your saved database. If you see the message "No customers found," you must navigate to the Customers tab to add one before you can proceed.
-
Dates: Use the calendar icons to set both the Invoice Date (when it is issued) and the Due Date (when payment is expected).
-
Terms & Tax: Use the dropdowns to set Payment Terms (such as "Due On Receipt") and enter the applicable Tax Rate percentage.
Adding Line Items
Line items represent the specific work or products you are charging for.
-
Adding Items: Click the + Add Item button to add more rows to your invoice.
-
Item Details: For each row, you can choose a saved item from your catalog or enter a "Custom" one. Fill in the Description, Quantity (Qty), and Price.
-
Taxable Toggle: Check the Taxable circle for individual items if tax should be applied specifically to that row.
-
Totals: The system will automatically calculate your Subtotal, any Tax amounts, and the final Total at the bottom right.
No comments to display
No comments to display