
The Strategy Hub Dashboard
The Strategy Hub Dashboard
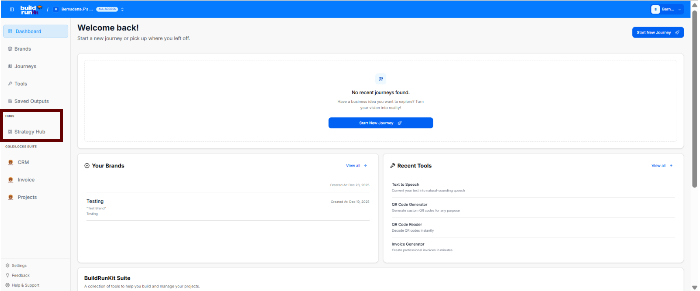
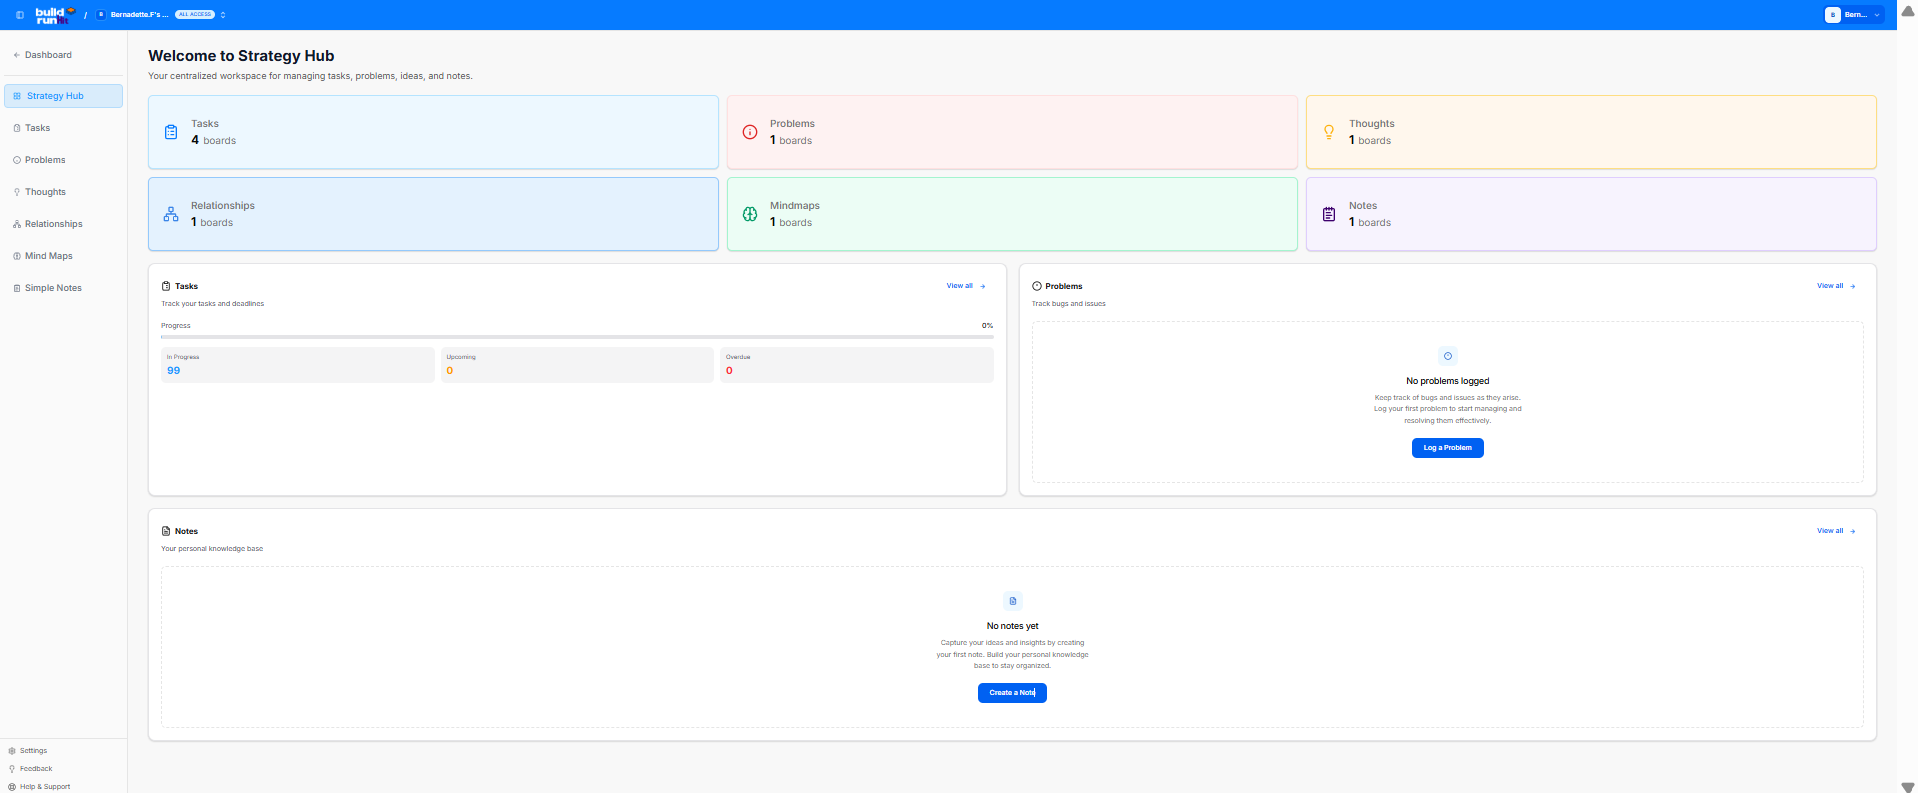
The Strategy Hub isdashboard serves as your centralcentralized workspace for activemanaging planning,tasks, problem-solving,problems, ideas, and execution.notes. The dashboardIt provides a high-level summaryview of your active boards and tracks real-time progress across allkey workflow segments.
Overview Cards
The top metric cards show the total number of active tracking boards within each core strategic modules.category:
Strategy
On the main Strategy Hub page, you can monitor the health and status of your business strategy through four key metric cards:
-
workspaceTotalTasks: Displays the total number oftaskstaskcurrentlyboardsbeingactivetracked across allin yourboards.
Total Problems: Shows the number of active issues or bugs that need to be addressed.
Total Thoughts: Tracks the number of strategic ideas or insights you've logged.
Total Relationships: Monitors the number of key business connections or stakeholders you are managing.
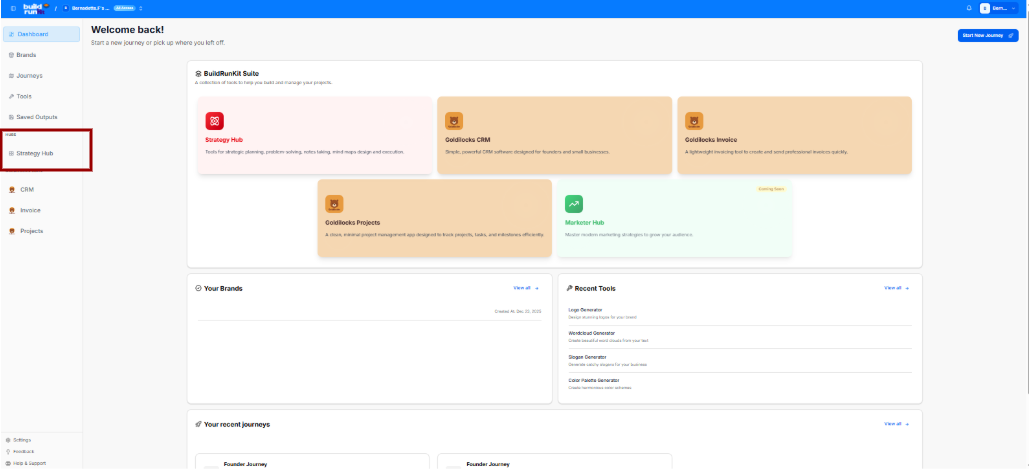
Module Quick-Access
From the Strategy Hub Dashboard, you can quickly jump into specialized modules using the cards below the metrics:
Tasks: Manage your execution through interactive task boards.boards).
Problems: LogTracks andactive trackissue issuesor withbug severitylogging levelsboards (Critical,e.g., Medium,1 Low)boards).
Thoughts: AAggregates spacebrainstorms, for capturingideas, and organizing strategic ideas.thoughts (e.g., 1 boards).
Relationships: MapManages outnetwork, partner, or team connection boards (e.g., 1 boards).
Mindmaps: Provides quick access to visual brainstorming or mind mapping workspaces (e.g., 1 boards).
Notes: Collects knowledge base and documentation folders (e.g., 1 boards).
Dashboard Trackers & Widgets
The lower half of the dashboard features dedicated summary panels to track your items and jump directly into deep-dive views:
Tasks Panel
This section helps you track your tasks and deadlines.
Progress Bar: Displays a total visual percentage completion rate of your combined task workload.
In Progress: Counts active tasks currently being worked on.
Upcoming: Lists scheduled or future action items.
Overdue: High-priority alert counting tasks that have passed their set deadlines.
View all: Click the blue View all → link to manage your complete task records.
Problems Panel
A dedicated tracking area to monitor workspace bugs and issues.
Log a Problem: If no items are listed, click the blue Log a Problem button to record a new bug or block.
View all: Click the blue View all → link to navigate directly to the dedicated Problems module.
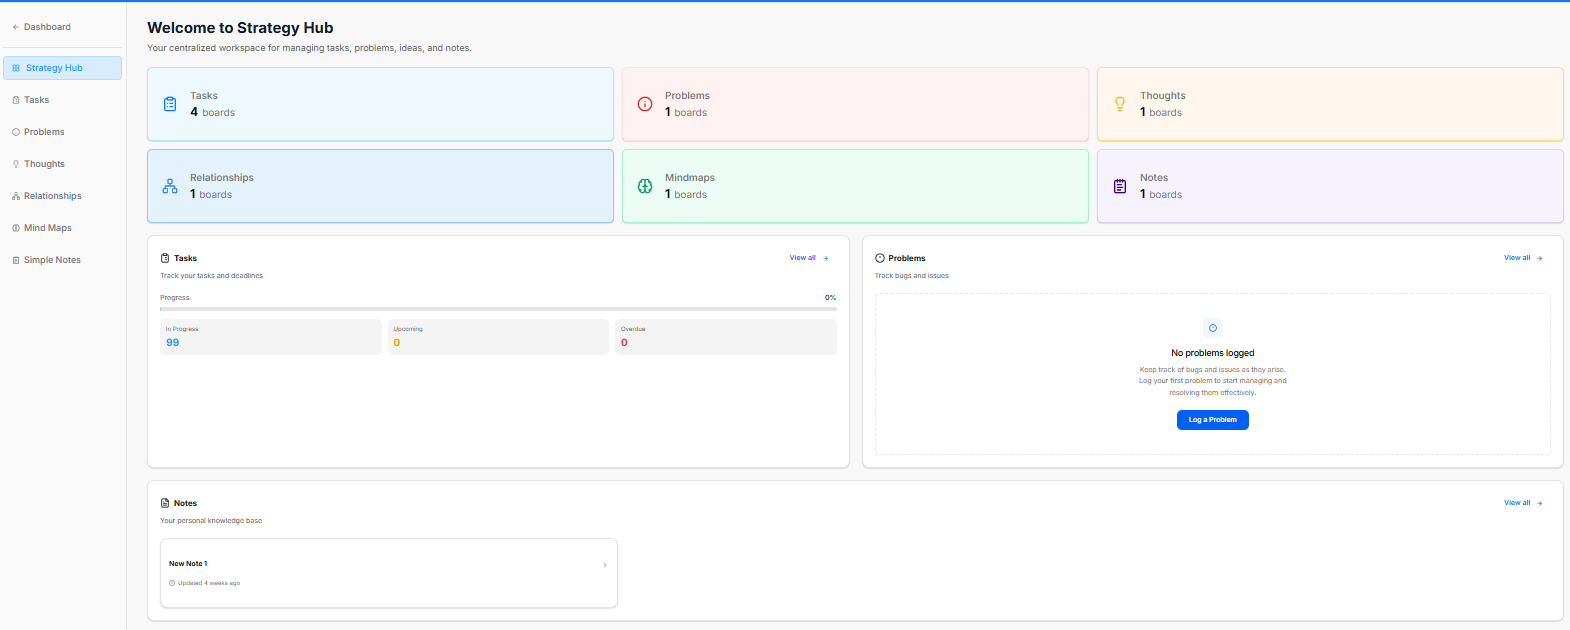
Notes Panel
Acts as your personal knowledge base framework directly on the main dashboard layout.
Quick Access Blocks: Lists your recent documents, displaying individual row titles and their last updated relative timestamp (e.g., Updated 4 weeks ago).
View all: Click the blue View all → link to open up the complete knowledge module.
Left Navigation Sidebar
Dashboard: Jumps back to your global dashboard hub.
Strategy Hub: Refreshes or returns you to this primary workspace layout.
Tasks: Direct link to your expanded task listings.
Problems: Opens your complete workspace issue tracker.
Thoughts: Accesses your logged ideas and concepts.
Relationships: Opens your contact network of stakeholders.maps.
Mind Maps: Visually designLaunches your productvisual ecosystemplanning or growth strategies.boards.
Simple Notes: AccessLinks to your personalfull documentation knowledge base for guidelines and templates.base.
Managing Tasks in Strategy Hub
The Tasks module is a comprehensive project management workspace designed to help you organize, track, and execute your business goals. By using Task Boards, you can visualize your workflow, collaborate with your team, and ensure every milestone is met on time.
Managing Your Task Boards
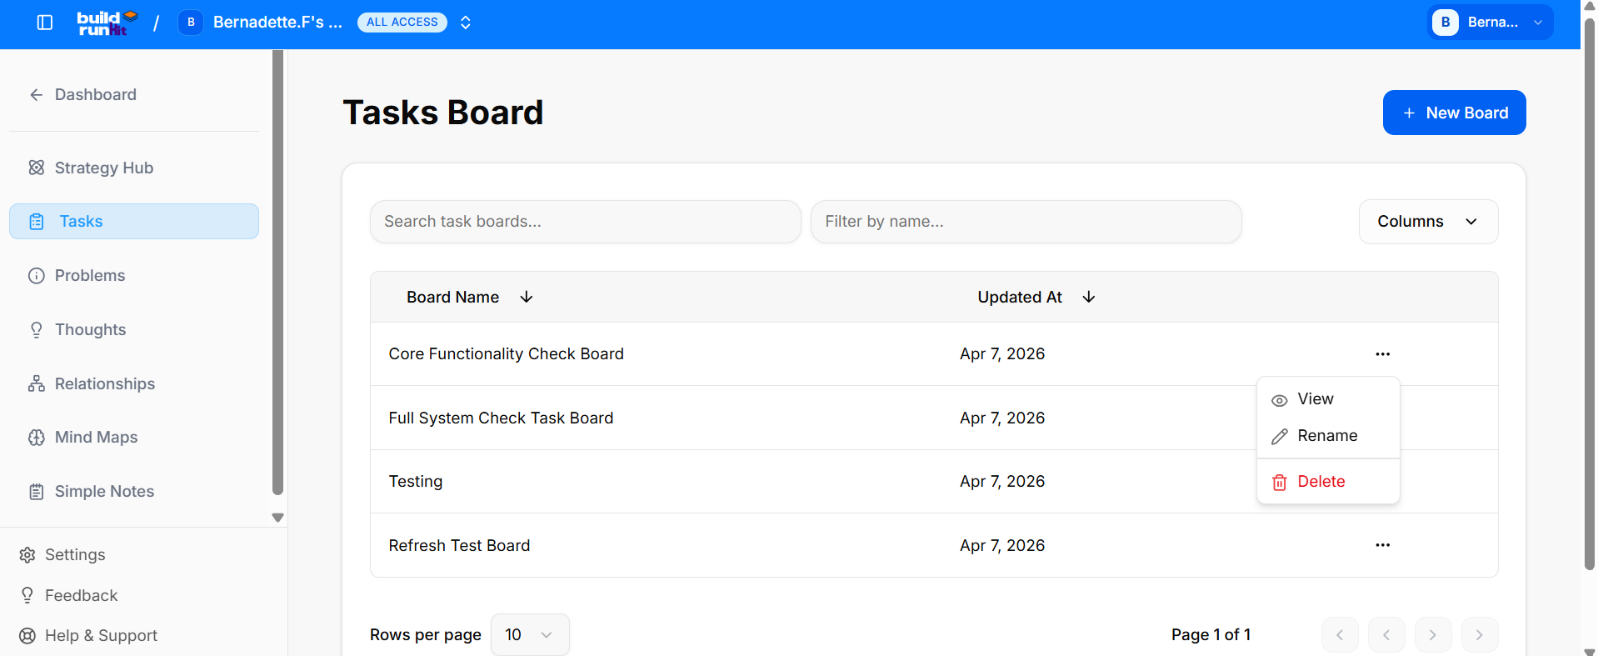
The main Tasks page provides a high-level overview of all your active projects, such as "Strategy & Planning" or "Active Execution."
Board: Each board is represented by a card that displays essential details:
Board Name: The title of your project or workspace.
Updated At: The specific date and time the board was last modified.
Search & Filter: Use the "Search task boards..." and "Filter by name..." bars at the top to quickly locate a specific project.
Customizing Columns: The "Columns" dropdown menu allows you to choose which project details (like Status or Date) are visible in your list.
Board Actions: Click the three-dot menu (...) on the right side of any board card to access management options:
View: Open the board to access your lists and tasks.
Rename: Update the board title as your project evolves.
Delete: Permanently remove the board and all contained data.
Create New Board: To initiate a new project, click the blue "+ New Board" button at the top right.
Creating and Customizing Lists Within Task Board 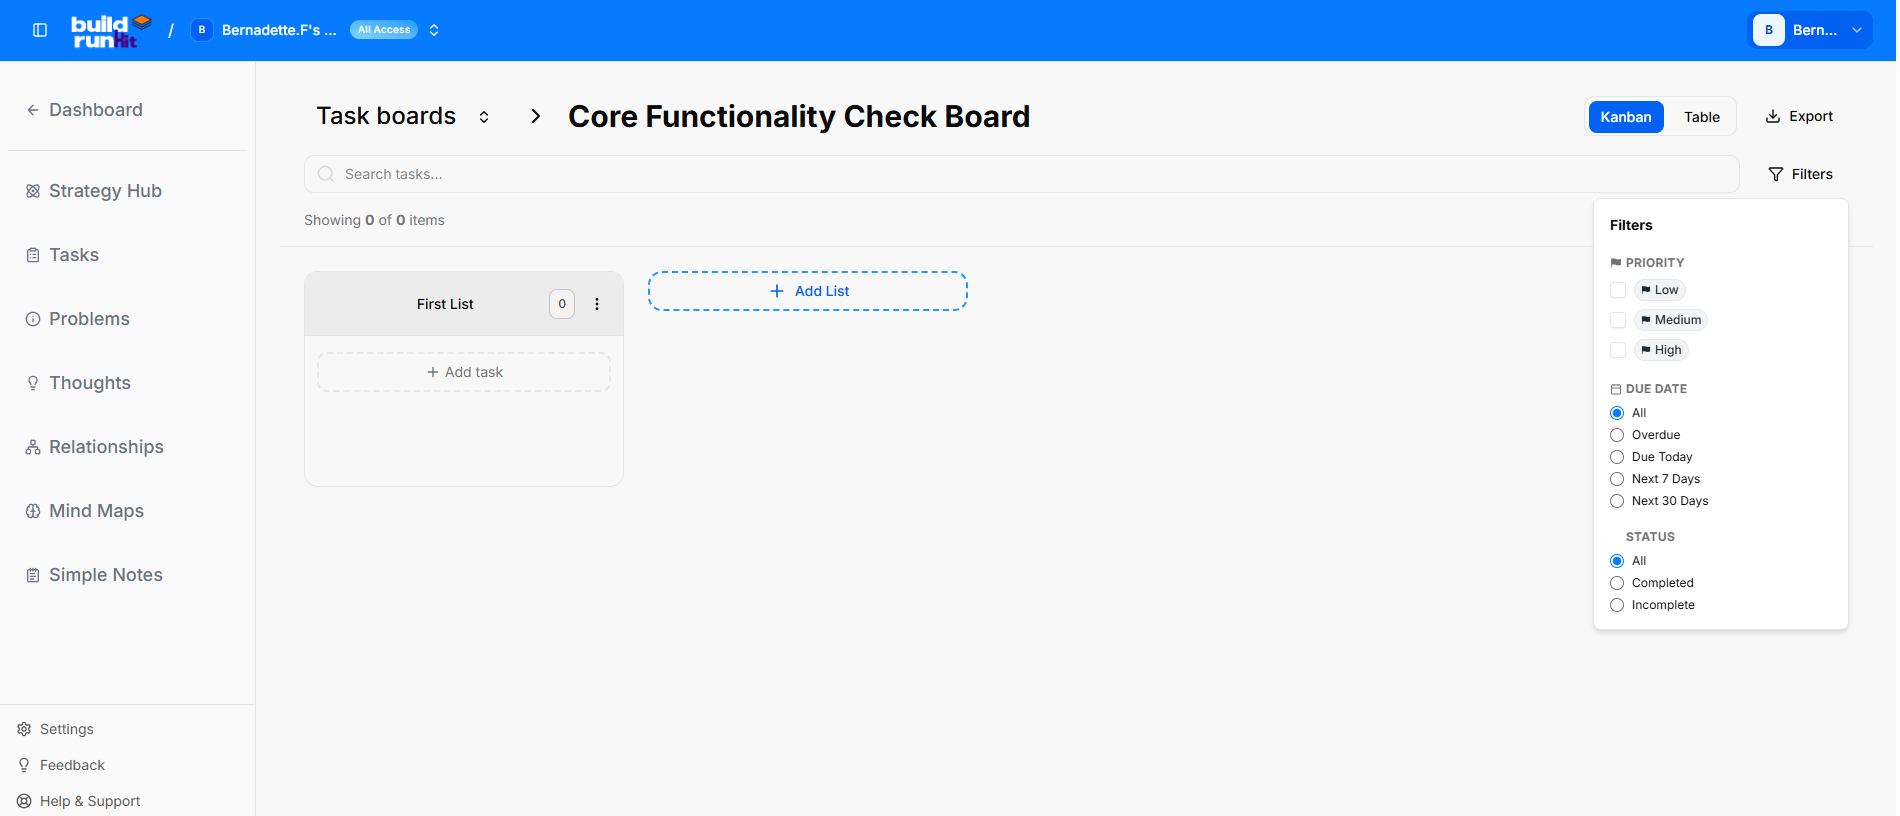
Upon opening a specific board, you gain complete control over your workflow organization. The board acts as a flexible canvas where you can build a structure that perfectly aligns with your project requirements.
Board Controls and Navigation At the top of each board, several tools are available to manage your view:
Search Tasks: Quickly find specific tasks within the active board.
View Toggles: Switch between Kanban (card-based) and Table (list-based) views to suit your preference.
Filters: Apply filters to narrow down tasks by priority, assignee, or status.
Export: Use the Export button to download your board data as a PNG or PDF for external reporting.
List Management To organize your task, click the "+ New List" button.
Reordering: Next to each list name, use the Left and Right Arrows to horizontally reorder lists across your board.
List Actions: Access the three-dot menu (...) on any list to access advanced options:
Rename List: Update the title to reflect a new stage in your process.
Bulk Create: Open a specialized window to add multiple tasks at once. This is ideal for quickly populating a list with known action items.
Delete List: Permanently remove the entire list and all associated tasks.
Adding and Managing Tasks 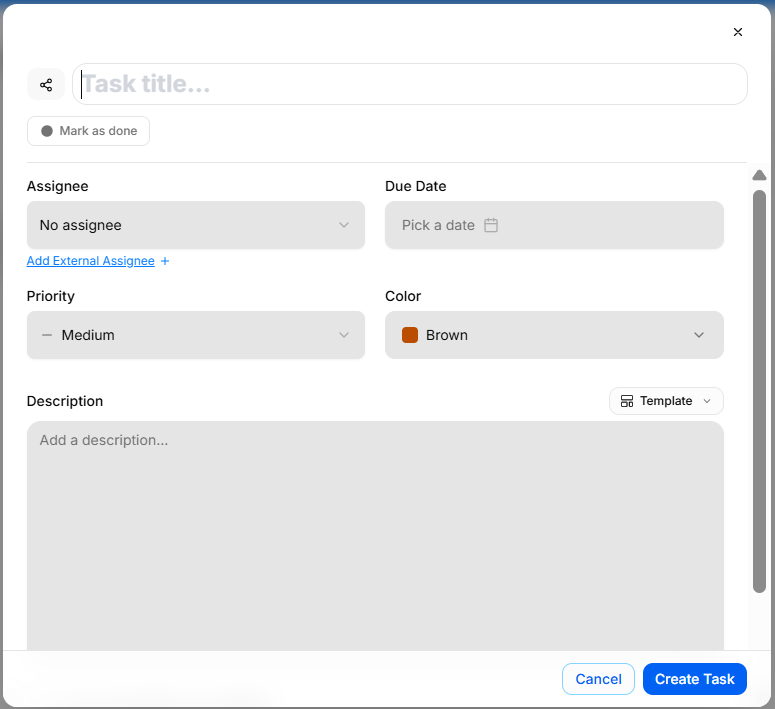
Tasks are the individual action items that drive your project forward. You can add tasks individually or use the bulk creation tool for efficiency.
Adding Individual Tasks Simply click the "+ Add a task" button at the bottom of any list to open the task creation modal.
Task Details and Customization Within the task modal, you can define specific parameters to keep your team informed:
Title & Description: Enter a clear title and a detailed description (up to 3000 characters).
Assignee: Assign the task to a team member or enter an External Assignee email for outside collaborators.
Due Date: Set a clear deadline using the date picker.
Priority: Categorize the urgency as Low, Medium, or High.
Status & Color: Mark tasks as completed using the status checkbox and use color coding to visually organize different types of work.
Collaboration and History The task modal includes a Comments tab for centralized communication:
Adding Comments: Post updates, ask questions, or provide feedback directly within the task.
Activity Log: View a history of when the task was created and by whom, ensuring full transparency.
Managing Task Progress
Drag-and-Drop: Once created, tasks can be moved between lists using a simple drag-and-drop interface, allowing you to update task status seamlessly as work progresses.
Task Updates: Click on any task card to reopen the modal and update details, change priorities, or add new comments at any time.
Managing Problems in Strategy Hub
The Problem Board is a specialized workspace designed to help you identify, analyze, and solve complex business challenges. By breaking down obstacles into manageable components, you can develop clear action plans and track the progress of your solutions.
Managing Your Problem Boards
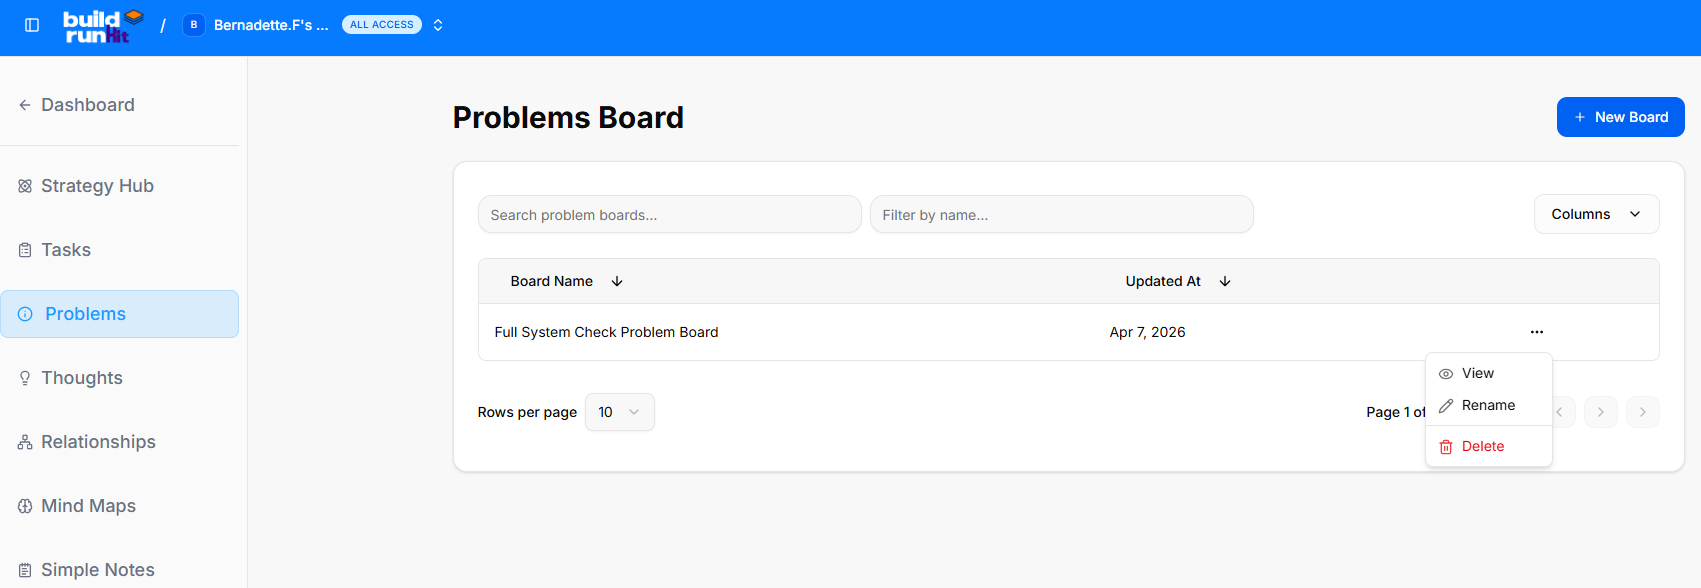
The main Problem Board page provides a high-level overview of all your active problem-solving projects.
Board: Each board is represented by a card showing its status:
Board Name: The title of the specific challenge or problem area.
Updated At: The exact date and time the board was last modified.
Search & Filter: Use the "Search problem boards..." and "Filter by name..." bars at the top to instantly find a specific board.
Customizing Columns: The "Columns" dropdown menu allows you to choose which project details are visible in your list view.
Board Actions: Click the three-dot menu (...) on the right side of any board card to access:
View: Open the board to access your analysis and lists.
Rename: Update the title of the problem board.
Delete: Permanently remove the board and all its contents.
Create New Board: To start a new analysis, click the blue "+ New Board" button at the top right.
Creating and Customizing Lists Within a Board 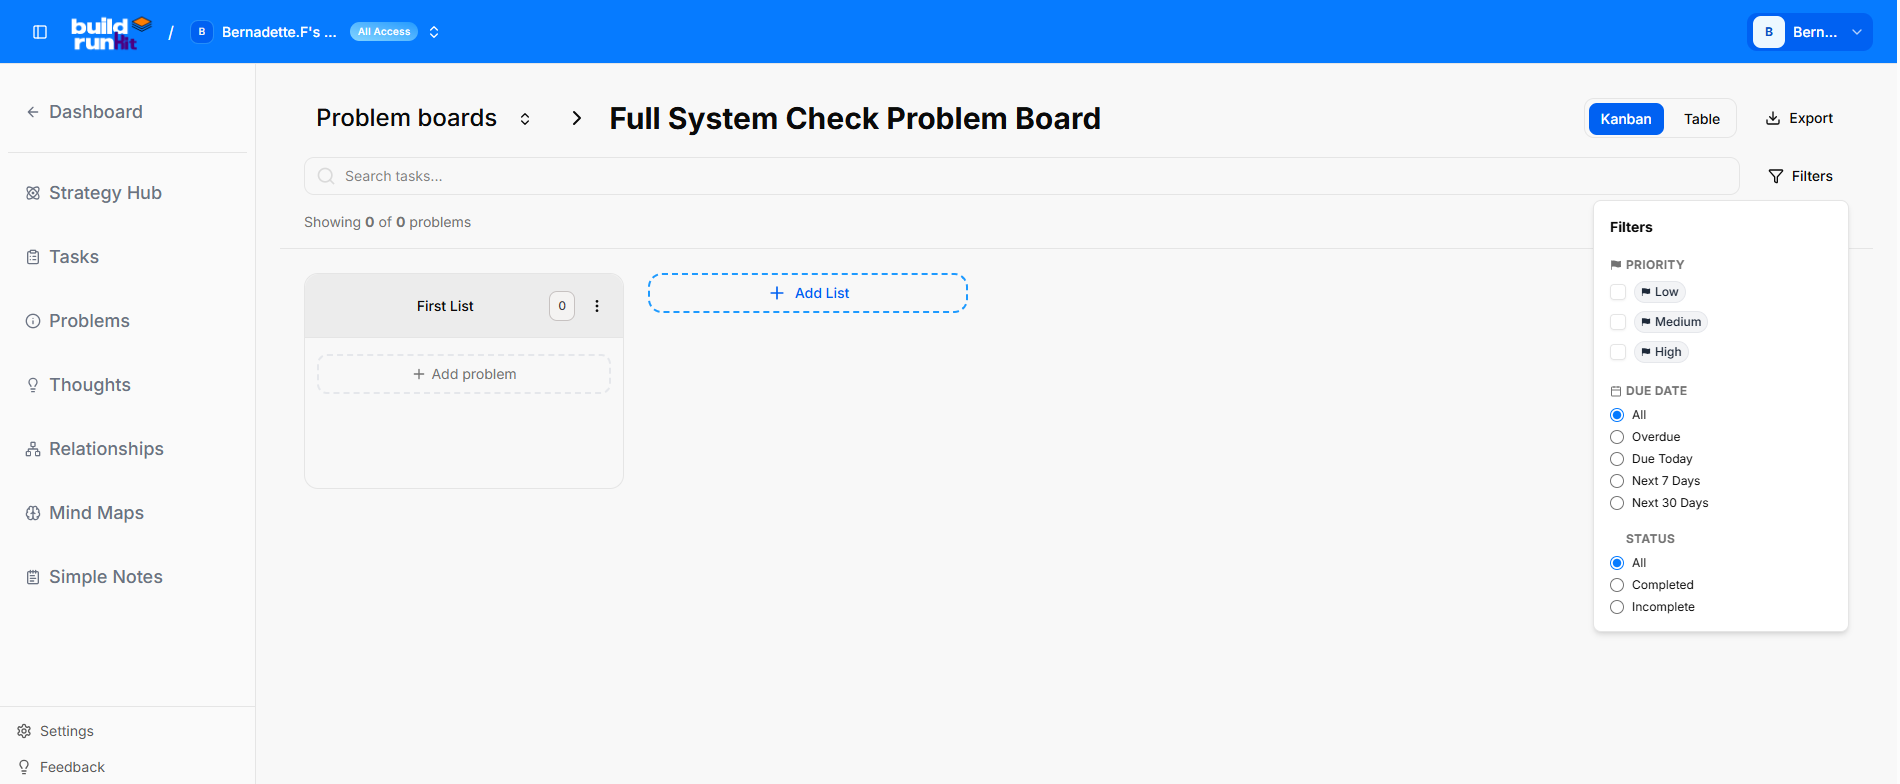
Once a board is opened, you can structure your problem-solving workflow using dynamic lists. This allows you to categorize different stages of a problem (e.g., "Root Causes," "Proposed Solutions," "Tested," or "Resolved").
Board Controls and Navigation At the top of each board, use these tools to manage your workspace:
Search Tasks: Quickly find specific items or "problem cards" within the board.
View Toggles: Switch between Kanban and Table views.
Filters: Narrow down items by priority, status, or assignee.
Export: Click the Export button to save your board as a PNG or PDF.
List Management To organize your problems, click the "+ New List" button. 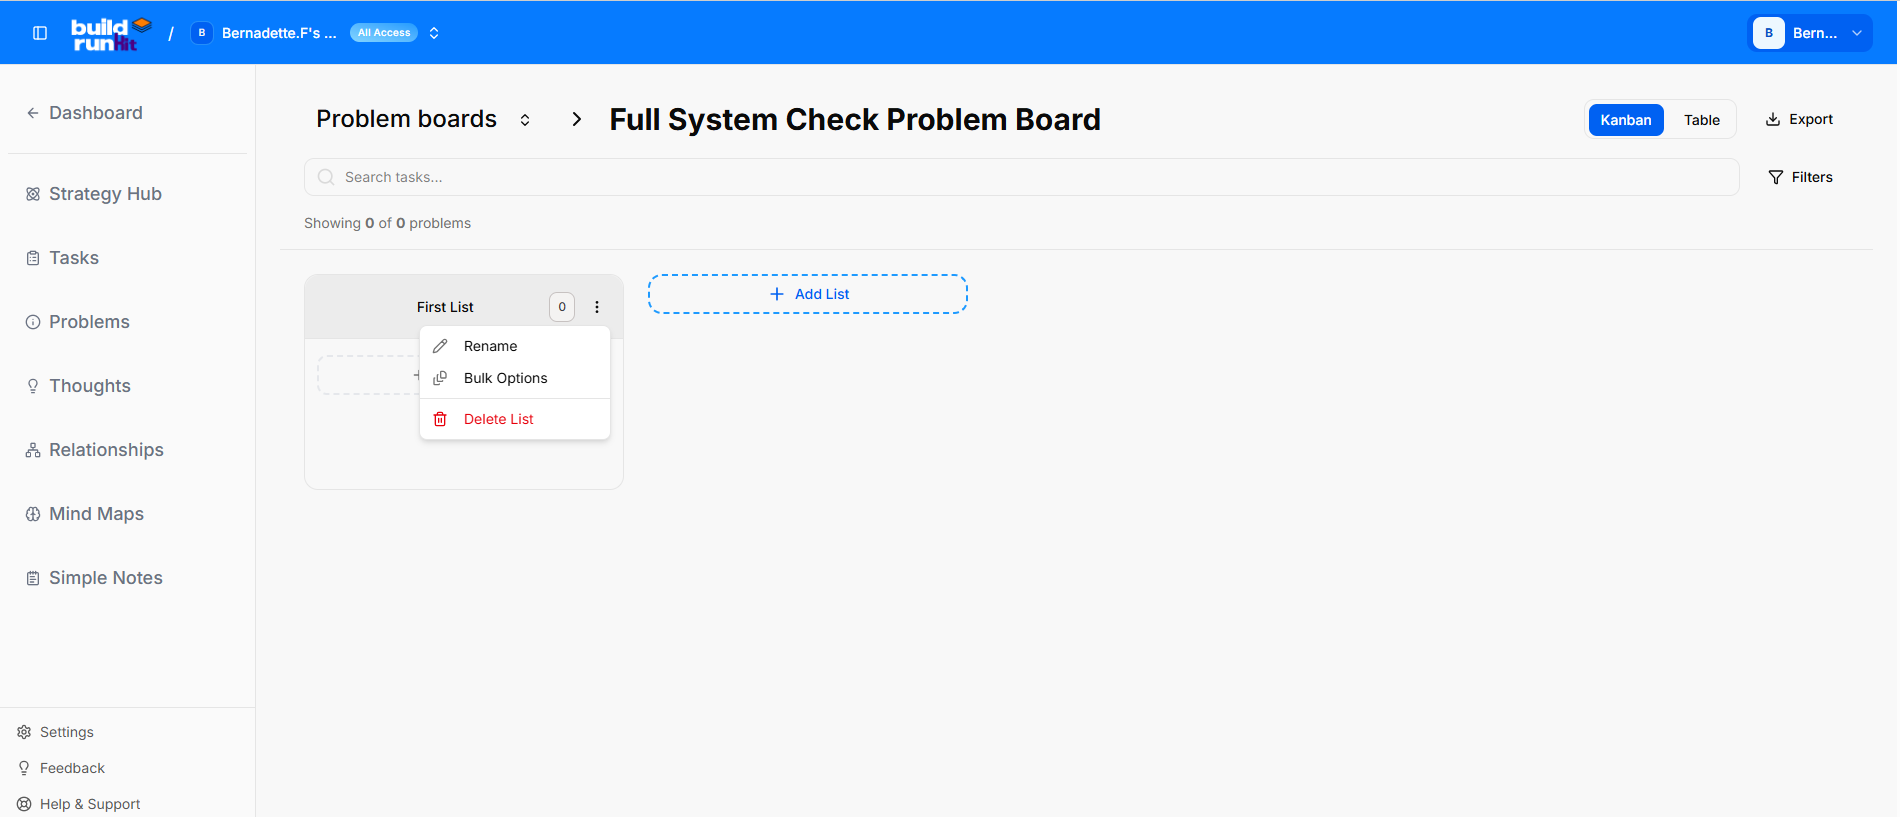
Reordering: Use the Left and Right Arrows next to the list name to rearrange your workflow.
List Actions: Click the three-dot menu (...) on any list for these options:
Rename List: Change the list title as your analysis evolves.
Bulk Create: Open the bulk creation window to add multiple problem items or ideas to the list simultaneously.
Delete List: Permanently remove the entire list and all its associated items.
Adding and Managing Problem Items 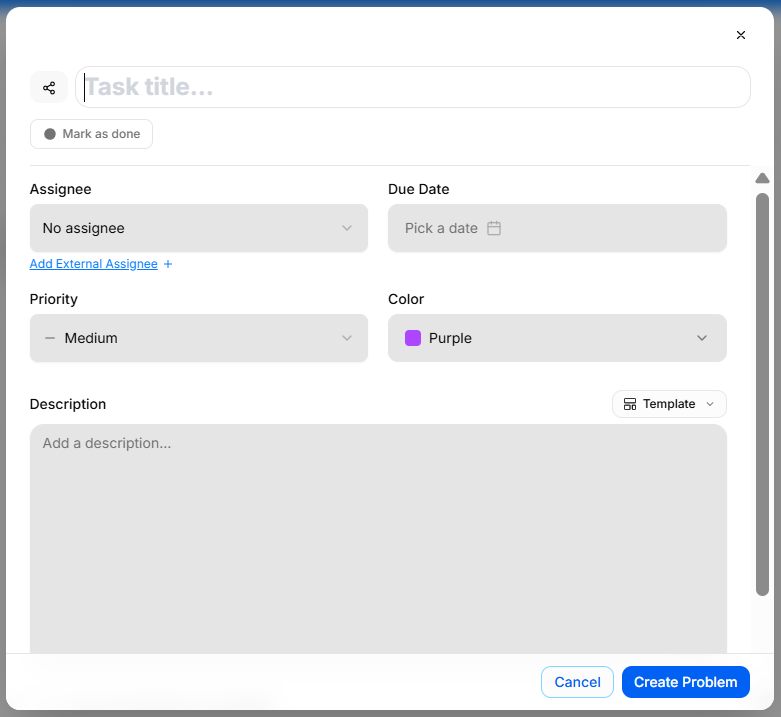
Individual items represent specific aspects of the problem or steps toward a solution.
Adding Items
Individually: Click the "+ Add a task" button at the bottom of any list to open the detailed modal.
In Bulk: Use the Bulk Create option from the list menu to quickly list multiple points at once.
Item Details and Customization Within the creation modal, you can define the specifics:
Title & Description: Provide a mandatory title and a description (up to 3000 characters) to explain the issue.
Assignee: Assign the item to a team member or add an External Assignee email.
Due Date: Set a deadline for when this specific part of the problem needs to be addressed.
Priority: Set the urgency to Low, Medium, or High.
Status & Color: Use the checkbox to mark an item as resolved and apply colors for visual categorization.
Collaboration
Comments & Activity: Use the Comments tab to discuss the problem with your team. This section also serves as an activity log, tracking who created the item and when.
Drag-and-Drop: Move items between lists to show progress (e.g., moving an item from "Identified" to "Solved").
Managing Thoughts in Strategy Hub
The Thoughts module is a creative workspace designed for brainstorming, capturing ideas, and developing early-stage concepts. By using Thought Boards, you can keep your inspirations organized and separate from your active execution tasks.
Managing Your Thought Boards
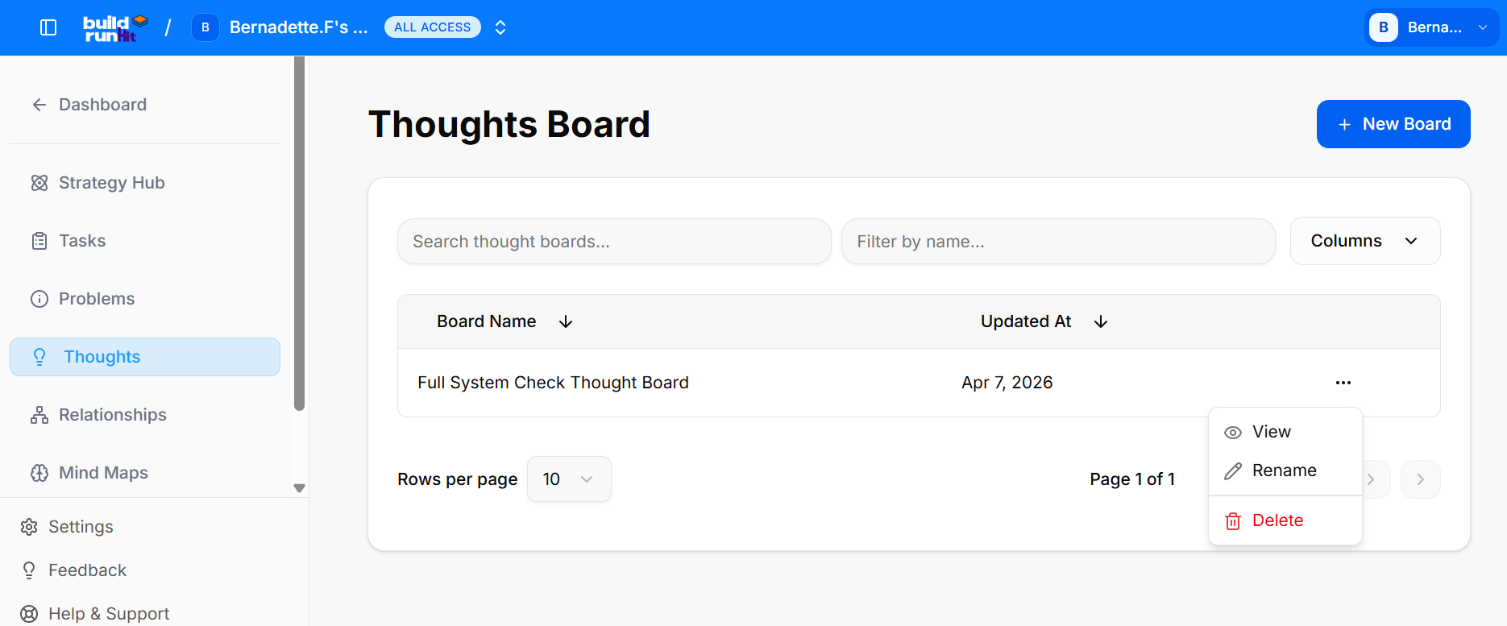
The main Thoughts page provides a clear list of all your active brainstorming projects. This view is designed to help you quickly access and manage your collection of ideas.
Board Overview: Each entry in the list displays the Board Name and the date it was Updated At, helping you track the progress of your brainstorming sessions.
Search & Filter: Use the "Search thought boards..." and "Filter by name..." fields at the top to quickly locate a specific board.
Customizing Columns: The "Columns" dropdown menu allows you to choose which information is displayed in your board list.
Board Actions: Click the three-dot menu (...) on the right side of any board to access management options:
View: Open the board to see your organized lists of ideas.
Rename: Update the name of the board as your ideas evolve.
Delete: Permanently remove the board and all its contents.
Create New Board: To start a new brainstorming session, click the blue "+ New Board" button at the top right.
Using the Thoughts Canvas
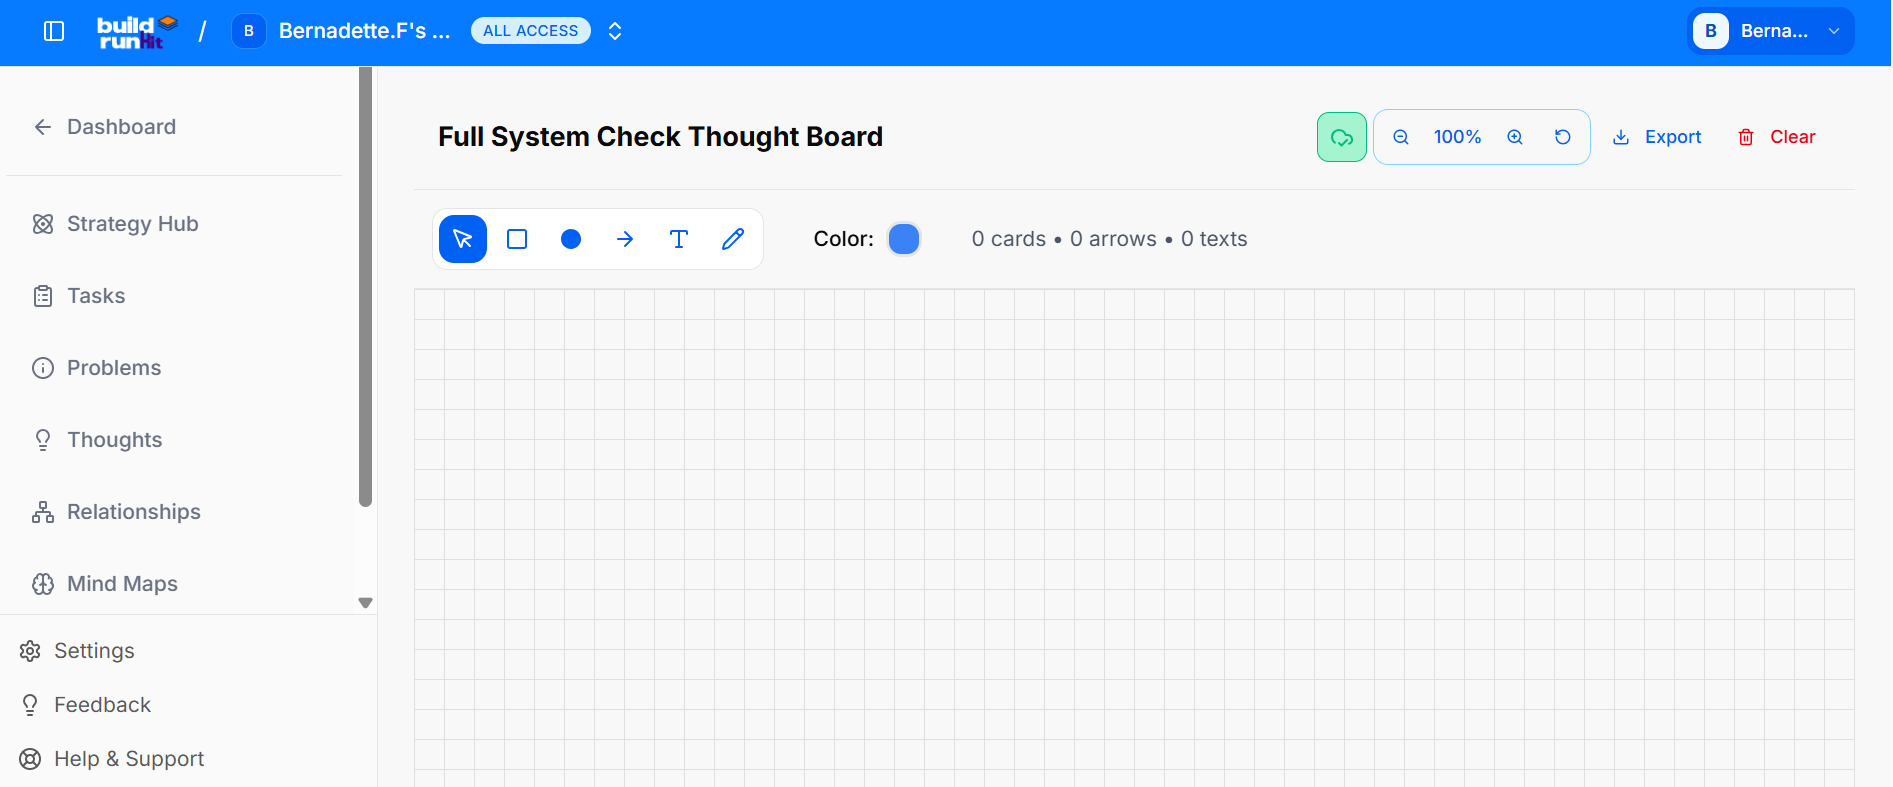
Unlike the Tasks and Problems modules, the Thoughts Board provides a completely free-form Canvas designed for visual brainstorming and creative exploration. Instead of lists and columns, you have a blank workspace and a specialized toolkit to map out your ideas.
The Thoughts Board provides a free-form Canvas designed for visual brainstorming and creative exploration. Unlike the structured list views in other modules, this environment allows you to map out ideas using a specialized toolkit.
The Creative Toolkit
At the top of the canvas, you have access to a specialized set of tools to visualize your thoughts:
Select Tool (Arrow): Use this to select, move, and resize any element on your canvas.
Square & Circle Shapes: Create structured containers for your ideas.
Arrow/Connector: Draw lines between shapes to show relationships, flow, and dependencies.
Text Tool (T): Add standalone labels or detailed notes anywhere on the canvas.
Pencil Tool: For free-hand sketching, underlining, or adding a personal touch to your brainstorm.
Color Palette: Use the color selector at the top of the toolkit to change the color of your shapes, text, and pencil strokes, allowing for immediate visual categorization as you build your map.
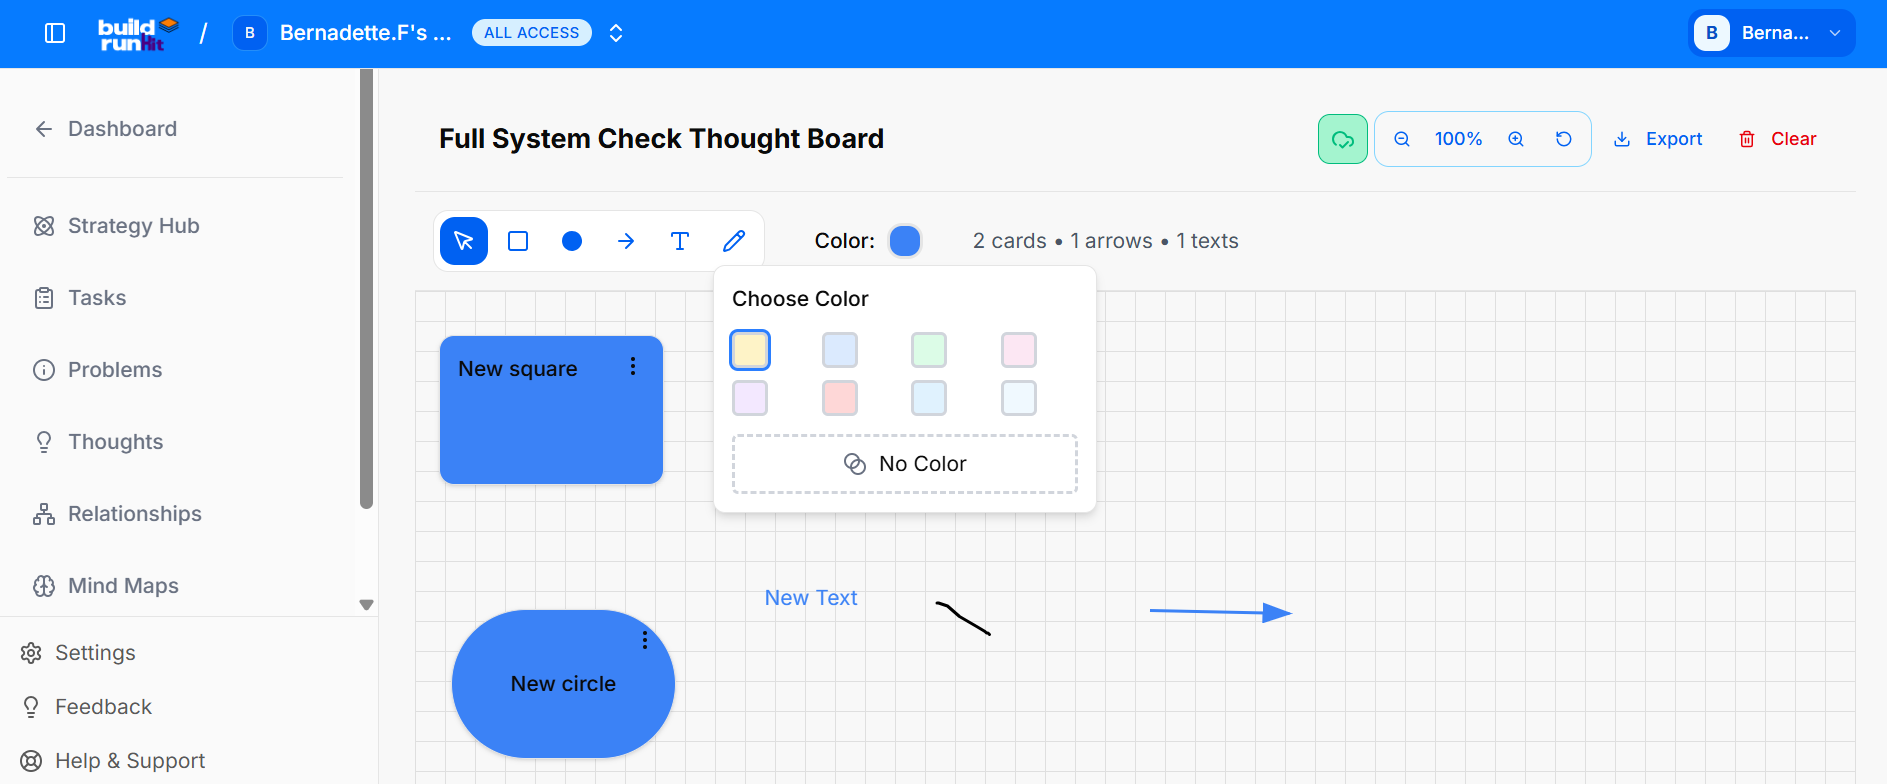
Editing and Customizing Shapes
Each shape on your canvas (Square or Circle) is fully interactive and provides multiple ways to manage your ideas:
Edit Content: You can double-click any shape to quickly open the editor. Here, you can add a clear Title and a detailed Description to expand on your thought.
Shape Management (Three-Dot Menu): Each shape features a three-dot menu (...) that provides quick access to essential actions:
Edit: Open the details modal to update the title, description, or color.
Delete: Permanently remove the shape and its content from your canvas.
Change Color: Within the edit options, you can customize the Color of each shape to visually categorize your ideas (e.g., using specific colors for different themes or priority levels).
Canvas Controls and Navigation
Export: Use the Export button at the top right to download your entire canvas for external use or sharing.
Clear: Click the Clear button (located near the Export button) to permanently delete all elements from the canvas and start with a fresh workspace.
Zoom & Pan: Use the controls at the bottom left to Zoom In (+), Zoom Out (-), or Reset Zoom (100%) to navigate your workspace easily.
Managing Relationships in Strategy Hub
The Relationships module is a specialized workspace designed for identifying, mapping, and managing the various connections within your business ecosystem. By using Relationship Boards, you can keep track of key stakeholders, partners, and internal connections in an organized manner.
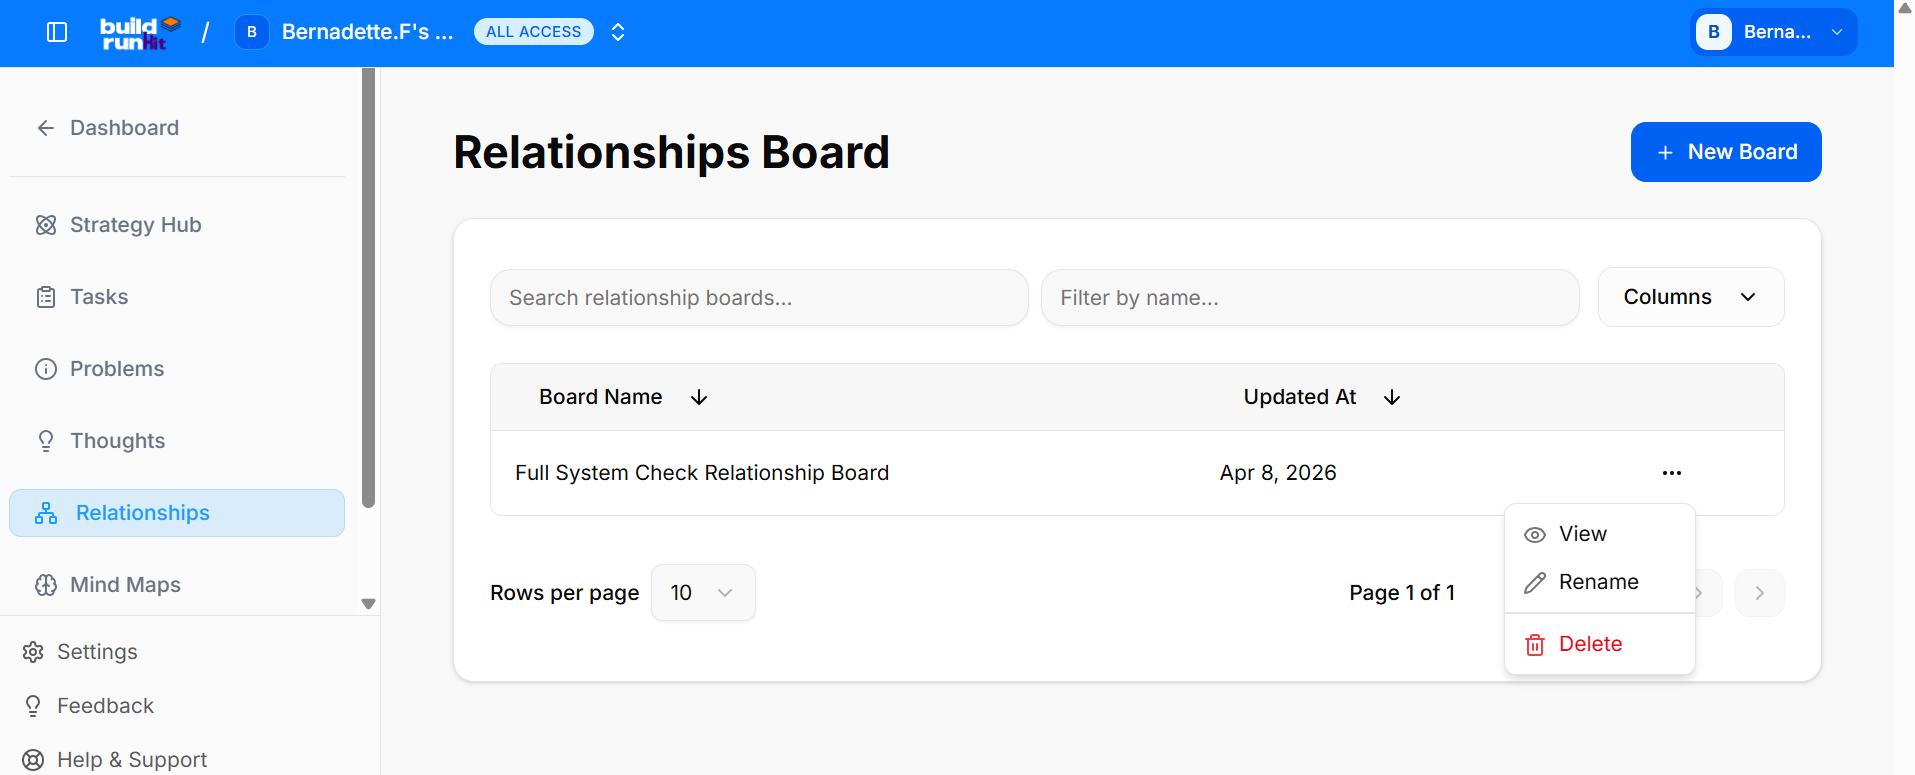
Managing Your Relationship Boards
The main Relationships page provides a streamlined overview of all your active mapping projects, allowing you to quickly identify and access specific relationship maps.
Board: Each entry in the list provides key information at a glance:
Board Name: The title of your relationship project.
Updated At: The exact date and time the board was last modified.
Search & Filter: Use the "Search relationship boards..." and "Filter by name..." fields at the top to quickly locate a specific board.
Customizing Columns: The "Columns" dropdown menu allows you to choose which information is displayed in your board list.
Board Actions: Click the three-dot menu (...) on the right side of any board to access management options:
View: Open the board to see your detailed relationship maps.
Rename: Update the name of the board as your network evolves.
Delete: Permanently remove the board and all its contents.
Create New Board: To start a new relationship mapping project, click the blue "+ New Board" button at the top right.
Using the Relationships Board
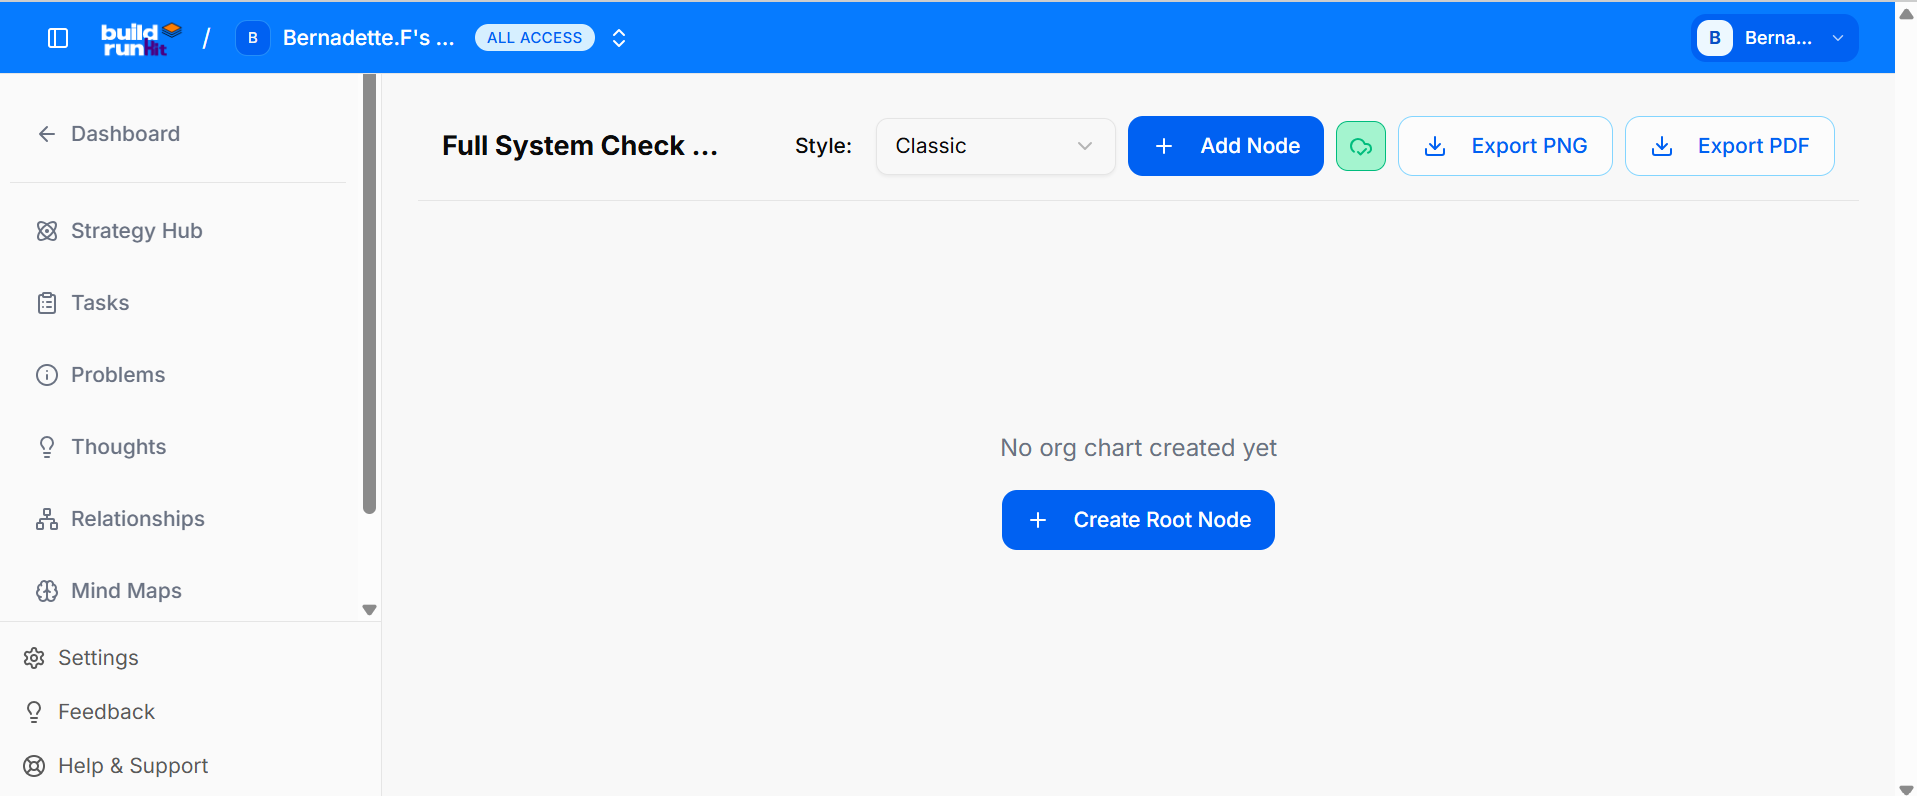
The Relationships Board provides a specialized workspace for building organizational charts and mapping hierarchical connections. This environment allows you to visualize complex structures using a dedicated set of tools.
The Relationship Toolkit (Top Toolbar)
At the top of the board, you have access to the following controls:
Style Selector: A dropdown menu (currently set to "Classic") to choose the visual style of your chart.
Add Node: A button to add new individual elements or "nodes" to your map.
Export Options: Two buttons to save your work for external use:
Export PNG: Download your chart as a high-quality image file.
Export PDF: Download your chart as a document for sharing or printing.
Initial Setup (Empty State)
If you are starting a new project, you will see the following:
No org chart created yet: A message indicating that the board is currently empty.
Create Root Node: A prominent button to place the first, central element of your chart. Once the root node is created, you can begin branching out to show relationships and hierarchies.
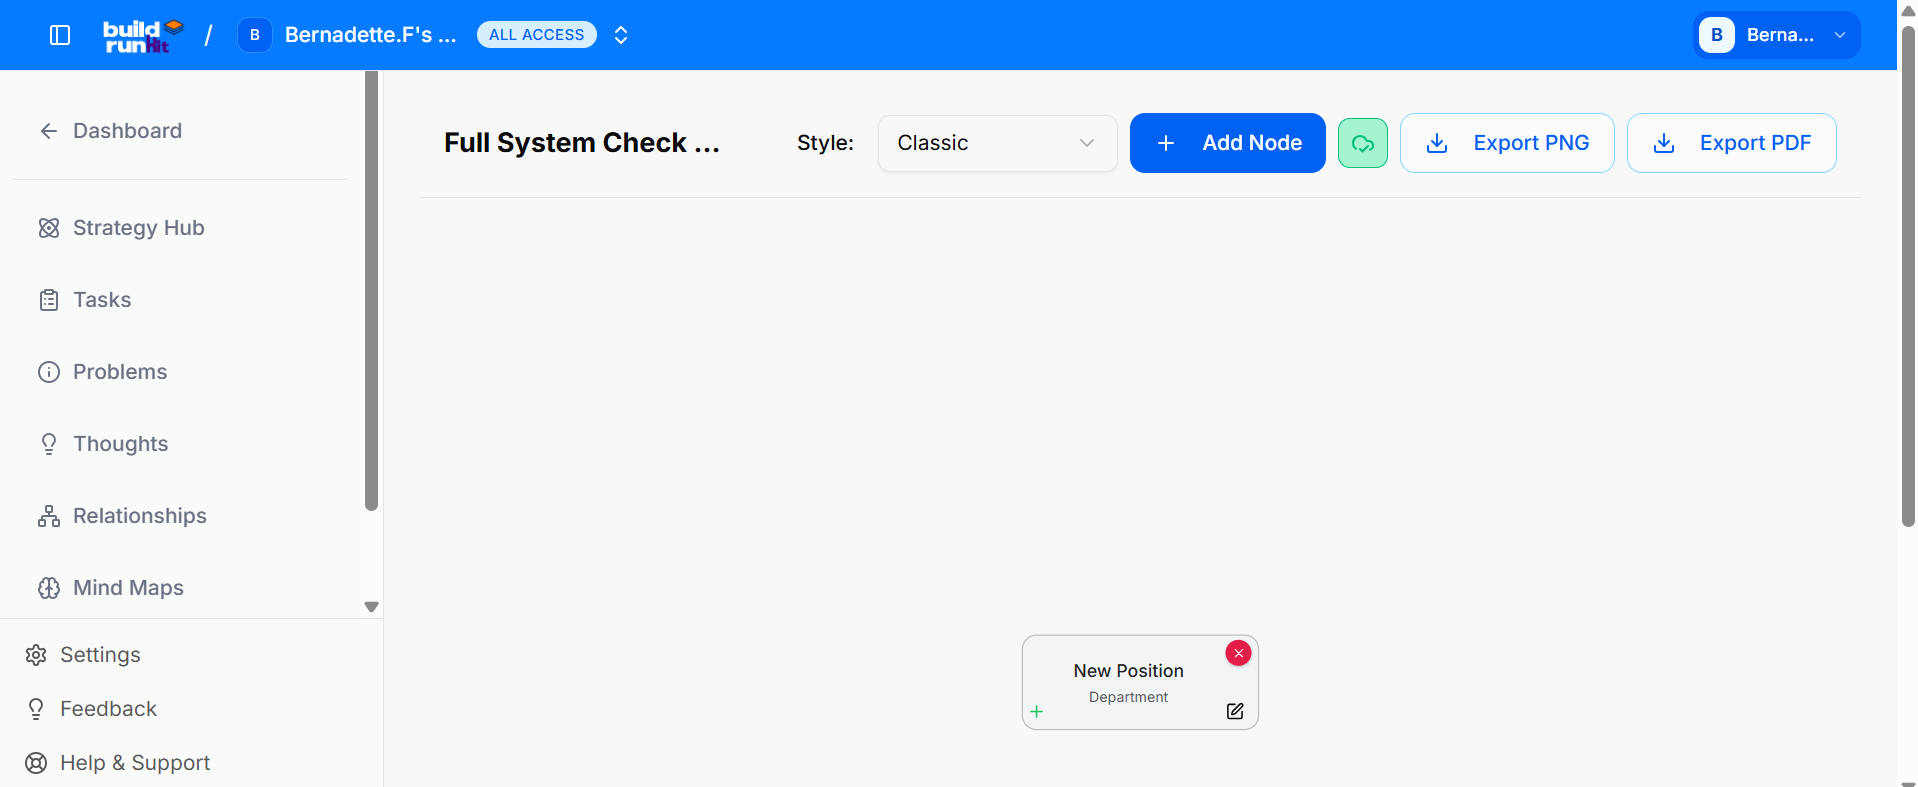
Managing Nodes and Hierarchies
Once a node (such as the Root Node) is created, you can define its details and build out the structure:
Node Details: Each node displays a Position and a Department, allowing for clear identification of roles within the organization.
Node Controls: Hovering over or selecting a node reveals three specific action icons:
Green Cross (+): Click this to Add a Child Node, creating a new level in the hierarchy directly below the current node.
Pencil Icon: Click this to Edit the Node, allowing you to update the position, department, or other details.
Red X: Click this to Delete the Node and remove it from the chart.
Managing Your Map Minds in Strategy Hub
Map Minds
The Map Minds module is a specialized workspace designed for capturing, organizing, and visualizing complex ideas and business strategies. By using Map Minds boards, you can brainstorm effectively and create mental models that show the "big picture" of your projects.
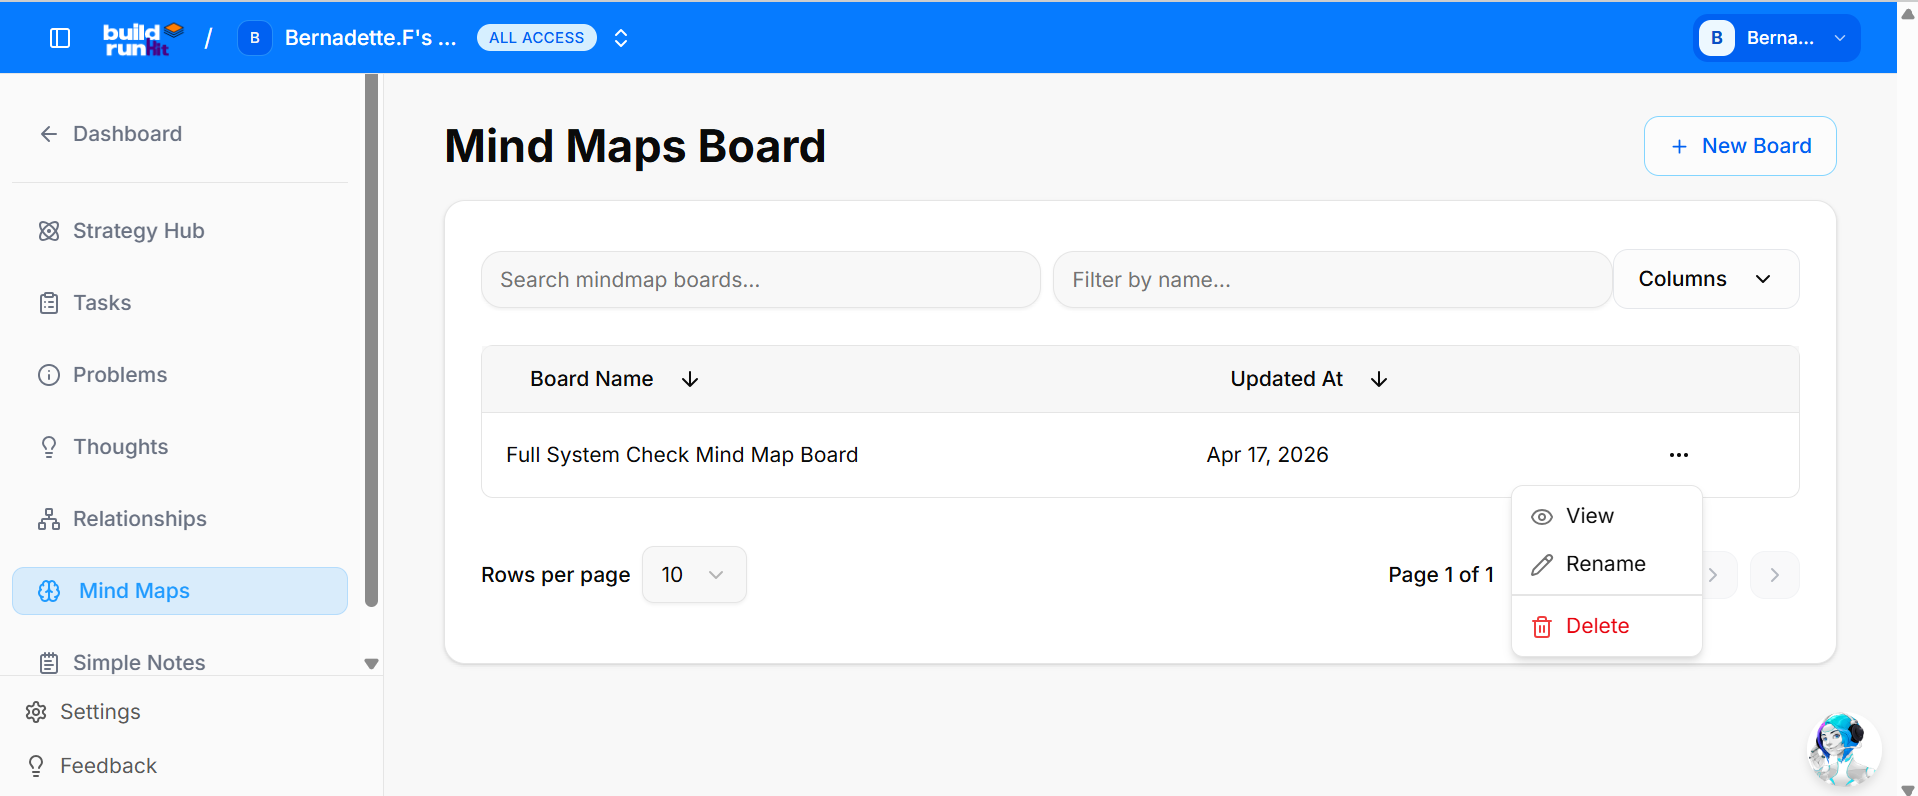
Managing Your Map Minds Boards
The main Map Minds page provides a streamlined overview of all your active brainstorming projects, allowing you to quickly identify and access specific mind maps.
Board: Each entry in the list provides key information at a glance:
Board Name: The title of your mind map project.
Updated At: The exact date and time the board was last modified.
Search & Filter: Use the "Search mind map boards..." and "Filter by name..." fields at the top to quickly locate a specific board.
Customizing Columns: The "Columns" dropdown menu allows you to choose which information is displayed in your board list.
Board Actions: Click the three-dot menu (...) on the right side of any board to access management options:
View: Open the board to access your detailed mind map.
Rename: Update the name of the board as your ideas evolve.
Delete: Permanently remove the board and all its contents.
Create New Board: To start a new brainstorming project, click the blue "+ New Board" button at the top right.
Using the Map Minds Board
The Map Minds Board provides a specialized workspace for capturing, organizing, and visualizing complex ideas and business strategies. This environment allows you to brainstorm effectively and build mental models using a dedicated set of tools.
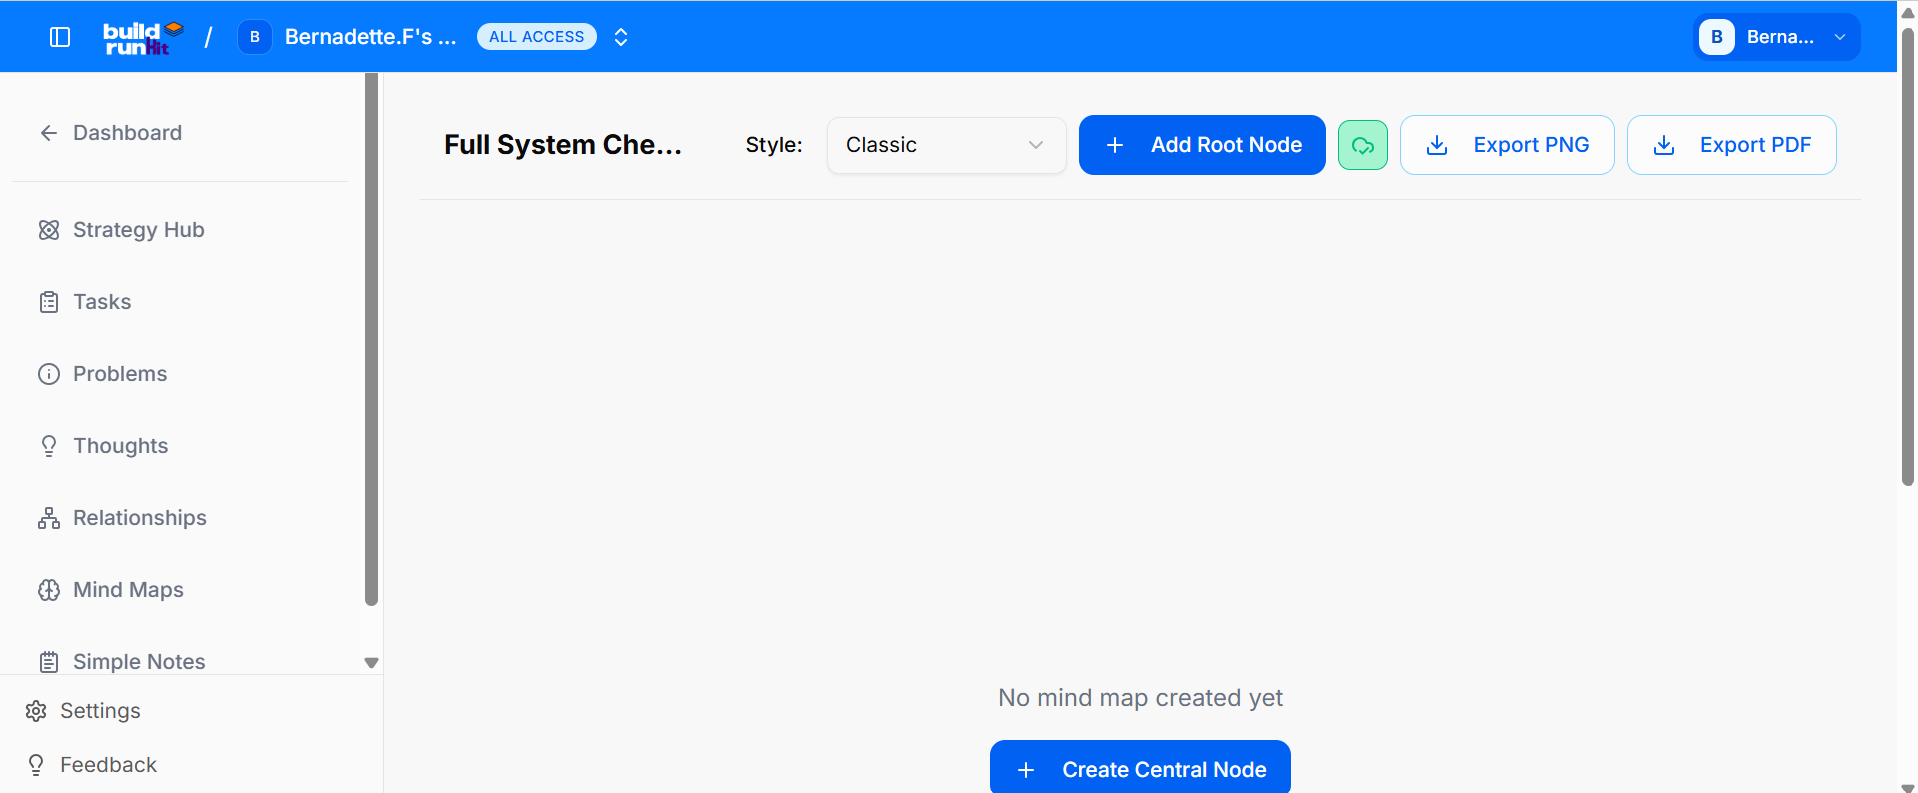
The Map Minds Toolkit (Top Toolbar)
At the top of the board, you have access to the following controls:
Add Node: A button to add new individual elements or "nodes" to your map.
Export Options: Two buttons to save your work for external use:
Export PNG: Download your current mind map as a high-quality image file.
Export PDF: Save your work as a document for easy sharing or printing.
Initial Setup (Empty State)
If you are starting a new project, you will see the following:
No mind map created yet: A message indicating that the board is currently empty.
Create Root Node: A prominent button to place the first, central element of your map. This serves as the starting point from which all other ideas will grow.
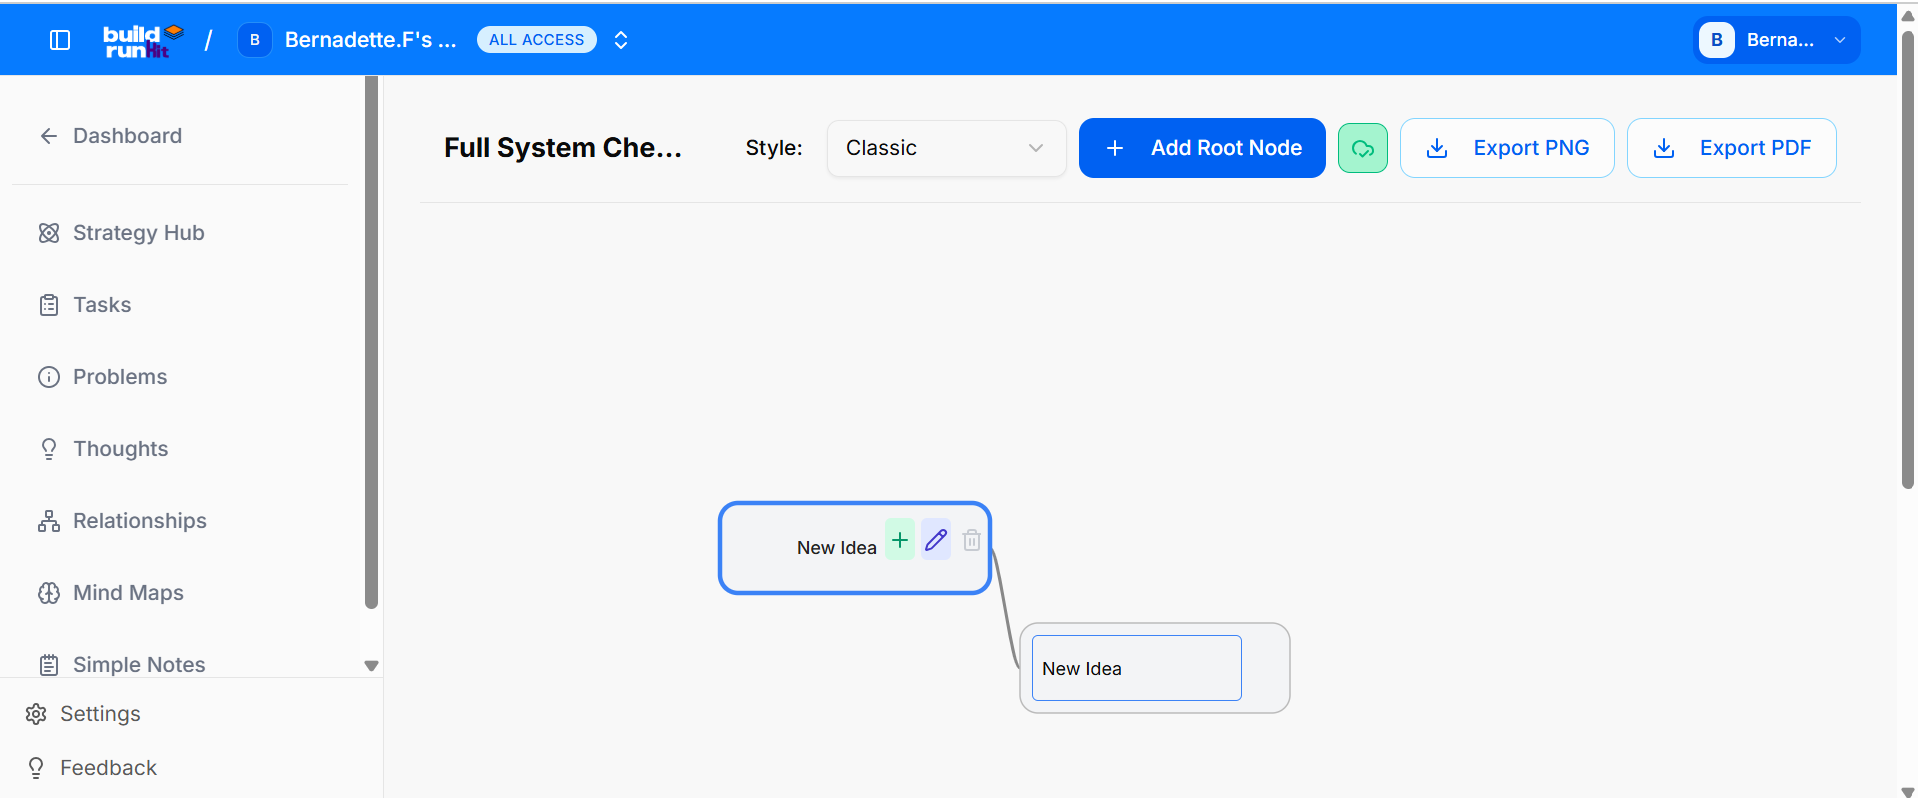
Managing Nodes and Ideas
Once a node (such as the Root Node) is created, you can define its details and build out the structure:
Node Details: Each node allows you to label your ideas, creating a clear visual map of your thoughts or business plans.
Node Controls: Hovering over or selecting a node reveals three specific action icons:
Green Cross (+): Click this to Add a Child Node, creating a sub-idea or secondary branch linked directly to the current node.
Pencil Icon: Click this to Edit the Node, allowing you to update the text and refine your ideas.
Red X: Click this to Delete the Node and remove that specific branch from the map.
Managing Simple Notes in Strategy Hub
The Simple Note module is a streamlined workspace designed for capturing quick ideas, drafting content, and keeping track of essential information. By using Simple Note boards, you can maintain a clean, organized repository of your thoughts and documentation.
Managing Your Simple Note Boards
The main Simple Note page provides a clear overview of all your existing notes, allowing you to organize and access your information efficiently.
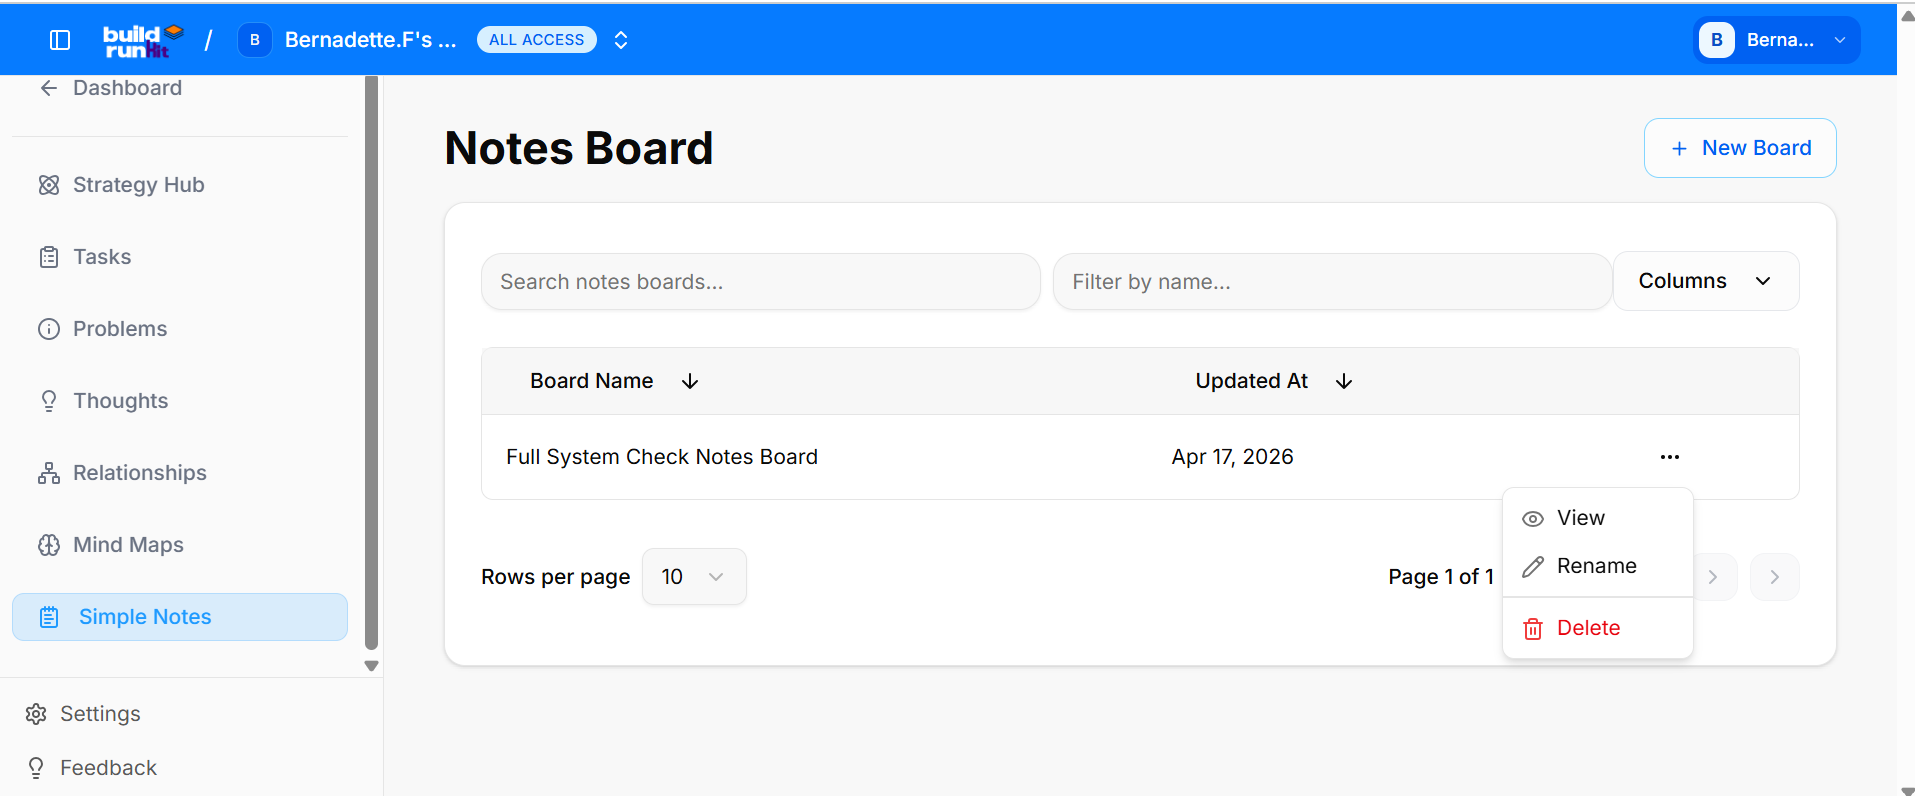
Board: Each entry in the list displays key details for quick identification:
Board Name: The title of your note or project.
Updated At: The specific date and time the note was last modified.
Search & Filter: Use the "Search simple note boards..." and "Filter by name..." bars at the top to instantly find a specific note.
Customizing Columns: The "Columns" dropdown menu allows you to select which data fields are visible in your list view.
Board Actions: Click the three-dot menu (...) on the right side of any note entry to access management tools:
View: Open the note to read or continue editing your content.
Rename: Change the title of the note to better reflect its contents.
Delete: Permanently remove the note from your workspace.
Create New Board: To start a new draft or note, click the blue "+ New Board" button at the top right.
Using the Simple Note Board
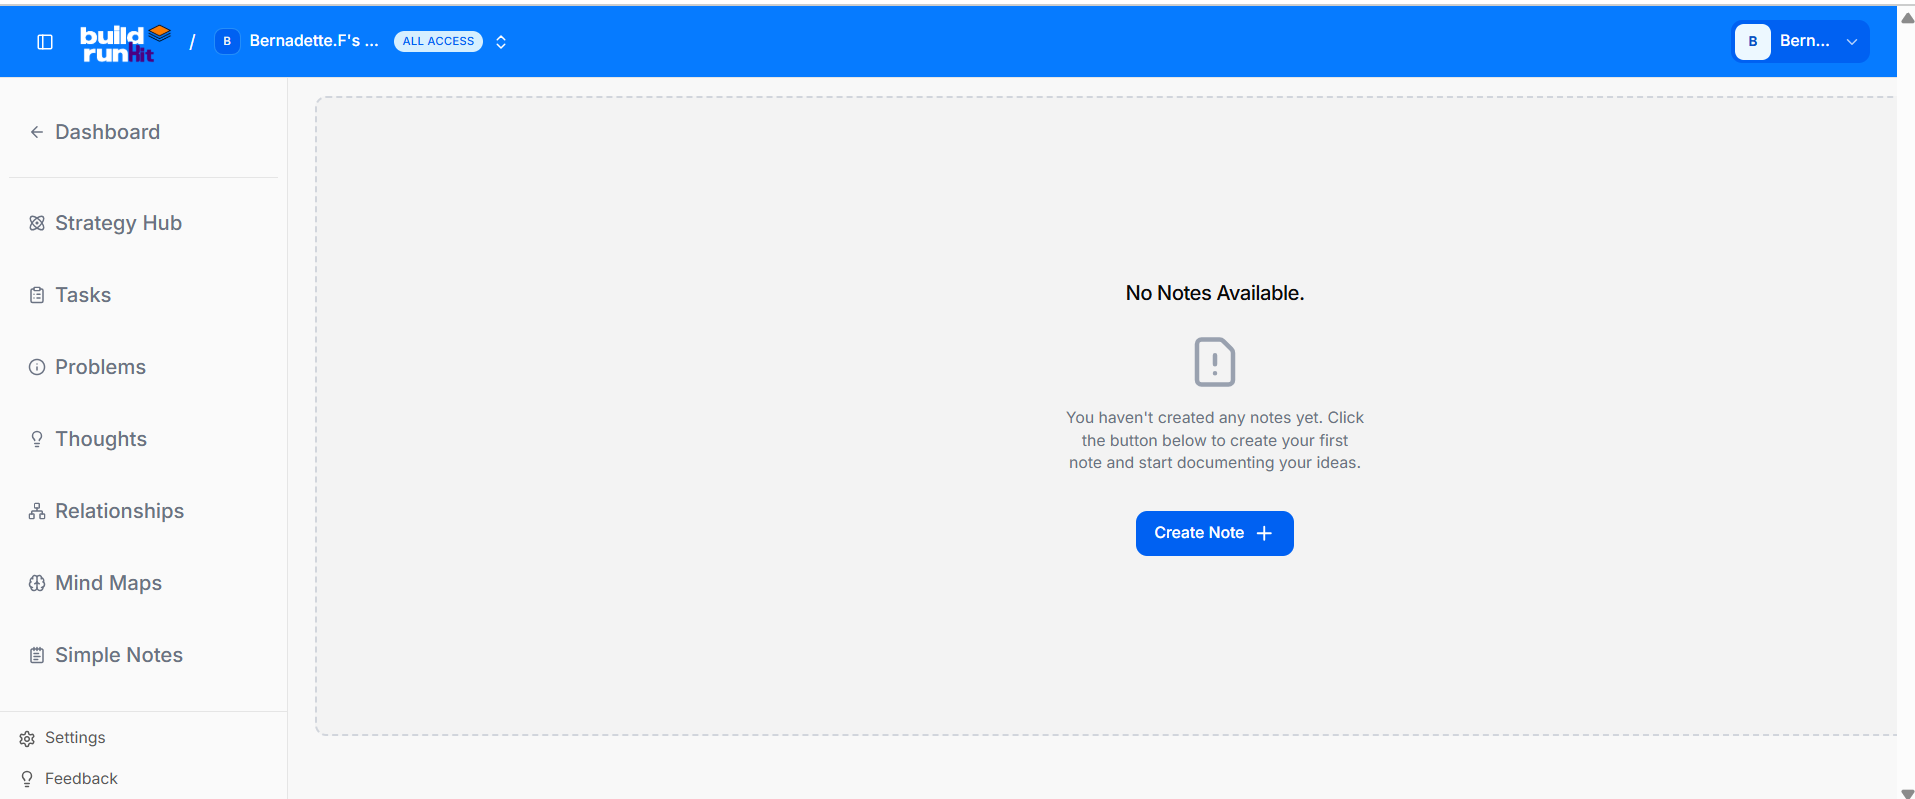
The Simple Note Board provides a distraction-free environment for drafting long-form content, taking meeting notes, or organizing business documentation. This workspace allows you to focus on your writing with a clean interface and essential export tools.
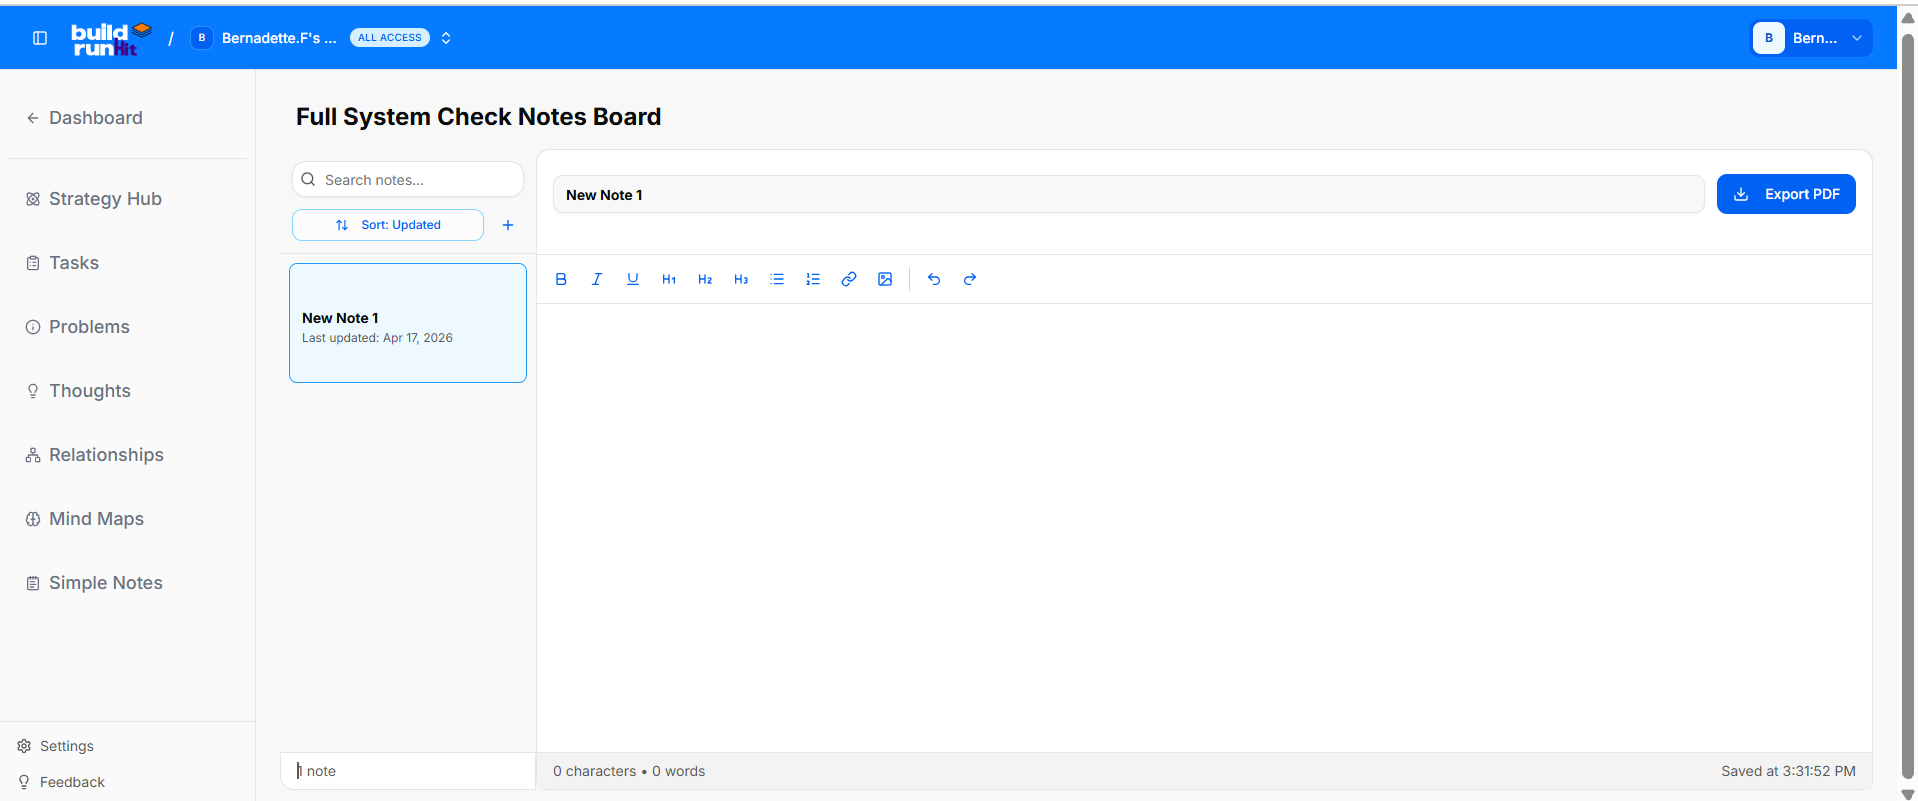
The Simple Note Toolkit (Top Toolbar)
At the top of the board, you have access to the following controls:
Export Options: Save your notes for external use or sharing:
Export PNG: Download your note as an image file.
Export PDF: Download your note as a professional document.
Working with Your Note
The editor is designed for ease of use, allowing you to capture information quickly:
Note Title: At the top of the editor, you can set a clear title for your note to keep your workspace organized.
Main Text Area: A spacious field for typing your content. Whether it’s a quick list or a detailed project overview, the editor scales to fit your needs.
Saving and Management
Automatic Updates: As you work, your progress is tracked. You can see the last time the note was modified in the main Simple Note list under the Updated At column.
Return to List: Once you have finished drafting, you can navigate back to the main dashboard to manage other notes or start a new project using the + New Board button.