User Profile & Settings
User Profile & Settings

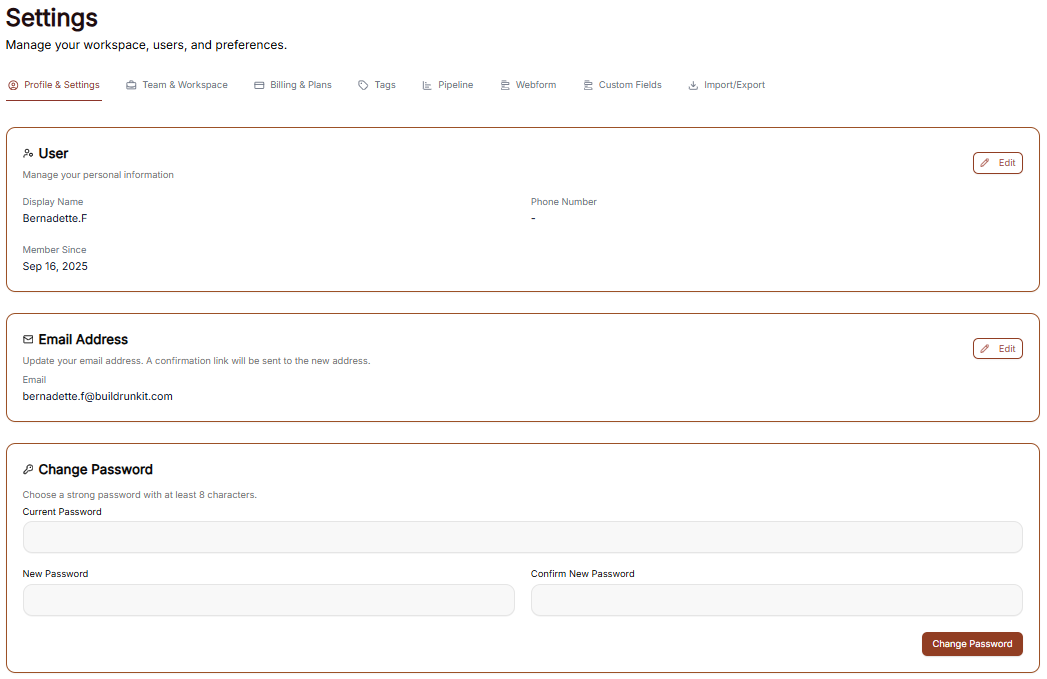
The Settings area allows you to manage your personal information, account security, and how the interface appears to you.
Managing Personal Information
Under the User Settings tab, you can view and update your primary account details:
-
Profile Details: This section allows you to manage your identity. You can enter and update your First Name, Last Name, Email, and Phone number in the provided text fields.
-
Bio: Use the larger text area to add a brief professional summary or description to your profile.
-
Save Changes: Click the brown Save Changes button at the bottom right to finalize any updates to your personal information.
Account Security
You can manage your account access and protection through the Security menu:
-
Password Management: Update your login credentials to keep your account secure.
-
Notifications: Configure how and when you receive system alerts and updates.
Interface Preferences
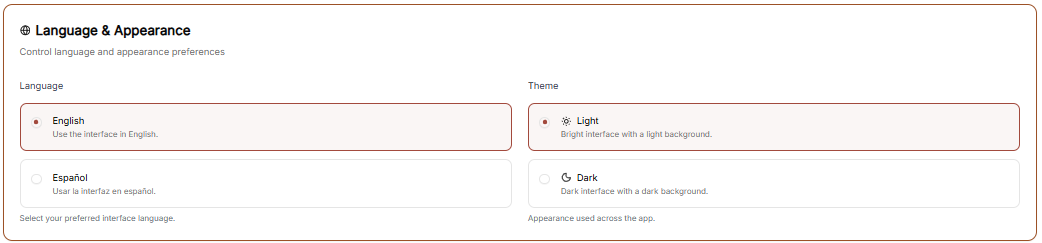
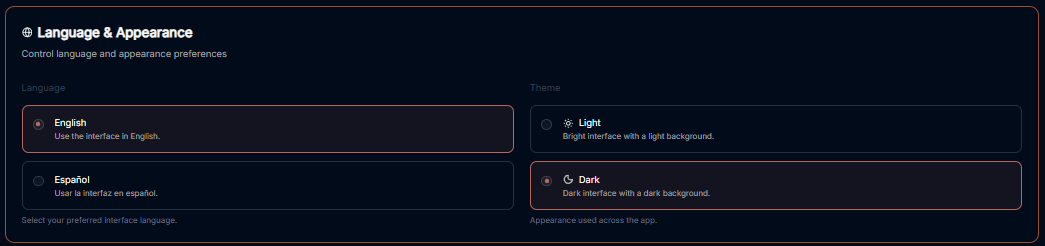
You can customize the look of your workspace through the Appearance menu to match your working environment.
Theme Selection Adjust the visual style of the application:
-
Light: A bright interface with a light-colored background.
-
Dark: A high-contrast interface with a dark background, ideal for low-light environments.
-
System: Automatically syncs the interface theme with your device's operating system settings.
-
Update Theme: Click the brown Update Theme button to apply your chosen visual style.
Workspace Management
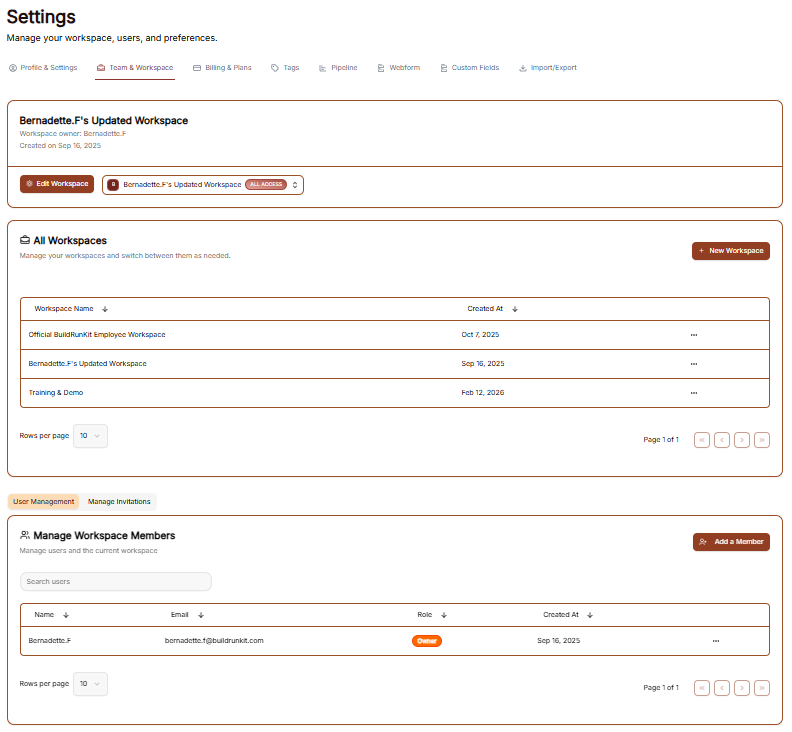
The Workspace settings allow you to control the environments you belong to, manage your team, and update workspace identities.
All Workspaces
This tab provides an overview of every workspace your account is currently associated with.
-
Status & Plans: You can see the name of each workspace and its current subscription plan (e.g., "Custom" or "Enterprise").
-
Leaving a Workspace: By clicking the three dots (actions menu) next to a workspace, you can select Exit to remove yourself from that environment.
Edit Workspace
This is where you manage the primary identity of your current business environment.
-
Changing the Name: Use the Edit Workspace section to update the display name of the workspace.
-
Save Changes: Ensure you click the brown Save Changes button after renaming to apply the update across the suite.
Manage Workspace Members
Control who has access to your workspace in this section.
-
Member List: View all users, their email addresses, and their assigned roles (e.g., Owner).
-
Invite Members: Click the + Invite member button at the top right to add a new person to the team via email.
-
Removing Users: To revoke access, click the three dots (actions menu) next to a member's name and select Remove user.
Subscription & Billing
The Subscription area is your hub for managing plan access, tracking workspace limits, and handling payments.
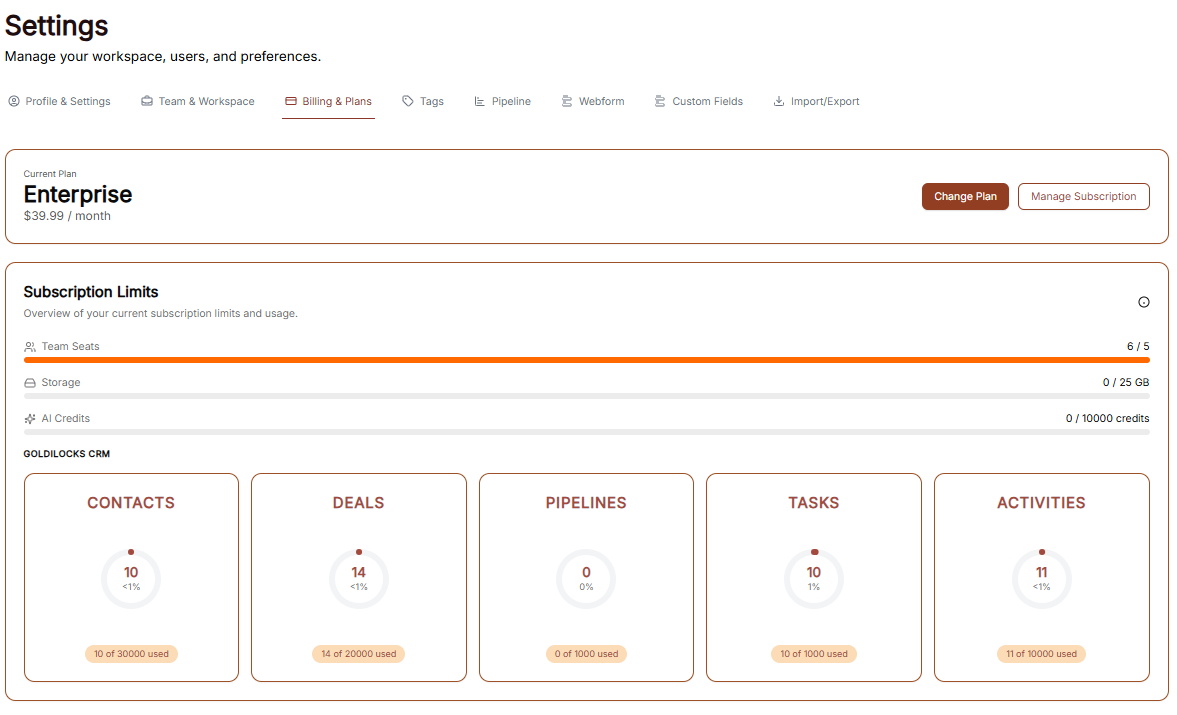
Subscription Overview
This tab provides a high-level view of your current standing:
-
Active Plan: Displays the name of your current plan (e.g., "Custom").
-
Cost Details: Shows the recurring price and billing frequency (e.g., "$0.00 / Monthly").
-
Usage Trackers: Three progress bars track your real-time usage for Invoices, Customers, and Items against your plan’s total capacity.
-
Management Buttons: * Change Plan: Opens the tier selection menu.
-
Cancel Subscription: Initiates the process to stop recurring payments.
-
Changing Your Plan
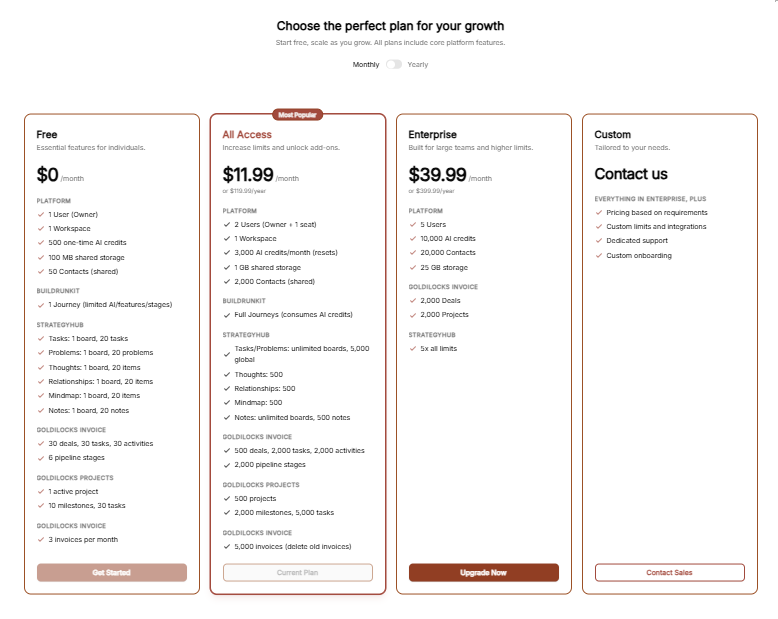
Clicking Change Plan reveals the available subscription tiers:
-
Billing Toggle: A switch at the top to toggle between Monthly and Yearly pricing.
-
Plan Tiers: Choose between Free, Plus, and Pro.
-
Tier Limits: Each column details the specific limits for Invoices, Customers, Items, and Workspace Members.
-
Action: Click the brown Choose Plan button under your desired tier to proceed.
Add-ons
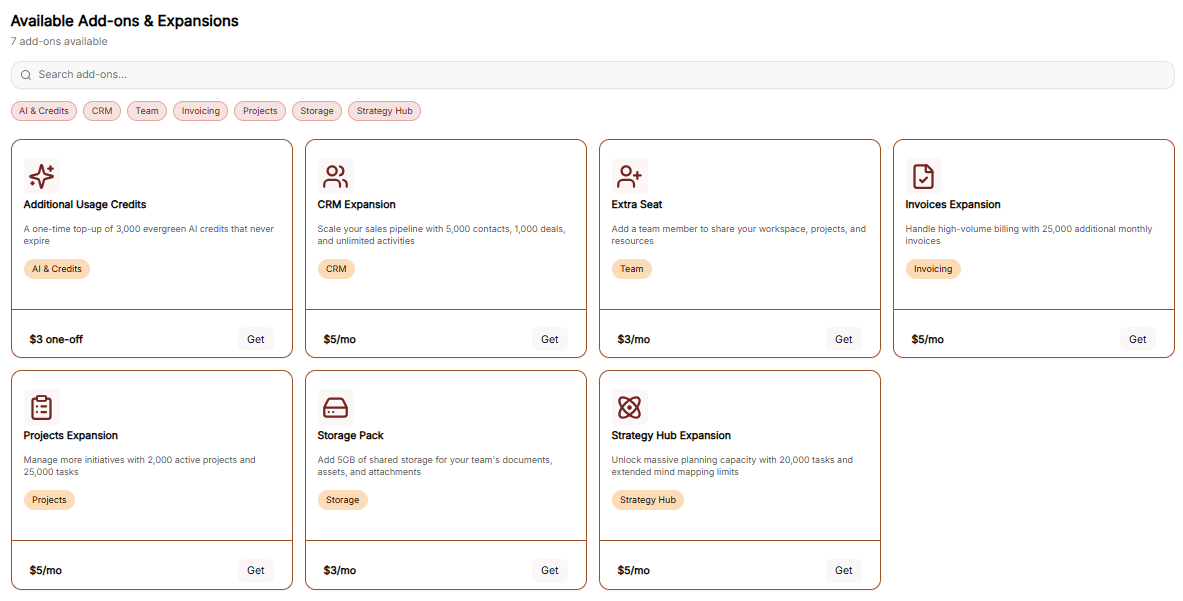
The Add-ons tab allows for modular upgrades without changing your full plan:
-
Available Features: You can purchase extra Invoices, Customers, Items, or Workspace Members.
-
Pricing: Each add-on lists its specific monthly cost.
-
Action: Click the brown Buy button next to the relevant feature to initiate the purchase.
Checkout Process
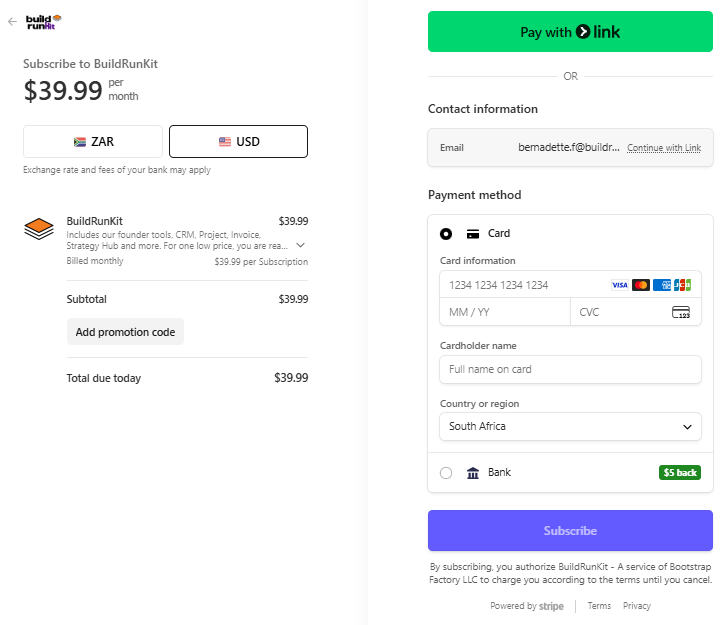
The Checkout page is the final step for any plan change or add-on purchase:
-
Back to subscription: A link at the top left to return without purchasing.
-
Payment Method: Confirms the card on file that will be charged for the transaction.
-
Order Summary: Displays the Subtotal, Tax, and the final Total Amount Due.
-
Action: Click the brown Pay & Subscribe button to finalize the order and update your workspace limits.
Tags Settings
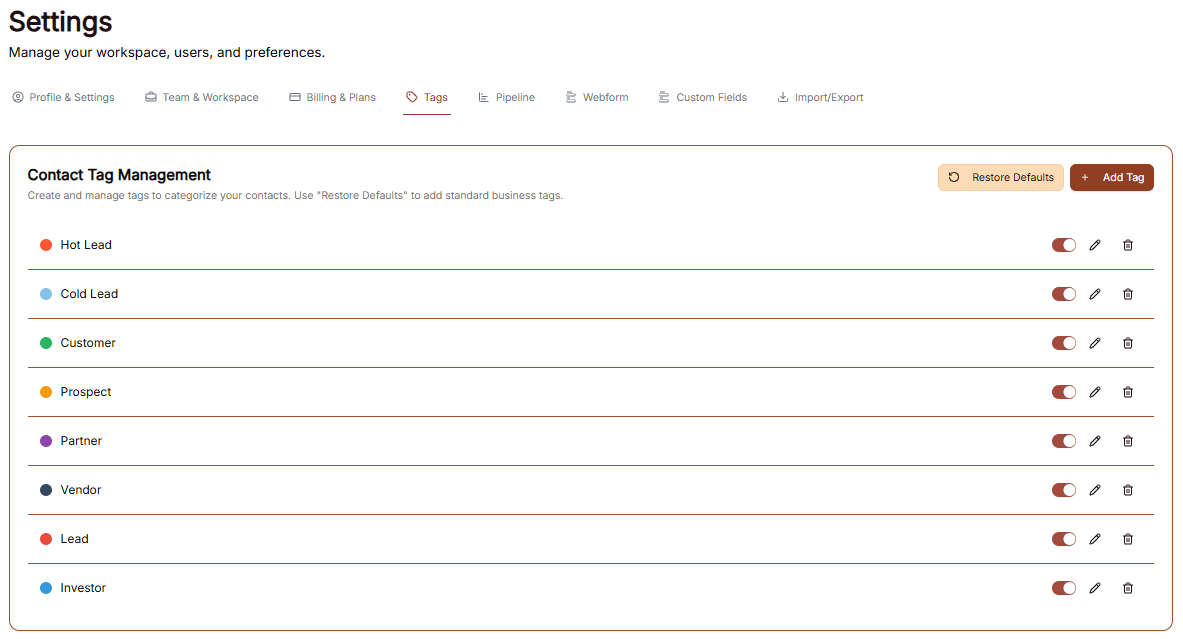
The Settings area includes a dedicated section for managing your contact categorization through the Tags menu. This allows you to label and organize your contacts based on their relationship to your business.
Contact Tag Management
Customizing Your Tags
You can further tailor your labeling system using the management buttons at the top right of the list:
-
Add Tag: Click the brown + Add Tag button to create a brand-new category specific to your workflow.
-
Restore Defaults: Use this button to automatically add a standard set of business tags to your workspace if you need a quick starting point.
Pipeline Settings
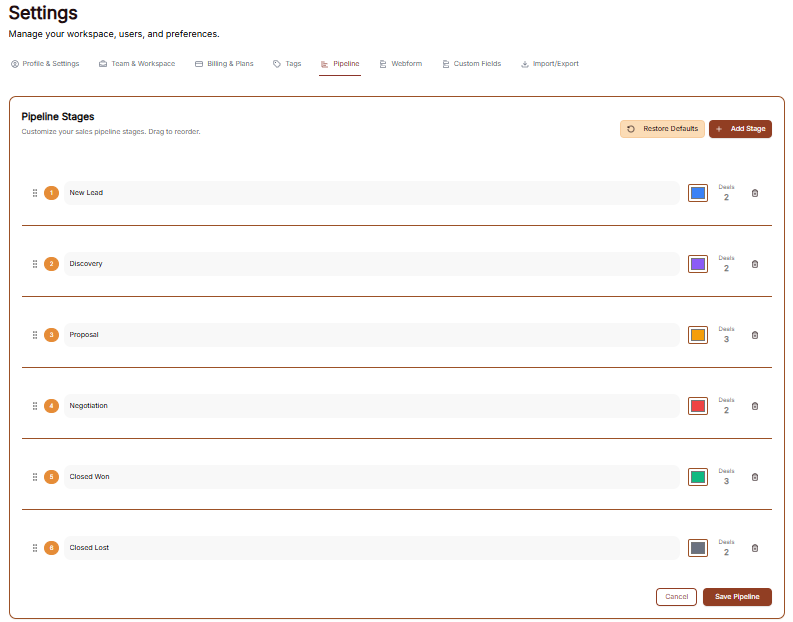
The Pipeline section in Settings allows you to customize the stages of your sales process to match your specific workflow.
Managing Pipeline Stages
In the Pipeline Stages tab, you can define the progression of your deals from initial contact to completion:
-
Current Stages: View your active pipeline stages, such as New Lead, Discovery, Proposal, Negotiation, Closed Won, and Closed Lost.
-
Reorder Stages: Use the drag-and-drop handle (six dots) on the left of each stage to change the order of your sales process.
-
Stage Colors: Each stage is associated with a specific color for easy visual identification in the main Pipeline view.
-
Deal Count: Monitor how many active deals are currently assigned to each specific stage.
-
Delete Stage: Click the trash can icon to remove a stage that is no longer needed in your process.
Customizing Your Workflow
You can modify the structure of your sales pipeline using the primary management tools:
-
Add Stage: Click the brown + Add Stage button at the top right to create a new step in your sales cycle.
-
Restore Defaults: Use this button to reset your pipeline to a standard set of business stages.
-
Save Pipeline: Once you have finished making adjustments, click the brown Save Pipeline button at the bottom right to apply your changes.
Webform
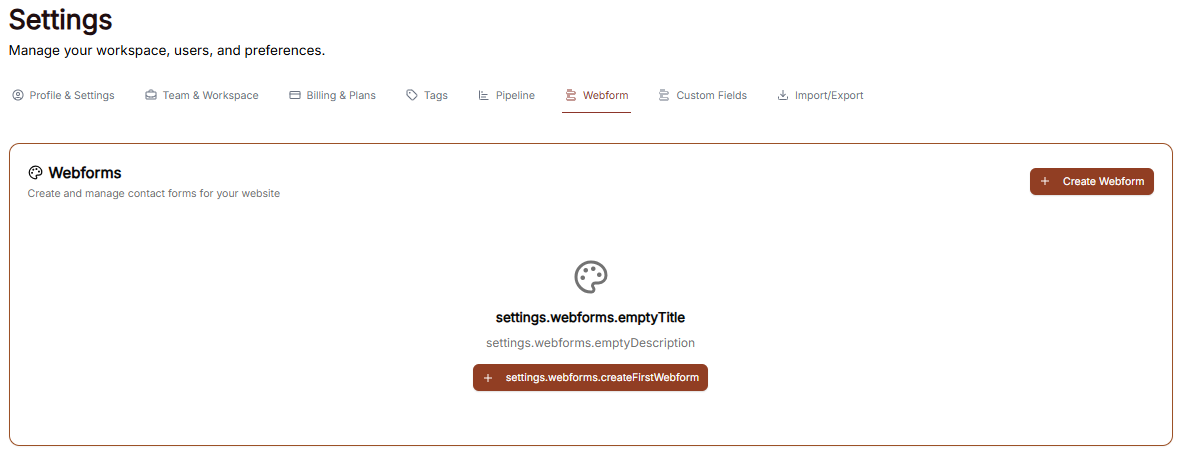
The Webform section in Settings allows you to create and manage custom contact forms to embed on your website, streamlining how you capture new leads.
Managing Webforms
In the main Webforms tab, you can oversee your collection of active forms:
-
Create Webform: Click the brown + Create Webform button to start building a new form.
-
Form List: View all existing forms and their current status within your workspace.
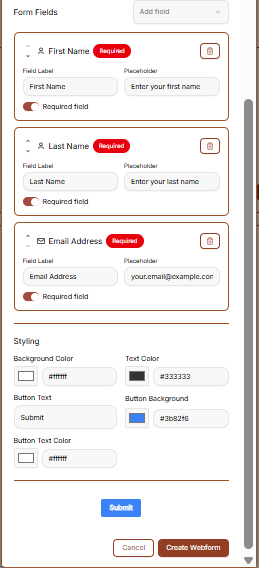
Creating a New Webform
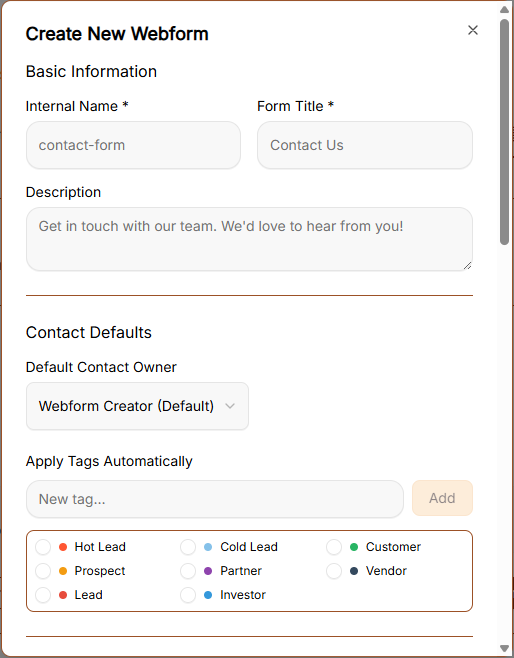
When building a form, you can customize the information gathered, automate contact settings, and define the visual style to match your brand:
Basic Information
-
Internal Name: Input a unique identifier for internal tracking (e.g., "contact-form").
-
Form Title: Define the public-facing title displayed at the top of your form (e.g., "Contact Us").
-
Description: Provide a brief public message or instructions for your visitors (e.g., "Get in touch with our team. We'd love to hear from you!").
Contact Defaults & Automation
-
Default Contact Owner (Auto-Assignment): Use the dropdown menu to assign a default team member responsible for new leads generated through this form.
-
System Behavior: New submissions are routed automatically to this person. If an existing contact submits the form, their current owner remains unchanged to prevent workflow disruptions.
-
-
Apply Tags Automatically (Auto-Tagging): Select tags to apply automatically to contacts upon submission. Options include Hot Lead, Cold Lead, Customer, Prospect, Partner, Vendor, Lead, Investor, and VIP.
-
System Behavior: If the contact already exists in your database, these new tags are appended without deleting any of their existing tags.
-
Form Fields
-
Field Addition: Use the Add field dropdown menu at the top right of the section to introduce new data points.
-
Standard Fields: Arrange and configure core contact fields, including First Name, Last Name, and Email Address.
-
Field Labels & Placeholders: Customize the visible label text and the temporary placeholder hint inside the box (e.g., "your.email@example.com").
-
Requirements: Toggle the Required field switch to determine if a field must be completed before submission. Mandatory fields display a red Required badge.
-
Removal: Click the trash can icon on any field block to delete it from the form layout.
Styling & Submission Details
-
Background Color: Define the primary block color using hex codes (e.g., #ffffff).
-
Text Color: Set the visual hex code for standard form labeling (e.g., #333333).
-
Button Text: Customize the text displayed inside the submission button (e.g., "Submit").
-
Button Background: Select a hex code to brand the main button element (e.g., #3b82f6).
-
Button Text Color: Specify the hex value for the text inside the submission button (e.g., #ffffff) to ensure proper visual contrast.
-
Live Preview: Review the interactive button component at the bottom of the panel to verify color combinations before deploying.
Finalizing Your Form
-
-
Cancel: Click Cancel to discard changes and close the form builder.
-
Create Webform: Click the brown Create Webform button to save your settings and activate the form.
-
Custom Fields
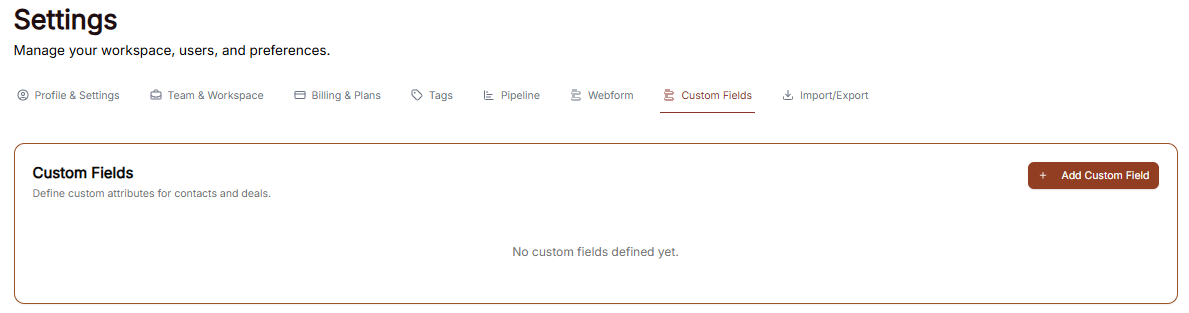
The Custom Fields section in Settings allows you to define unique attributes for your records, ensuring you can capture specific data points that are important to your business but not included in the standard fields.
Managing Custom Fields
In the main Custom Fields tab, you can oversee all specialized data points you have created for your workspace:
-
Add Custom Field: Click the brown + Add Custom Field button at the top right to define a new attribute.
-
Field Overview: This area displays a list of all current custom fields. If none have been created yet, the screen will show a "No custom fields defined yet" message.
Adding a Custom Field
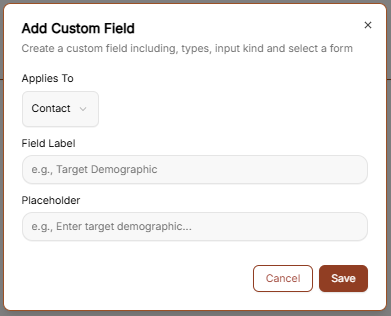
When you create a new field, you can specify exactly how it functions and where it appears:
-
Applies To: Use the dropdown menu to select whether the new field should be attached to a Contact or a Deal.
-
Field Label: Enter the name of the field as you want it to appear in the interface (e.g., "Target Demographic").
-
Placeholder: Customize the hint text that appears inside the input box to guide data entry (e.g., "e.g., Enter target demographic...").
-
Save: Click the brown Save button to finalize the field and add it to your records.
Import & Export
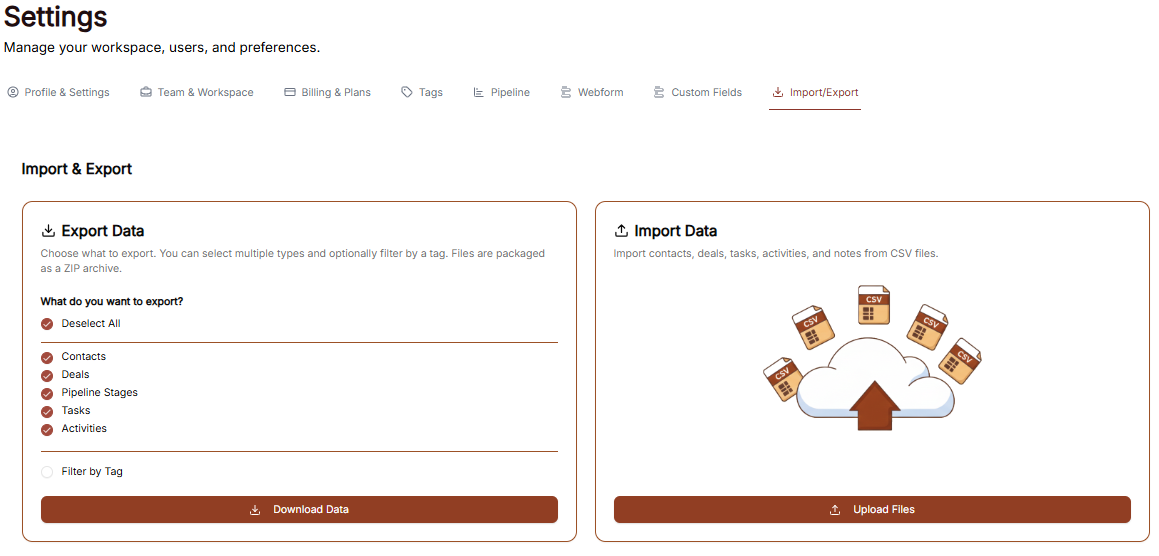
The Import/Export section allows you to migrate data into your workspace or download your current records for external use.
Data Import Process

To ensure your data is formatted correctly before uploading, you can use the built-in templates provided by the CRM:
-
Step 1: Download Templates: Before you begin your upload, use the Download Template links for Contacts, Deals, or Tasks. These files contain the correct column headers to make mapping seamless.
-
Step 2: Upload File: Once your template is filled out, select the appropriate category and upload your file.
-
Step 3: Map Fields: Align your spreadsheet columns with the CRM fields.
-
Step 4: Preview & Finish: Review your data sample, then complete the import to add the records to your workspace.
Importing Tasks
When you reach the Tasks portion of the tool, you have two final choices:
-
Upload Tasks: If you have task data ready in the template, click this button to process it.
-
Finish and go to Dashboard: Click this to exit the setup and return to your main dashboard.
Data Export
The export tool allows you to create portable backups of your information:
-
Select Records: Choose to export your Contacts, Deals, or Tasks.
-
Export Action: Click the brown Export Data button.
-
File Format: Your records will automatically download as a ZIP file. You must extract this folder on your computer to access the individual spreadsheet files inside.