# Strategy Hub

# The Strategy Hub Dashboard

## The Strategy Hub Dashboard  
 

<div drawio-diagram="318"><img src="https://library.buildrunkit.com/uploads/images/drawio/2026-05/drawing-4-1779191062.png" alt=""/></div>


[![Screenshot 2026-05-19 133542.png](https://library.buildrunkit.com/uploads/images/gallery/2026-05/scaled-1680-/screenshot-2026-05-19-133542.png)](https://library.buildrunkit.com/uploads/images/gallery/2026-05/screenshot-2026-05-19-133542.png)

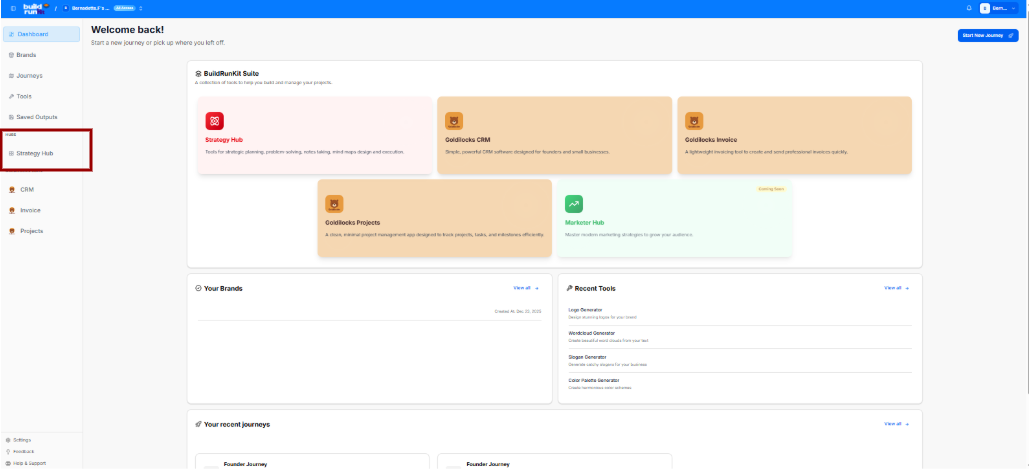
The Strategy Hub dashboard serves as your centralized workspace for managing tasks, problems, ideas, and notes. It provides a high-level view of your active boards and tracks real-time progress across key workflow segments.

<div _ngcontent-ng-c2372931610="" class="container" id="bkmrk--5"><div _ngcontent-ng-c2383366420="" aria-busy="false" aria-live="polite" class="markdown markdown-main-panel enable-updated-hr-color" dir="ltr" inline-copy-host="">---

</div></div>### Overview Cards

The top metric cards show the total number of active tracking boards within each core strategic category:

<div _ngcontent-ng-c2372931610="" class="container" id="bkmrk-tasks%3A-displays-the-"><div _ngcontent-ng-c2383366420="" aria-busy="false" aria-live="polite" class="markdown markdown-main-panel enable-updated-hr-color" dir="ltr" inline-copy-host="">- Tasks: Displays the total number of task boards active in your workspace (e.g., 4 boards).
- Problems: Tracks active issue or bug logging boards (e.g., 1 boards).
- Thoughts: Aggregates brainstorms, ideas, and strategic thoughts (e.g., 1 boards).
- Relationships: Manages network, partner, or team connection boards (e.g., 1 boards).
- Mindmaps: Provides quick access to visual brainstorming or mind mapping workspaces (e.g., 1 boards).
- Notes: Collects knowledge base and documentation folders (e.g., 1 boards).

---

</div></div>### Dashboard Trackers &amp; Widgets

The lower half of the dashboard features dedicated summary panels to track your items and jump directly into deep-dive views:

**Tasks Panel**

This section helps you track your tasks and deadlines.

<div _ngcontent-ng-c2372931610="" class="container" id="bkmrk-progress-bar%3A-displa"><div _ngcontent-ng-c2383366420="" aria-busy="false" aria-live="polite" class="markdown markdown-main-panel enable-updated-hr-color" dir="ltr" inline-copy-host="">- Progress Bar: Displays a total visual percentage completion rate of your combined task workload.
- In Progress: Counts active tasks currently being worked on.
- Upcoming: Lists scheduled or future action items.
- Overdue: High-priority alert counting tasks that have passed their set deadlines.
- View all: Click the blue View all <span class="math-inline" data-index-in-node="34" data-math="\rightarrow"><span class="katex"><span aria-hidden="true" class="katex-html"><span class="base"><span class="mrel">→</span></span></span></span></span> link to manage your complete task records.

</div></div>Problems Panel

A dedicated tracking area to monitor workspace bugs and issues.

<div _ngcontent-ng-c2372931610="" class="container" id="bkmrk-log-a-problem%3A-if-no"><div _ngcontent-ng-c2383366420="" aria-busy="false" aria-live="polite" class="markdown markdown-main-panel enable-updated-hr-color" dir="ltr" inline-copy-host="">- Log a Problem: If no items are listed, click the blue Log a Problem button to record a new bug or block.
- View all: Click the blue View all <span class="math-inline" data-index-in-node="34" data-math="\rightarrow"><span class="katex"><span aria-hidden="true" class="katex-html"><span class="base"><span class="mrel">→</span></span></span></span></span> link to navigate directly to the dedicated Problems module.

</div></div>**Notes Panel**

Acts as your personal knowledge base framework directly on the main dashboard layout.

<div _ngcontent-ng-c2372931610="" class="container" id="bkmrk-quick-access-blocks%3A"><div _ngcontent-ng-c2383366420="" aria-busy="false" aria-live="polite" class="markdown markdown-main-panel enable-updated-hr-color" dir="ltr" inline-copy-host="">- Quick Access Blocks: Lists your recent documents, displaying individual row titles and their last updated relative timestamp (e.g., *Updated 4 weeks ago*).
- View all: Click the blue View all <span class="math-inline" data-index-in-node="34" data-math="\rightarrow"><span class="katex"><span aria-hidden="true" class="katex-html"><span class="base"><span class="mrel">→</span></span></span></span></span> link to open up the complete knowledge module.

---

</div></div>### Left Navigation Sidebar

Quickly navigate between specific strategic tools via the left-side index:

<div _ngcontent-ng-c2372931610="" class="container" id="bkmrk-dashboard%3A-jumps-bac"><div _ngcontent-ng-c2383366420="" aria-busy="false" aria-live="polite" class="markdown markdown-main-panel enable-updated-hr-color" dir="ltr" id="bkmrk-dashboard%3A-jumps-bac-1" inline-copy-host="">- Dashboard: Jumps back to your global dashboard hub.
- Strategy Hub: Refreshes or returns you to this primary workspace layout.
- Tasks: Direct link to your expanded task listings.
- Problems: Opens your complete workspace issue tracker.
- Thoughts: Accesses your logged ideas and concepts.
- Relationships: Opens your contact network maps.
- Mind Maps: Launches your visual planning boards.
- Simple Notes: Links to your full documentation knowledge base.

</div></div>

# Strategy Hub: Tasks Module

## **Strategy Hub: Tasks Module**

**[![Screenshot 2026-05-19 134615.png](https://library.buildrunkit.com/uploads/images/gallery/2026-05/scaled-1680-/screenshot-2026-05-19-134615.png)](https://library.buildrunkit.com/uploads/images/gallery/2026-05/screenshot-2026-05-19-134615.png)**

The Tasks module within the Strategy Hub enables you to organize, track, and manage your operational action items using flexible Kanban boards or structured table lists.

<div _ngcontent-ng-c2372931610="" class="container" id="bkmrk--1"><div _ngcontent-ng-c2383366420="" aria-busy="false" aria-live="polite" class="markdown markdown-main-panel enable-updated-hr-color" dir="ltr" inline-copy-host="">---

</div></div>### Managing Tasks Boards

When you enter the Tasks module, you are presented with a global directory of your active planning environments:

<div _ngcontent-ng-c2372931610="" class="container" id="bkmrk-creating-a-board%3A-cl"><div _ngcontent-ng-c2383366420="" aria-busy="false" aria-live="polite" class="markdown markdown-main-panel enable-updated-hr-color" dir="ltr" inline-copy-host="">- Creating a Board: Click the blue + New Board button at the top right to start a fresh project environment.
- Board Directory View: Track active spaces like your Core Functionality Check Board or Full System Check Task Board, along with their last relative modification date under the Updated At column.
- Filtering &amp; Columns: Use the top text bars to search specific project names. Use the Columns dropdown tool to show or hide parameters like *Name*, *Updated\_at*, or *Actions*.
- Board Context Menu: Clicking the three dots icon (`...`) on the right side of any individual board row opens control configurations to View, Rename, or Delete that board.

---

</div></div>### Working Inside a Task Board

[![Screenshot 2026-05-19 134753.png](https://library.buildrunkit.com/uploads/images/gallery/2026-05/scaled-1680-/screenshot-2026-05-19-134753.png)](https://library.buildrunkit.com/uploads/images/gallery/2026-05/screenshot-2026-05-19-134753.png)

Opening an individual board reveals your workflow columns (lists) where standalone action cards reside:

<div _ngcontent-ng-c2372931610="" class="container" id="bkmrk-lists-management%3A-or"><div _ngcontent-ng-c2383366420="" aria-busy="false" aria-live="polite" class="markdown markdown-main-panel enable-updated-hr-color" dir="ltr" inline-copy-host="">- Lists Management: Organize progression stages by clicking the + Add List container. Clicking the three dots (`...`) next to a column header like "First List" allows you to select Rename, Bulk Options, or Delete List.
- Board Layout Controls: Switch between dynamic visual cards using Kanban view or structural line rows using Table view.
- Data Retrieval: Use the Export button to extract your active list details, or utilize the right-hand Filters side-panel to slice view parameters by Priority (*Low, Medium, High*), Due Date (*Overdue, Due Today, Next 7/30 Days*), or completion Status.

---

</div></div>### Quick Board Switching

[![Screenshot 2026-05-19 152605.png](https://library.buildrunkit.com/uploads/images/gallery/2026-05/scaled-1680-/screenshot-2026-05-19-152605.png)](https://library.buildrunkit.com/uploads/images/gallery/2026-05/screenshot-2026-05-19-152605.png)

- Arrow Navigation: When working inside an individual board view, you can seamlessly navigate between your different workspace environments without returning to the main registry list.
- How to Use: Click the up and down arrow buttons located directly to the right of the board's name at the top-left of your workspace header. This allows you to cycle through your boards on the fly.

### Adding and Populating Tasks

You can populate your workflow boards using quick single entries or rapid multi-line creation tools:

#### **Bulk Tasks Creation**

**[![Screenshot 2026-05-19 135411.png](https://library.buildrunkit.com/uploads/images/gallery/2026-05/scaled-1680-/screenshot-2026-05-19-135411.png)](https://library.buildrunkit.com/uploads/images/gallery/2026-05/screenshot-2026-05-19-135411.png)**

**[![Screenshot 2026-05-19 135001.png](https://library.buildrunkit.com/uploads/images/gallery/2026-05/scaled-1680-/screenshot-2026-05-19-135001.png)](https://library.buildrunkit.com/uploads/images/gallery/2026-05/screenshot-2026-05-19-135001.png)**

To quickly seed a list with multiple workflow elements without opening individual cards:

<div _ngcontent-ng-c2372931610="" class="container" id="bkmrk-click-the-list-setti"><div _ngcontent-ng-c2383366420="" aria-busy="false" aria-live="polite" class="markdown markdown-main-panel enable-updated-hr-color" dir="ltr" inline-copy-host="">1. Click the list settings menu and select Bulk Options.
2. In the Bulk Tasks workspace modal, enter one task item per line.
3. Use the explicit colon format: `task:description` (e.g., `Fix login bug:Investigate why the auth token expires early`).
4. Click the blue Save button to automatically generate distinct task cards down your targeted list.

</div></div>#### Individual Task Management &amp; Customization

[![Screenshot 2026-05-19 135506.png](https://library.buildrunkit.com/uploads/images/gallery/2026-05/scaled-1680-/screenshot-2026-05-19-135506.png)](https://library.buildrunkit.com/uploads/images/gallery/2026-05/screenshot-2026-05-19-135506.png)

To configure granular details for an individual work item, click + Add task or click on any existing card to launch the editor window:

<div _ngcontent-ng-c2372931610="" class="container" id="bkmrk-task-title%3A-provide-"><div _ngcontent-ng-c2383366420="" aria-busy="false" aria-live="polite" class="markdown markdown-main-panel enable-updated-hr-color" dir="ltr" inline-copy-host="">- Task Title: Provide a concise action statement at the top input line.
- Assignee: Use the selection dropdown to route accountability to a team member, or click Add External Assignee + to invite an outside contributor.
- Due Date: Use the interactive Pick a date calendar picker to establish your hard deadline.
- Priority: Designate importance tiers using the classification selector (*Low, Medium, High*).
- Color: Assign colored visual identifiers (such as *Pink*) to make cards stand out on your board grid.
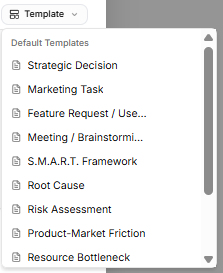
- Task Templates:
    
    [![Screenshot 2026-05-19 135758.png](https://library.buildrunkit.com/uploads/images/gallery/2026-05/scaled-1680-/screenshot-2026-05-19-135758.png)](https://library.buildrunkit.com/uploads/images/gallery/2026-05/screenshot-2026-05-19-135758.png)   
    Avoid starting from scratch by clicking the Template dropdown tool on the description block. Select from pre-structured blueprint outlines, including:
    
    
    - *Strategic Decision*
    - *Marketing Task*
    - *Feature Request / User Story*
    - *Meeting / Brainstorming*
    - *S.M.A.R.T. Framework*
    - *Root Cause*
    - *Risk Assessment*
    - *Product-Market Friction*
    - *Resource Bottleneck*
    - *Technical Debt Audit* *(Note: If you haven't saved any custom layouts yet, the system will display a "No workspace templates yet" notice at the bottom of the list until you toggle on the "Save description as a template" switch.)*
- Description Editor: Fill out your action details manually, or toggle the Save description as a template switch at the bottom to store your layout for future use.
- Status Action: Click the Mark as done check button to shift the task state instantly. Click Create Task to finalize.

---

</div></div>### Advanced Ticket Details: Comments &amp; Attachments

[![Screenshot 2026-05-19 144913.png](https://library.buildrunkit.com/uploads/images/gallery/2026-05/scaled-1680-/screenshot-2026-05-19-144913.png)](https://library.buildrunkit.com/uploads/images/gallery/2026-05/screenshot-2026-05-19-144913.png)

Once an individual task card is generated, you can open it to access dedicated deep-dive tabs for enhanced team collaboration and evidence tracking:

**Details Tab**

- Context &amp; Metadata: Displays your foundational core settings, including assigned team owners, set deadlines, importance tiers, and template-guided problem descriptions.

**Comments Tab**

- Team Communication: Exchange real-time feedback directly within the card context window.
- Posting Updates: Type message notes directly into the Add a comment... text entry block and click the blue Send arrow button to publish.
- Activity Stream: Tracks a clear, chronological conversation log underneath the main card workspace history.

**Attachments Tab**

- Evidence Collection: Centralize external files, technical logs, or system screenshots directly onto the task record.
- Uploading Files: Click the Choose Files icon block to drag and drop or browse local storage for relevant documentation items.
- Storage Rules: The platform handles image verification and securely anchors your uploaded assets right inside the targeted issue ticket layout.

### Task Card Actions &amp; Migration Assistant

[![Screenshot 2026-05-19 142147.png](https://library.buildrunkit.com/uploads/images/gallery/2026-05/scaled-1680-/screenshot-2026-05-19-142147.png)](https://library.buildrunkit.com/uploads/images/gallery/2026-05/screenshot-2026-05-19-142147.png)

[![Screenshot 2026-05-19 140117.png](https://library.buildrunkit.com/uploads/images/gallery/2026-05/scaled-1680-/screenshot-2026-05-19-140117.png)](https://library.buildrunkit.com/uploads/images/gallery/2026-05/screenshot-2026-05-19-140117.png)

Once a card is created on your workspace list, clicking the three vertical dots icon directly on that task card opens immediate item controls:

<div _ngcontent-ng-c2372931610="" class="container" id="bkmrk-open%3A-launches-the-f"><div _ngcontent-ng-c2383366420="" aria-busy="false" aria-live="polite" class="markdown markdown-main-panel enable-updated-hr-color" dir="ltr" id="bkmrk-open%3A-launches-the-f-1" inline-copy-host="">- Open: Launches the full individual configuration details view.
- Delete: Permanently drops the selected card from your board workspace records.
- Move or Copy (Migration Assistant): Selecting this action triggers a modal that helps you reposition or duplicate task items across different spaces without losing formatting details:
    
    
    - Existing Board Tab: Reposition or duplicate your item into another list layer inside any active environment already saved to your workspace profile.
    - New Board Tab: Type in a brand-new Board name and List name inline to build a fresh destination space on the fly, immediately routing the migrated card there.
    - Execution: Click the soft Copy button to clone the item, or click the blue Move button to shift the original record entirely.

</div></div>

# Strategy Hub: Problems Module

## **Strategy Hub: Problems Module**

**[![Screenshot 2026-05-19 143343.png](https://library.buildrunkit.com/uploads/images/gallery/2026-05/scaled-1680-/screenshot-2026-05-19-143343.png)](https://library.buildrunkit.com/uploads/images/gallery/2026-05/screenshot-2026-05-19-143343.png)**

The Problems module within the Strategy Hub enables teams to log, track, and systematically resolve bugs, operational issues, or blockers using Kanban boards or structured data tables.

<div _ngcontent-ng-c2372931610="" class="container" id="bkmrk--1"><div _ngcontent-ng-c2383366420="" aria-busy="false" aria-live="polite" class="markdown markdown-main-panel enable-updated-hr-color" dir="ltr" inline-copy-host="">---

</div></div>### Managing Problems Boards

The primary interface provides a high-level overview of all active issue-tracking environments:

<div _ngcontent-ng-c2372931610="" class="container" id="bkmrk-creating-a-board%3A-cl"><div _ngcontent-ng-c2383366420="" aria-busy="false" aria-live="polite" class="markdown markdown-main-panel enable-updated-hr-color" dir="ltr" inline-copy-host="">- Creating a Board: Click the blue + New Board button in the top-right corner to initiate a separate issue-tracking workspace.
- Directory List: View all active boards (such as the "Core Bug Tracker"), searchable by title and filterable using the Columns dropdown configuration menu.
- Board Options Menu: Click the three dots icon (`...`) on the right side of any listed board row to View, Rename, or Delete that board environment.

---

</div></div>### Working Inside a Problems Board

[![Screenshot 2026-05-19 143701.png](https://library.buildrunkit.com/uploads/images/gallery/2026-05/scaled-1680-/screenshot-2026-05-19-143701.png)](https://library.buildrunkit.com/uploads/images/gallery/2026-05/screenshot-2026-05-19-143701.png)

Opening an issue board displays tracking columns where individual problem entries are managed:

<div _ngcontent-ng-c2372931610="" class="container" id="bkmrk-columns-%26-views%3A-org"><div _ngcontent-ng-c2383366420="" aria-busy="false" aria-live="polite" class="markdown markdown-main-panel enable-updated-hr-color" dir="ltr" inline-copy-host="">- Columns &amp; Views: Organize your issue lifecycles dynamically across columns (e.g., "First List") using either the Kanban grid arrangement or a clean line-by-line Table view.
- List Configurations: Click the three dots icon (`...`) next to any column title header to Rename the list, access Bulk Options, or select Delete List.
- Filtering &amp; Export: Extract your active data sets using the Export function, or use the right-hand Filters side-panel to isolate entries by Priority (*Low, Medium, High*), Due Date, or completion Status.

---

</div></div>### Quick Board Switching

[![Screenshot 2026-05-19 160129.png](https://library.buildrunkit.com/uploads/images/gallery/2026-05/scaled-1680-/screenshot-2026-05-19-160129.png)](https://library.buildrunkit.com/uploads/images/gallery/2026-05/screenshot-2026-05-19-160129.png)

- Arrow Navigation: When working inside an individual board view, you can seamlessly navigate between your different workspace environments without returning to the main registry list.
- How to Use: Click the up and down arrow buttons located directly to the right of the board's name at the top-left of your workspace header. This allows you to cycle through your boards on the fly.

### Logging and Customizing Problems

You can log workspace issues individually or seed structural workflows simultaneously:

#### **Bulk Problems Logging**

**[![Screenshot 2026-05-19 144500.png](https://library.buildrunkit.com/uploads/images/gallery/2026-05/scaled-1680-/screenshot-2026-05-19-144500.png)](https://library.buildrunkit.com/uploads/images/gallery/2026-05/screenshot-2026-05-19-144500.png)**

**[![Screenshot 2026-05-19 144430.png](https://library.buildrunkit.com/uploads/images/gallery/2026-05/scaled-1680-/screenshot-2026-05-19-144430.png)](https://library.buildrunkit.com/uploads/images/gallery/2026-05/screenshot-2026-05-19-144430.png)**

To quickly register multiple issues or tickets without opening separate cards:

<div _ngcontent-ng-c2372931610="" class="container" id="bkmrk-click-your-list-conf"><div _ngcontent-ng-c2383366420="" aria-busy="false" aria-live="polite" class="markdown markdown-main-panel enable-updated-hr-color" dir="ltr" inline-copy-host="">1. Click your list configuration menu and choose Bulk Options.
2. Use the standard colon format: `problem:description` (entering one distinct issue ticket per line).
3. Click the blue Save button to populate your board instantly.

</div></div>#### Individual Problem Configuration

[![Screenshot 2026-05-19 144604.png](https://library.buildrunkit.com/uploads/images/gallery/2026-05/scaled-1680-/screenshot-2026-05-19-144604.png)](https://library.buildrunkit.com/uploads/images/gallery/2026-05/screenshot-2026-05-19-144604.png)

Click + Add task or open an existing card to configure deep-dive issue parameters inside the ticket modal:

<div _ngcontent-ng-c2372931610="" class="container" id="bkmrk-title-%26-mark-done%3A-p"><div _ngcontent-ng-c2383366420="" aria-busy="false" aria-live="polite" class="markdown markdown-main-panel enable-updated-hr-color" dir="ltr" inline-copy-host="">- Title &amp; Mark Done: Provide a descriptive title at the top, or toggle Mark as done to clear the card.
- Assignee: Designate a team member via the dropdown, or select Add External Assignee + to collaborate with outside support.
- Due Date: Set a target resolution deadline using the interactive calendar picker.
- Priority &amp; Color Tiers: Flag critical blockers by defining their importance level (*Low, Medium, High*) and assigning a distinct card accent color (e.g., *Pink*).
- Problem Templates: Drop in pre-structured frameworks by selecting the Template utility dropdown above the description text area. Options include specialized problem-solving blueprints such as Strategic Decision, Root Cause, Risk Assessment, or Technical Debt Audit.

---

</div></div>### Advanced Ticket Details: Comments &amp; Attachments

[![Screenshot 2026-05-19 144913.png](https://library.buildrunkit.com/uploads/images/gallery/2026-05/scaled-1680-/o7gscreenshot-2026-05-19-144913.png)](https://library.buildrunkit.com/uploads/images/gallery/2026-05/o7gscreenshot-2026-05-19-144913.png)

Once an individual problem card is generated, you can open it to access dedicated deep-dive tabs for enhanced team collaboration and evidence tracking:

##### **Details Tab**

<div _ngcontent-ng-c2372931610="" class="container" id="bkmrk-context-%26-metadata%3A-"><div _ngcontent-ng-c2383366420="" aria-busy="false" aria-live="polite" class="markdown markdown-main-panel enable-updated-hr-color" dir="ltr" inline-copy-host="">- Context &amp; Metadata: Displays your foundational core settings, including assigned team owners, set deadlines, importance tiers, and template-guided problem descriptions.

</div></div>##### **Comments Tab**

<div _ngcontent-ng-c2372931610="" class="container" id="bkmrk-team-communication%3A-"><div _ngcontent-ng-c2383366420="" aria-busy="false" aria-live="polite" class="markdown markdown-main-panel enable-updated-hr-color" dir="ltr" inline-copy-host="">- Team Communication: Exchange real-time feedback directly within the card context window.
- Posting Updates: Type message notes directly into the Add a comment... text entry block and click the blue Send arrow button to publish.
- Activity Stream: Tracks a clear, chronological conversation log underneath the main card workspace history.

</div></div>##### **Attachments Tab**

<div _ngcontent-ng-c2372931610="" class="container" id="bkmrk-evidence-collection%3A"><div _ngcontent-ng-c2383366420="" aria-busy="false" aria-live="polite" class="markdown markdown-main-panel enable-updated-hr-color" dir="ltr" inline-copy-host="">- Evidence Collection: Centralize external files, technical logs, or system screenshots directly onto the problem record.
- Uploading Files: Click the Choose Files icon block to drag and drop or browse local storage for relevant documentation items.
- Storage Rules: The platform handles image verification and securely anchors your uploaded assets right inside the targeted issue ticket layout.

---

</div></div>### Card Item Menus &amp; Migrations

[![Screenshot 2026-05-19 144742.png](https://library.buildrunkit.com/uploads/images/gallery/2026-05/scaled-1680-/screenshot-2026-05-19-144742.png)](https://library.buildrunkit.com/uploads/images/gallery/2026-05/screenshot-2026-05-19-144742.png)

Clicking the three vertical dots directly on any active board card reveals prompt item actions:

<div _ngcontent-ng-c2372931610="" class="container" id="bkmrk-open-%26-delete%3A-acces"><div _ngcontent-ng-c2383366420="" aria-busy="false" aria-live="polite" class="markdown markdown-main-panel enable-updated-hr-color" dir="ltr" id="bkmrk-open-%26-delete%3A-acces-1" inline-copy-host="">- Open &amp; Delete: Access full collaboration tabs or wipe obsolete records from the workspace tracking board entirely.
- Move or Copy: Launch the Migration Assistant modal to copy or move issue records. You can copy/move the ticket into an Existing Board layout list, or type a fresh identifier to establish a New Board workspace directly on the fly.

</div></div>

# Strategy Hub: Thoughts Module

## **Strategy Hub: Thoughts Module**

**[![Screenshot 2026-05-20 141803.png](https://library.buildrunkit.com/uploads/images/gallery/2026-05/scaled-1680-/screenshot-2026-05-20-141803.png)](https://library.buildrunkit.com/uploads/images/gallery/2026-05/screenshot-2026-05-20-141803.png)**

The Thoughts module within the Strategy Hub functions as a digital canvas or whiteboard, allowing you to visually map out brainstorming sessions, strategy links, and project ideas using interactive shapes.

### Managing Thoughts Boards

When you enter the Thoughts module, you are presented with a global directory of your active brainstorming and strategy environments:

- Creating a Whiteboard: Click the blue + New Whiteboard button at the top right to start a fresh visual planning environment.
- Board Directory View: Track active design spaces along with their last relative modification date under the Updated At column.
- Filtering &amp; Columns: Use the top text bars to search specific whiteboard names. Use the Columns dropdown tool to show or hide parameters like Name, Updated\_at, or Actions.
- Board Context Menu: Clicking the three dots icon (`...`) on the right side of any individual board row opens control configurations to View, Rename, or Delete that whiteboard.

### Inside a Thoughts Board

[![Screenshot 2026-05-20 141837.png](https://library.buildrunkit.com/uploads/images/gallery/2026-05/scaled-1680-/screenshot-2026-05-20-141837.png)](https://library.buildrunkit.com/uploads/images/gallery/2026-05/screenshot-2026-05-20-141837.png)

[![Screenshot 2026-05-20 141911.png](https://library.buildrunkit.com/uploads/images/gallery/2026-05/scaled-1680-/screenshot-2026-05-20-141911.png)](https://library.buildrunkit.com/uploads/images/gallery/2026-05/screenshot-2026-05-20-141911.png)

When you select and open an individual whiteboard from your directory, you enter an interactive grid canvas workspace where you can sketch, label, and manipulate shapes.

### Canvas Layout &amp; Header Controls

The top header of the whiteboard area contains configuration data, canvas actions, and canvas statistics:

<div _ngcontent-ng-c2170363542="" class="container" id="bkmrk-breadcrumb-navigatio"><div _ngcontent-ng-c1323015604="" aria-busy="false" aria-live="polite" class="markdown markdown-main-panel enable-updated-hr-color" dir="ltr" inline-copy-host="">- Breadcrumb Navigation: The top left displays the active path, showing Thought boards followed by an arrow pointing to your currently opened board name (e.g., *Full System Check Thought Board*).
- Quick Switch Dropdown: Clicking the small up and down arrow icon directly next to "Thought boards" pulls up a quick menu to toggle between your saved boards or click + Create new board without returning to the main directory.
- Canvas Settings &amp; Zoom Toolbar: Located at the top right of the canvas, this bar gives you layout controls:
    
    
    - Zoom Controls: Use the zoom-out (`minus`), percentage display (e.g., `100%`), zoom-in (`plus`), and `reset` icons to navigate a dense board.
    - Export: Click the download arrow icon to save a local copy of your canvas layout.
    - Clear (Trash Can Icon): A red button that completely wipes all shapes, lines, and data off the current canvas.

</div></div>### The Canvas Toolbar

A horizontal toolbar floats at the top-left section of the grid canvas to let you build out your board:

<div _ngcontent-ng-c2170363542="" class="container" id="bkmrk-selection-tool-%28curs"><div _ngcontent-ng-c1323015604="" aria-busy="false" aria-live="polite" class="markdown markdown-main-panel enable-updated-hr-color" dir="ltr" inline-copy-host="">- Selection Tool (Cursor Icon): The primary blue pointer used to select, drag, or highlight elements on the grid.
- Square Shape: Click this icon to drop a customizable square onto the workspace.
- Circle Shape: Click this icon to drop a customizable circle onto the workspace.
- Connection Arrow: Click this tool to manually draw directional lines connecting your elements.
- Text Tool ("T" Icon): Allows you to drop standalone text blocks directly onto the open canvas grid.
- Draw Tool (Pencil Icon): Activates freehand drawing or sketching directly on top of the grid space.
- Global Canvas Color: Shows a Color circle indicator (e.g., blue) that tracks your currently selected element tint.
- Board Statistics: Live counters immediately follow the color wheel to show you the exact total of items placed on the canvas (e.g., `2 cards • 1 arrows • 1 texts`).

</div></div>### Editing a Shape Modal

[![Screenshot 2026-05-20 142022.png](https://library.buildrunkit.com/uploads/images/gallery/2026-05/scaled-1680-/screenshot-2026-05-20-142022.png)](https://library.buildrunkit.com/uploads/images/gallery/2026-05/screenshot-2026-05-20-142022.png)

When you click the three dots menu (`...`) on a shape and choose to edit it, a modal pop-up window appears in the center of the screen with the following configuration fields:

- Modal Title: Displays the name of the shape type (e.g., Circle) at the top left.
- Title Field: A text input box where you can type or change the main title text displayed on the shape.
- Description Field: A larger text area box labeled Description to add detailed notes or context inside the shape properties.
- Color Selection: A row of interactive circular color buttons that allows you to click and choose the color styling for the shape.
- Action Buttons: Two options sit at the bottom right corner of the window to finalize your changes:
    
    
    - Cancel: Closes the modal without saving any modifications.
    - Update: Saves your text and color changes directly to the canvas element.

### Editing Canvas Text Blocks

[![Screenshot 2026-05-20 142641.png](https://library.buildrunkit.com/uploads/images/gallery/2026-05/scaled-1680-/screenshot-2026-05-20-142641.png)](https://library.buildrunkit.com/uploads/images/gallery/2026-05/screenshot-2026-05-20-142641.png)

When managing a standalone text element on the canvas, the properties window changes to a streamlined Edit Text modal with specific sizing attributes:

- Text: A multi-line editing box where you input the literal message displayed on the canvas grid.
- Font Size: A numerical box where you manually type or change the font scaling size directly (e.g., *15*). Note: There is no font-family picker layout; styling changes are strictly adjusted by size.
- Color: A color indicator box showing the current color assigned to the text layer.
- Form Submissions:
    
    
    - Cancel: Standard link text button to abandon changes.
    - Save: A blue button to lock in your text edits and font scaling parameters.

<div _ngcontent-ng-c2170363542="" class="container" id="bkmrk--5"></div><div _ngcontent-ng-c2372931610="" class="container" id="bkmrk--6"></div><div _ngcontent-ng-c2372931610="" class="container" id="bkmrk--7"></div>

# Strategy Hub: Mind Maps Module

## **Strategy Hub: Mind Maps Module**

The Mind Maps module within the Strategy Hub enables you to organize, track, and manage your operational action items using flexible visual mapping environments.

### Managing Mind Maps Boards

[![Screenshot 2026-05-21 131753.png](https://library.buildrunkit.com/uploads/images/gallery/2026-05/scaled-1680-/screenshot-2026-05-21-131753.png)](https://library.buildrunkit.com/uploads/images/gallery/2026-05/screenshot-2026-05-21-131753.png)

When you enter the Mind Maps module, you are presented with a global directory of your active planning environments:

- Creating a Board: Click the blue + New Board button at the top right to start a fresh project environment.
- Board Directory View: Track active spaces like your *Mind Maps* board or *Full System Check Mind Map Board*, along with their last relative modification date under the Updated At column.
- Filtering &amp; Columns: Use the top text bars to search specific project names. Use the Columns dropdown tool to show or hide parameters like Name, Updated\_at, or Actions.
- Board Context Menu: Clicking the three dots icon (`...`) on the right side of any individual board row opens control configurations for that board.

### Inside a Mind Maps Board

[![Screenshot 2026-05-21 131930.png](https://library.buildrunkit.com/uploads/images/gallery/2026-05/scaled-1680-/screenshot-2026-05-21-131930.png)](https://library.buildrunkit.com/uploads/images/gallery/2026-05/screenshot-2026-05-21-131930.png)

[![Screenshot 2026-05-21 132234.png](https://library.buildrunkit.com/uploads/images/gallery/2026-05/scaled-1680-/screenshot-2026-05-21-132234.png)](https://library.buildrunkit.com/uploads/images/gallery/2026-05/screenshot-2026-05-21-132234.png)

When you select and open an individual mind map board from your directory, you enter a canvas space designed to build out ideas and branches.

### Canvas Layout &amp; Header Controls

The top header of an active mind map board provides specific controls for styling, adding nodes, and exporting your map:

- Breadcrumb Navigation: The top left displays your current location, showing Mindmap boards next to an arrow pointing to the title of your active board (e.g., *Full System Check Mind Map Board*).
- Quick Switch Dropdown: Clicking the up and down arrow icon directly next to "Mindmap boards" allows you to quickly switch between different mind map boards in your workspace without exiting to the main menu.
- Style Dropdown: A dedicated Style selector menu allows you to alter the visual appearance of your map. Clicking the dropdown reveals five distinct options:
    
    
    - Classic (selected by default with a checkmark)
    - Modern
    - Minimal
    - Corporate
    - Playful
- Canvas Actions: Located at the top right of the screen are your action keys:
    
    
    - \+ Add Root Node: A blue button used to place a main foundational node onto the canvas.
    - Mini-Map Toggle (Green Icon): Toggles a small overlay window to help navigate around your branches.
    - Export PNG: Click to export and download your current mind map structure as an image file.
    - Export PDF: Click to save your structural layout as a document file.

### Managing Mind Map Nodes

[![Screenshot 2026-05-21 132508.png](https://library.buildrunkit.com/uploads/images/gallery/2026-05/scaled-1680-/screenshot-2026-05-21-132508.png)](https://library.buildrunkit.com/uploads/images/gallery/2026-05/screenshot-2026-05-21-132508.png)

When interacting with an active node (e.g., *New Idea*) on the canvas, a quick action toolbar appears directly inside the card boundaries to manage branches:

- Add a Node (Green Cross Icon): Click the green + button to branch off and add a connected sub-node to your mind map.
- Edit Node Title (Pencil Icon): Click the purple pencil button to quickly rename or modify the text displayed inside that specific node card.
- Delete Node (Trash Can Icon): Click the red trash can button to permanently remove the node from your mind map layout.

# Strategy Hub: Simple Notes Module

## Strategy Hub: Simple Notes Module

[![Screenshot 2026-05-21 132939.png](https://library.buildrunkit.com/uploads/images/gallery/2026-05/scaled-1680-/screenshot-2026-05-21-132939.png)](https://library.buildrunkit.com/uploads/images/gallery/2026-05/screenshot-2026-05-21-132939.png)

The Simple Notes module within the Strategy Hub enables you to organize, track, and manage your operational action items using structured note directories and document environments.

### Managing Notes Boards

When you enter the Simple Notes module, you are presented with a global directory of your active planning environments:

- Creating a Board: Click the blue + New Board button at the top right to start a fresh project environment.
- Board Directory View: Track active spaces like your Simple Notes board or Full System Check Notes Board, along with their last relative modification date under the Updated At column.
- Filtering &amp; Columns: Use the top text bars to search specific project names. Use the Columns dropdown tool to show or hide parameters like Name, Updated\_at, or Actions.
- Board Context Menu: Clicking the three dots icon (`...`) on the right side of any individual board row opens control configurations for that board.

### Inside a Simple Notes Board

[![Screenshot 2026-05-21 133420.png](https://library.buildrunkit.com/uploads/images/gallery/2026-05/scaled-1680-/screenshot-2026-05-21-133420.png)](https://library.buildrunkit.com/uploads/images/gallery/2026-05/screenshot-2026-05-21-133420.png)

[![Screenshot 2026-05-21 133455.png](https://library.buildrunkit.com/uploads/images/gallery/2026-05/scaled-1680-/screenshot-2026-05-21-133455.png)](https://library.buildrunkit.com/uploads/images/gallery/2026-05/screenshot-2026-05-21-133455.png)

When you select and open an individual notes board from your directory, you enter a split-screen document editor environment designed to create, filter, and write detailed records.

### Canvas Layout &amp; Header Controls

The top header of an active notes board keeps track of your location and provides options to download your text files:

- Breadcrumb Navigation: The top left displays your current navigation track, showing Notes boards next to a selector arrow pointing to the active board title (e.g., *Full System Check Notes Board*).
- Quick Switch Dropdown: Clicking the up and down arrow icon directly next to "Notes boards" opens a quick selection menu to swap between your different notes directories without having to go back to the main menu page.
- Export PDF: A blue button located at the top right of the editor workspace allows you to immediately export and download your active note document as a PDF file.

### The Notes Sidebar Menu (Left Panel)

The left side of the workspace acts as a navigation column to search, organize, and toggle through the documents assigned to this specific board:

- Search Bar: A text search box labeled Search notes... allows you to look up existing documents inside the board by typing keywords from their titles.
- Sort Dropdown: Clicking the Sort button opens a configuration filter layout to rearrange how your document list is organized. It features three sorting criteria options:
    
    
    - Updated (Newest)
    - Created (Newest)
    - Title (A-Z)
- Add Note Button (Plus Icon): Clicking the blue + icon directly to the right of the sort dropdown creates a brand-new blank document inside the directory folder.
- Document Cards: Individual text logs are listed vertically as clickable preview cards showing the card title (e.g., *New Note 3*, *New Note 2*, *New Note 1*) and a subtitle logging its exact relative save status date (e.g., *Last updated: May 21, 2026*).
- Live Counter: The very bottom of the left column tracks your folder volume with a static counter showing the exact total numbers of documents stored inside the active board (e.g., *3 notes*).

### The Rich Text Editor (Right Panel)

Selecting any card from the sidebar opens its contents inside the primary workspace panel on the right:

- Document Title Input: A prominent text box located at the top of the workspace allows you to add or modify the title of your active card text document (e.g., *New Note 3*).
- Text Formatting Toolbar: A horizontal utility bar floats directly above the main text workspace area to give you text-styling options:
    
    
    - B: Bold
    - *I*: Italic
    - U: Underline
    - H1 / H2 / H3: Main headers and subsection headers styling options
    - Bullet Points: Bullet list toggle button
    - Numbered List: Numbered list tracking toggle button
    - Link (Chain-link Icon): Insert hyperlinked text parameters
    - Image (Picture Icon): Insert external image variables into your text canvas
    - Undo / Redo (Arrows): Backtrack text entries or restore modifications on the fly
- Editor Stats Footer: The footer bar running along the bottom edge of the document workspace tracks your formatting updates live:
    
    
    - Counters: Displays real-time content size variables on the left side of the row (e.g., *0 characters • 0 words*).
    - Auto-Save Status: Displays a confirmation timestamp indicator on the right edge of the row tracking exactly when the system last secured your updates.